Introduction
In today’s fast-paced business environment, managing leads, cases, and customer inquiries efficiently can make or break your sales and support operations. If your team struggles with unassigned records piling up, unclear ownership, or uneven workload distribution, you’re not alone. The good news? Salesforce queues offer a powerful solution to these common challenges.
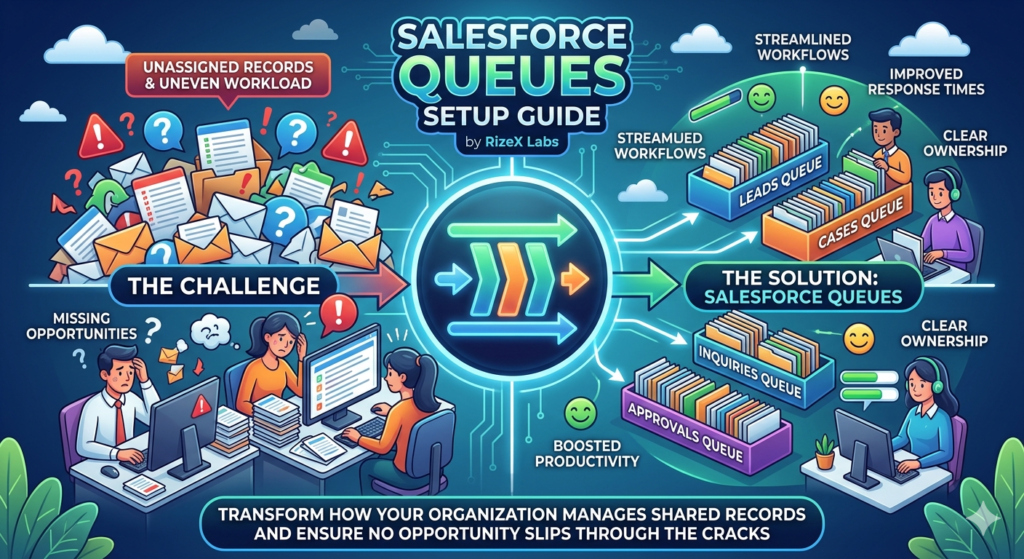
Salesforce queues setup is one of the most underutilized yet transformative features in the Salesforce ecosystem. Whether you’re managing incoming leads, customer support cases, or approval processes, properly configured queues ensure that no opportunity slips through the cracks and every team member knows exactly what needs their attention.
In this comprehensive guide, RizeX Labs walks you through everything you need to know about Salesforce queues—from basic concepts to advanced configurations, real-world use cases, and best practices that will transform how your organization manages shared records.
By the end of this article, you’ll understand how to implement salesforce queue configuration that streamlines workflows, improves response times, and boosts team productivity. Let’s dive in.
What Are Salesforce Queues?
Understanding the Fundamentals
Salesforce queues are holding areas for records that don’t have a specific owner assigned yet. Think of them as virtual waiting rooms where leads, cases, opportunities, service contracts, or custom objects sit until a team member is ready to claim ownership.
Unlike assigning records to individual users, queues allow multiple team members to access and work on shared records. This creates a collaborative environment where work gets distributed more efficiently.
How Queues Differ from Groups and Roles
Many Salesforce beginners confuse queues with public groups or roles, but they serve distinct purposes:
- Queues: Temporary holding areas for unassigned records that multiple users can claim
- Public Groups: Collections of users used primarily for sharing and visibility
- Roles: Hierarchical structures that control record access and reporting relationships
While public groups can be members of queues, queues specifically facilitate record ownership and assignment workflows.
Objects That Support Queues
Salesforce allows queue creation for these standard objects:
- Leads
- Cases
- Service Contracts
- Orders
- Knowledge Articles
- Custom Objects (when enabled)
Additionally, you can configure queues for specific custom objects in your organization, making them incredibly versatile for various business processes.
Step-by-Step Salesforce Queues Setup
Setting up salesforce queues requires administrative access and careful planning. Here’s a detailed walkthrough to get you started.
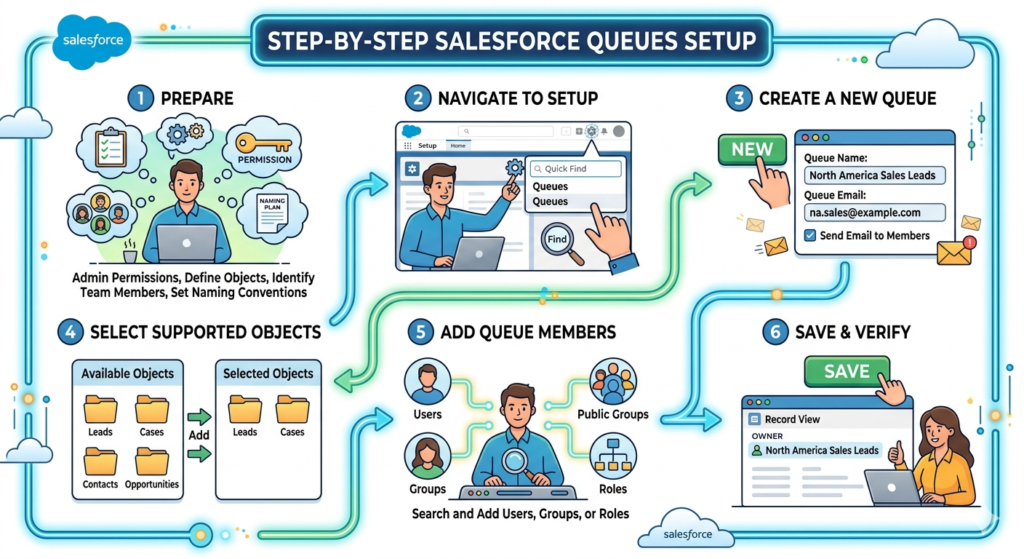
Prerequisites
Before beginning your salesforce queues setup, ensure you have:
- System Administrator or appropriate profile permissions
- A clear understanding of which objects need queues
- Identified team members who will be queue members
- Defined your queue naming conventions
Step 1: Navigate to Queue Setup
- Log into Salesforce as an Administrator
- Click the gear icon in the upper right corner
- Select Setup
- In the Quick Find box, type “Queues”
- Click on Queues under Feature Settings
This brings you to the Queue management page where you’ll see any existing queues and can create new ones.
Step 2: Create a New Queue
- Click the New button
- Enter a descriptive Queue Name (e.g., “North America Sales Leads” or “Tier 1 Support Cases”)
- Add a Queue Email address if you want notifications sent to a group inbox
- Optionally, check Send Email to Members if individual queue members should receive notifications
Pro Tip: Use clear, descriptive names that immediately convey the queue’s purpose. Avoid abbreviations that new team members might not understand.
Step 3: Select Supported Objects
In the Supported Objects section:
- Select which object(s) this queue will handle from the Available Objects list
- Click the Add arrow to move them to Selected Objects
- You can select multiple objects if the same team handles different record types
For example, a customer support queue might handle both Cases and Service Contracts.
Step 4: Add Queue Members
Queue members are the users who can view and claim records from the queue. To add members:
- Scroll to the Queue Members section
- From the Search dropdown, select:
- Users (individual team members)
- Public Groups (collections of users)
- Roles (everyone in a particular role)
- Roles and Subordinates (includes hierarchy below)
- Search for and select the appropriate members
- Click Add to move them to Selected Members
Best Practice: Using public groups or roles instead of individual users makes queue maintenance easier as your team grows or changes.
Step 5: Save and Activate
- Review all your configurations
- Click Save
- Your queue is now active and ready to receive records
The queue will immediately appear as an option in assignment rules and can be manually selected as an owner for supported objects.
Step 6: Verify Queue Setup
After creation, verify your queue works correctly:
- Navigate to the object (Leads, Cases, etc.)
- Create a test record or edit an existing one
- In the Owner field, search for your new queue name
- Assign the record to the queue
- Have a queue member verify they can see the record in their queue view
Salesforce Queue Configuration Explained
Basic queue creation is just the beginning. Advanced salesforce queue configuration involves fine-tuning settings for optimal performance.
Queue Email Configuration
When you assign an email address to a queue, you have two notification options:
Send Email to Members: When enabled, every queue member receives an email notification when a record is assigned to the queue. This works well for small teams or high-priority queues but can create notification overload in busy environments.
Queue Email Address: Acts as a group inbox where all notifications are sent. This centralizes communications and prevents individual inbox clutter.
Configuration Tip: For high-volume queues, use a queue email address without member notifications. For critical, low-volume queues (like executive escalations), enable member notifications.
Queue Member Hierarchy
Understanding who can be a queue member is crucial for effective salesforce queue configuration:
Individual Users: Direct assignment gives specific people access. Use this for small, specialized teams.
Public Groups: The most flexible option. Create a public group first, then add it to the queue. When team members join or leave the group, queue access updates automatically.
Roles and Subordinates: Automatically includes everyone in a role hierarchy. Perfect for organizational structures where entire departments need queue access.
Territories (with Territory Management enabled): Geographic or account-based assignments.
Multi-Object Queue Configuration
A single queue can support multiple objects, which streamlines operations when the same team handles related records.
Example Configuration:
- Queue Name: “Customer Success Team”
- Supported Objects: Cases, Service Contracts, Orders
- Members: Customer Success public group
This allows customer success representatives to manage all customer-related records from one centralized location.
Queue Visibility and Sharing
Queue membership doesn’t automatically grant access to all records in the queue. Your organization-wide defaults (OWD) and sharing rules still apply.
Important Considerations:
- If your OWD for Leads is Private, only queue members can see queued leads
- If OWD is Public Read/Write, non-members might see queued records but can’t claim ownership
- Sharing rules can grant additional access beyond queue membership
Permission Sets and Queue Access
Beyond queue membership, users need appropriate permissions to work with queued records:
- Transfer Record permission (to assign records from queue to themselves)
- Edit permission on the object
- View All or Modify All for administrative oversight
Consider creating permission sets specifically for queue operations to ensure consistent access across team members.
Lead Queues Salesforce: A Deep Dive
Lead queues salesforce implementations are among the most common and impactful queue configurations. Let’s explore this use case in detail.
Why Lead Queues Matter
Leads are the lifeblood of sales organizations. Without proper distribution mechanisms:
- High-value leads sit unworked while sales reps scramble for prospects
- Geographic or product expertise doesn’t match lead assignments
- Response times lag, reducing conversion rates
- Lead ownership disputes create internal friction
Lead queues solve these challenges by creating transparent, fair distribution systems.
Setting Up Lead Queues
Scenario: A company with sales teams in three regions (East, West, Central) wants to route leads based on geography.
Step-by-step Configuration:
- Create Regional Public Groups:
- Setup → Users → Public Groups
- Create “East Sales Team,” “West Sales Team,” “Central Sales Team”
- Add appropriate sales reps to each group
- Create Lead Queues:
- Setup → Queues → New
- Queue Name: “East Region Leads”
- Supported Objects: Leads
- Queue Members: Add “East Sales Team” public group
- Repeat for West and Central regions
- Configure Lead Assignment Rules:
- Setup → Lead Assignment Rules
- Create rule entries based on State/Province field
- Route CA, OR, WA leads to “West Region Leads” queue
- Route NY, NJ, PA leads to “East Region Leads” queue
- Route IL, MO, TX leads to “Central Region Leads” queue
- Set as Active Rule: Activate your assignment rule to automatically route new leads
Lead Queue Views
Create custom list views to help sales reps efficiently work queue leads:
High Priority Leads View:
- Filter: Owner equals “East Region Leads” AND Lead Score > 70
- Visible to: East Sales Team members
- Columns: Name, Company, Lead Score, Created Date, State
Today’s New Leads View:
- Filter: Owner equals queue AND Created Date = TODAY
- Sorted by: Created Date (oldest first)
Aging Leads View:
- Filter: Owner equals queue AND Created Date < LAST_30_DAYS
- Highlight formula: Days in queue > 7 (shows overdue leads)
Lead Queue Best Practices
Round-Robin Assignment: While Salesforce doesn’t natively support automatic round-robin from queues, you can implement it through:
- Process Builder or Flow that assigns based on a counter field
- Third-party apps from AppExchange
- Scheduled Apex jobs that distribute queued leads
Service Level Agreements (SLAs): Set expectations for lead follow-up:
- Create a formula field: “Hours in Queue”
- Build reports showing SLA compliance
- Use workflow alerts when leads exceed acceptable queue time
Lead Queue Ownership Culture: Train sales reps to:
- Check queue views at the start of each day
- Claim leads immediately when taking ownership
- Never leave leads in queue “to work on later”
Real-World Use Cases for Salesforce Queues
Beyond lead management, queues solve diverse business challenges across industries and departments.
Use Case 1: Customer Support Case Management
Scenario: A technology company handles 500+ support cases daily across three support tiers.
Queue Configuration:
Tier 1 Support Queue:
- Members: All support agents
- Handles: Initial case triage, password resets, general questions
- Assignment Rule: All new cases default to Tier 1
Tier 2 Technical Queue:
- Members: Senior support engineers
- Handles: Complex technical issues, bug reports
- Assignment Rule: Cases escalated from Tier 1 or created with “Critical” priority
Tier 3 Engineering Queue:
- Members: Product engineers and development team
- Handles: Product defects, feature requests requiring code changes
- Assignment Rule: Manual escalation only
Workflow:
- Customer submits case via web-to-case
- Assignment rule routes to Tier 1 Queue
- Agent claims case, troubleshoots
- If resolution requires deeper expertise, agent changes owner to Tier 2 Queue
- Tier 2 engineer claims, investigates
- If product fix needed, escalates to Tier 3 Queue
Benefits:
- Clear escalation path
- Specialists handle appropriate complexity levels
- No case goes unnoticed
- Workload visibility across support organization
Use Case 2: Marketing Lead Qualification
Scenario: Marketing generates leads through multiple channels that need qualification before sales handoff.
Queue Configuration:
Marketing Qualified Leads (MQL) Queue:
- Members: Marketing operations team
- Purpose: Initial lead scoring and enrichment
- Source: Web forms, trade shows, content downloads
Sales Development Representatives (SDR) Queue:
- Members: SDR team
- Purpose: Outbound qualification and appointment setting
- Source: Leads passed from MQL queue with score > 50
Regional Sales Queues (East, West, Central):
- Members: Account Executives by region
- Purpose: Qualified opportunities ready for sales cycle
- Source: Leads converted by SDRs
Process Flow:
- New lead enters MQL Queue
- Marketing ops enriches data, scores lead
- Qualified leads moved to SDR Queue
- SDR qualifies, sets appointment, assigns to regional sales queue
- Account Executive claims and converts to opportunity
Metrics Tracked:
- Average time in each queue
- Conversion rates between stages
- Queue volume trends
- Individual SDR productivity
Use Case 3: Partner Channel Management
Scenario: A software company works with implementation partners who need lead assignments.
Queue Configuration:
Partner Lead Distribution Queue:
- Members: Channel managers
- Purpose: Evaluate and assign leads to appropriate partners
- Rules: Leads from partner referral form
Partner Tier Queues (Gold, Silver, Bronze):
- Members: Respective partner tier groups
- Purpose: Partners claim leads matching their tier
- Assignment: Channel manager moves qualified leads to appropriate tier queue
Partner Return Queue:
- Members: Inside sales team
- Purpose: Handle leads partners couldn’t convert
- Rules: Leads in partner queues > 30 days without activity
Governance:
- Partners have 48 hours to claim leads from their tier queue
- Unclaimed leads return to distribution queue
- Partners report back on lead status weekly
Use Case 4: Order Processing and Fulfillment
Scenario: An e-commerce business processes orders requiring different approval levels.
Queue Configuration:
Standard Orders Queue:
- Members: Order processing team
- Criteria: Orders under $10,000
- SLA: Process within 24 hours
Large Orders Queue:
- Members: Senior order specialists + sales managers
- Criteria: Orders $10,000-$50,000
- SLA: Review within 4 hours, approve within 24 hours
Executive Approval Queue:
- Members: VP of Sales, CFO
- Criteria: Orders > $50,000 or custom pricing
- SLA: Executive review within 2 hours
Automation:
- Process Builder routes orders to appropriate queue based on amount
- Approval processes trigger for large order queue
- Email alerts notify queue members of urgent orders
Use Case 5: HR Recruitment Management
Scenario: HR department manages job applications across multiple departments.
Queue Configuration:
Initial Application Review Queue:
- Members: HR recruiters
- Purpose: Screen applications for basic qualifications
- Source: All job applications
Department-Specific Queues (Engineering, Sales, Marketing, Operations):
- Members: Department hiring managers + HR
- Purpose: Department reviews qualified candidates
- Source: Applications passed by HR after initial screening
Interview Scheduling Queue:
- Members: HR coordinators
- Purpose: Coordinate interviews for approved candidates
- Trigger: Hiring manager marks “Proceed to Interview”
Benefits:
- Centralized application tracking
- Clear handoffs between HR and departments
- No applications lost in email chains
- Reporting on time-to-hire by queue stage
Benefits of Using Salesforce Queues
Implementing proper salesforce queues setup delivers measurable benefits across your organization.
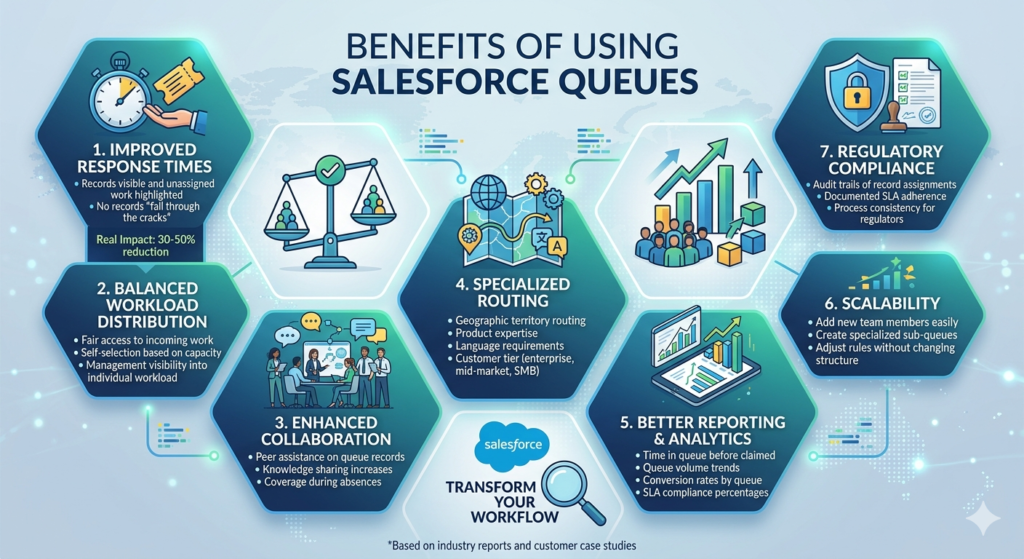
1. Improved Response Times
Without queues, records can sit unassigned for hours or days. Queues create visibility and accountability:
- Team members see all pending work in one view
- No records “fall through the cracks”
- Queue metrics identify bottlenecks
- SLA tracking becomes possible
Real Impact: Companies report 30-50% reduction in average response time after implementing queue-based workflows.
2. Balanced Workload Distribution
Individual assignment can create imbalances where some reps are overwhelmed while others are underutilized. Queues enable:
- Fair access to incoming work
- Self-selection based on capacity
- Management visibility into individual workload
- Flexibility as team members join or leave
3. Enhanced Collaboration
Queues foster team-based approaches:
- Multiple experts can review complex cases before claiming
- Peer assistance on queue records is natural
- Knowledge sharing increases as team members see each other’s work
- Coverage during absences is seamless
4. Specialized Routing
Salesforce queue configuration allows sophisticated routing based on:
- Geographic territory
- Product expertise
- Customer tier (enterprise, mid-market, SMB)
- Issue complexity
- Language requirements
This ensures the right specialist handles each record.
5. Better Reporting and Analytics
Queues create data points for performance measurement:
- Time in queue before claimed
- Queue volume trends
- Individual claim rates
- Conversion rates by queue
- SLA compliance percentages
These metrics drive continuous improvement in your processes.
6. Scalability
As your business grows, queues scale effortlessly:
- Add new team members to existing queues
- Create specialized sub-queues for new product lines
- Adjust assignment rules without changing queue structure
- Maintain historical data through organizational changes
7. Regulatory Compliance
For industries with compliance requirements, queues provide:
- Audit trails of record assignments
- Documented SLA adherence
- Clear accountability for customer interactions
- Process consistency that regulators value
Common Mistakes to Avoid
Even experienced Salesforce administrators make these salesforce queue configuration mistakes. Learn from them:
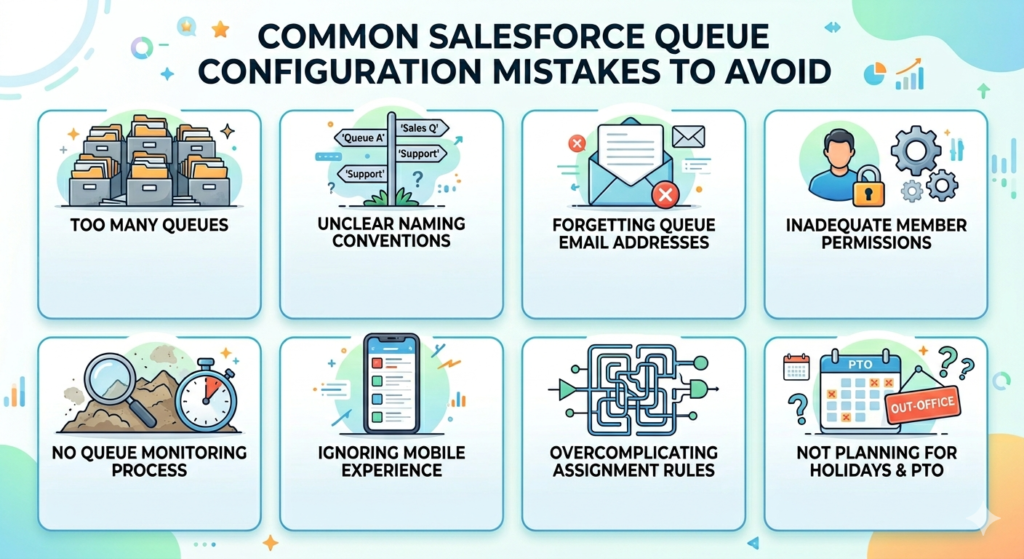
Mistake 1: Too Many Queues
Problem: Creating dozens of hyper-specific queues that fragment your team and complicate management.
Example: Separate queues for “California High-Value Leads,” “California Mid-Value Leads,” “California Low-Value Leads,” etc.
Solution: Start with broader queues and use list views within queues for segmentation. Create new queues only when workflow actually differs.
Better Approach: One “California Leads” queue with multiple list views based on lead score.
Mistake 2: Unclear Naming Conventions
Problem: Queue names like “Queue 1,” “Sales Queue,” or “Support Q” that don’t clearly indicate purpose.
Solution: Develop a naming standard that includes:
- Function (Leads, Cases, etc.)
- Region or specialty (if applicable)
- Tier or priority level (if applicable)
Good Examples:
- “APAC Enterprise Leads”
- “Tier 2 Technical Support Cases”
- “Product Return Orders – North America”
Mistake 3: Forgetting Queue Email Addresses
Problem: Not configuring queue email addresses, losing valuable communication history.
Solution: Always assign queue email addresses. Use group inboxes or distribution lists that your team monitors.
Bonus Tip: Email-to-Case functionality works with queue email addresses, automating case creation and assignment.
Mistake 4: Inadequate Queue Member Permissions
Problem: Adding users to queues without verifying they have permissions to edit or transfer records.
Solution: Create a permission set called “Queue User – [Object]” that includes:
- Read, Create, Edit permissions on the object
- Transfer Record permission
- Access to relevant apps and tabs
Assign this permission set to all queue members.
Mistake 5: No Queue Monitoring Process
Problem: Records accumulate in queues with no one noticing or caring.
Solution: Implement queue health checks:
- Weekly reports on aging queue records
- Dashboard tiles showing queue volume
- Scheduled reminders to queue members
- Manager review of unclaimed records
Mistake 6: Ignoring Mobile Experience
Problem: Configuring queues for desktop users only, forgetting mobile sales reps.
Solution: Test queue views and record assignment on Salesforce Mobile. Ensure:
- Queue views are available in mobile
- Claiming ownership is intuitive on mobile
- Critical queue fields are visible on mobile layouts
Mistake 7: Overcomplicating Assignment Rules
Problem: Creating Byzantine assignment rules with dozens of criteria that break frequently.
Solution: Keep assignment rules simple and well-documented:
- Limit to 10-15 rule entries per object
- Use clear, maintainable criteria (avoid complex formulas)
- Document the business logic in rule descriptions
- Test thoroughly before activating
Mistake 8: Not Planning for Holidays and PTO
Problem: Queues become bottlenecks when key members are unavailable.
Solution:
- Use public groups instead of individual users as queue members
- Cross-train team members across queues
- Create backup queues for escalation during absences
- Set up automated reassignment for queues inactive beyond threshold
Best Practices for Salesforce Queues
Implement these proven strategies for optimal salesforce queues setup and management.
1. Design Queues Around Business Processes
Don’t create queues just because you can. Each queue should represent a distinct step in your business workflow with clear:
- Entry criteria (how records enter)
- Ownership rules (who claims them)
- Exit criteria (when records leave the queue)
- Success metrics (how you measure performance)
Framework Questions:
- What business outcome does this queue support?
- Who is responsible for records in this queue?
- What happens if records aren’t claimed within SLA?
- How will we know if this queue is working?
2. Leverage Public Groups for Flexibility
Always add public groups to queues rather than individual users. This provides:
- Easier Maintenance: Update group membership instead of editing multiple queues
- Consistent Access: Users inherit queue access across all queues using that group
- Better Governance: Group membership can be delegated to managers
- Audit Trail: Public group changes are tracked
Implementation:
- Create public groups for each functional team
- Add these groups to relevant queues
- Manage team changes through group membership
- Document which groups map to which queues
3. Create Standard Queue Views
Don’t make queue members create their own views. Build standardized views that promote best practices:
“My Open Queue Items” View:
- Filter: Owner equals specific queue AND Status not closed
- Purpose: Everything currently in the queue
- Sort: By priority, then created date
“Aging Queue Items” View:
- Filter: Owner equals queue AND Created Date older than 7 days
- Purpose: Identify stale records needing attention
- Highlight: Formula showing days in queue
“Today’s Arrivals” View:
- Filter: Owner equals queue AND Created Date = TODAY
- Purpose: Focus on newest items
- Sort: Created date (newest first)
“High Priority” View:
- Filter: Owner equals queue AND Priority = High/Critical
- Purpose: Ensure urgent items get immediate attention
- Sort: Created date (oldest first)
4. Implement Queue SLAs
Define and monitor service level agreements for queue processing:
Create Custom Fields:
- Time in Queue (Formula): NOW() – CreatedDate
- SLA Breached (Formula): Boolean indicating if SLA exceeded
- Date Claimed (DateTime): When record was assigned from queue to user
Build SLA Reports:
- Percentage of records claimed within SLA
- Average time in queue by queue
- SLA breaches by queue member
- Trend analysis month-over-month
Automate Alerts:
- Email alerts when records exceed 80% of SLA time
- Escalation workflows for SLA breaches
- Daily digests to managers showing queue health
5. Document Queue Processes
Create clear documentation for queue workflows:
Queue Charter Template:
textQueue Name: [Name]
Purpose: [Business objective]
Supported Objects: [List]
Queue Members: [Groups/Users]
Entry Criteria: [How records get here]
SLA: [Expected processing time]
Exit Criteria: [How records leave queue]
Responsibilities: [What members should do]
Escalation Path: [What happens if SLA breached]
Share this documentation in your team wiki or Salesforce Files for easy reference.
6. Use Chatter for Queue Collaboration
Enable Chatter on queue-supported objects to facilitate collaboration:
- Queue members can @mention specialists for input
- Questions can be answered before claiming ownership
- Knowledge is preserved in the Chatter feed
- Managers can provide guidance on complex items
Best Practice: Create Chatter naming conventions like “[Queue Name] – Question” for searchability.
7. Monitor and Optimize Regularly
Queue performance degrades without regular attention. Schedule monthly reviews:
Metrics to Track:
- Queue volume trends (increasing/decreasing)
- Average time in queue
- Claim rate by team member
- Abandonment rate (records deleted or reassigned from queue)
- Conversion rates (for lead queues)
Optimization Questions:
- Are any queues consistently bottlenecked?
- Do certain queue members never claim records?
- Are assignment rules routing correctly?
- Can we consolidate underutilized queues?
- Do we need to split high-volume queues?
8. Train Queue Members Thoroughly
Don’t assume users understand how to work with queues. Provide training on:
- How to access queue views
- How to claim ownership from queue
- When to transfer back to queue vs. to another user
- Queue SLA expectations
- How to escalate problematic queue records
Training Materials:
- Quick reference guide (one-pager)
- Video walkthrough of common queue tasks
- FAQ document addressing common questions
- Process flowchart showing queue workflow
9. Integrate Queues with Other Salesforce Features
Maximize value by connecting queues to complementary Salesforce functionality:
Assignment Rules: Automatically route records to appropriate queues based on criteria
Auto-Response Rules: Send acknowledgment emails when records enter queue
Escalation Rules: Move records to different queues if SLA breached
Approval Processes: Route records through queue-based approval chains
Process Builder/Flow: Advanced automation for queue management
Reports & Dashboards: Real-time visibility into queue performance
Omni-Channel: Advanced queue routing for service organizations
10. Plan for Edge Cases
Consider unusual scenarios in your queue design:
What happens when:
- A queue member goes on extended leave?
- A record doesn’t fit any queue criteria?
- Multiple teams need access to the same records?
- A customer requests a specific representative?
- Queue volume exceeds team capacity?
Document your answers and build exception handling into your processes.
Conclusion
Mastering salesforce queues setup transforms how your organization manages shared workloads, from lead queues salesforce implementations that accelerate sales response times to case queues that revolutionize customer support. Throughout this comprehensive guide, we’ve explored the fundamentals of salesforce queue configuration, walked through detailed setup procedures, examined real-world use cases, and shared best practices refined from years of Salesforce implementations.
The power of queues lies not just in their technical configuration but in how they enable collaborative, efficient workflows. When properly implemented, queues ensure no lead goes uncontacted, no customer issue is forgotten, and no opportunity slips away due to unclear ownership. They provide the visibility, accountability, and structure that growing organizations need to scale their operations without sacrificing quality.
As you implement queues in your Salesforce org, remember these key takeaways:
- Start simple: Create a few well-designed queues rather than dozens of specialized ones
- Think process-first: Design queues around your actual business workflows
- Use public groups: Build flexibility into your configuration from day one
- Monitor actively: Queue health requires ongoing attention and optimization
- Train thoroughly: Technology only works when users understand and embrace it
Whether you’re setting up your first queue for incoming web leads or architecting a sophisticated multi-tier support system, the principles remain the same: clear purpose, proper configuration, and continuous improvement.
RizeX Labs specializes in helping organizations optimize their Salesforce implementations, including queue strategies that drive measurable business results. If you’re struggling with queue configuration or want to take your Salesforce workflows to the next level, our team of certified experts is ready to help.
Ready to transform your Salesforce operations with optimized queue management? Contact RizeX Labs today for a consultation on how we can help you implement queue strategies that accelerate your business goals.
About RizeX Labs
At RizeX Labs, we specialize in delivering cutting-edge Salesforce solutions, including advanced queue management and automation strategies within the Salesforce platform. Our expertise combines deep technical knowledge, industry best practices, and real-world implementation experience to help businesses streamline task assignment, improve response time, and enhance operational efficiency.
We empower organizations to optimize workload distribution—from manual task handling to fully automated queue-based workflows that improve productivity and accountability.
Internal Links:
- Salesforce Admin course page
- Salesforce Flows vs Apex: When Should You Use Code vs No-Code Automation?
- Salesforce Data Cloud Explained — What It Is and Why It Matters
- AI Tools for Salesforce Development in 2026 — Cursor AI, Copilot and More
- Why Your Company Should Invest in Salesforce Developer Training in 2026
- Salesforce Named Credentials: What They Are and How to Use Them Safely
- Prompt Engineering for Salesforce Agentforce — Beginner’s Guide
External Links:
McKinsey Sales Growth Reports
Quick Summary
Salesforce queues are powerful organizational tools that serve as holding areas for unassigned records like leads, cases, and custom objects, enabling teams to collaboratively manage shared workloads without individual ownership conflicts. Setting up salesforce queues involves navigating to Setup > Queues, creating a new queue with a descriptive name, selecting supported objects, and adding queue members (users, public groups, or roles) who can view and claim records. Proper salesforce queue configuration includes setting up queue email addresses, defining assignment rules for automatic routing, creating standardized list views for easy access, and establishing SLAs to monitor response times. Common use cases include lead queues salesforce implementations for geographic or product-based routing, customer support case management with tiered escalation paths, partner channel management, order processing workflows, and HR recruitment tracking. The benefits of queues include improved response times (30-50% reduction reported), balanced workload distribution, enhanced team collaboration, specialized routing capabilities, better reporting analytics, and seamless scalability as organizations grow. Best practices emphasize designing queues around business processes rather than organizational charts, using public groups for flexible membership management, implementing clear SLAs with monitoring, documenting queue workflows thoroughly, and conducting regular performance reviews to optimize queue efficiency and ensure no records fall through the cracks.

