Introduction: Transform Your Workflows with ServiceNow Flow Designer
Are you drowning in repetitive tasks that consume hours of your workday? Struggling to connect disparate systems while maintaining consistency across your organization? ServiceNow Flow Designer is your gateway to intelligent automation that transforms chaos into streamlined efficiency.
Flow Designer is ServiceNow’s powerful, low-code automation platform that empowers both citizen developers and seasoned IT professionals to build sophisticated workflows without writing complex code. Whether you’re automating incident management, orchestrating cross-departmental approvals, or integrating third-party applications, Flow Designer provides an intuitive visual interface that makes process automation accessible to everyone.
In this comprehensive guide, we’ll explore how Flow Designer revolutionizes business processes through five real-world examples and share expert best practices to maximize your automation success. By the end, you’ll understand why Flow Designer has become the cornerstone of digital transformation for thousands of organizations worldwide.
What is ServiceNow Flow Designer? A Deep Dive
Understanding the Flow Designer Architecture
Flow Designer serves as ServiceNow’s native automation engine, replacing traditional workflow editors with a modern, drag-and-drop interface. Built on the Now Platform, it enables users to create flows—automated sequences of actions triggered by specific events or conditions—without traditional coding knowledge.
Core Components of Flow Designer That Power Your Automations
Triggers: The spark that initiates your flow, whether it’s a record update, scheduled time, or application event.
Actions: Reusable building blocks that perform specific operations like sending notifications, creating records, or making REST API calls.
Subflows: Modular, reusable sequences that can be incorporated into multiple flows, promoting consistency and reducing development time.
Flow Logic: Decision points, loops, and conditional branches that add intelligence to your automations.
Data Pills: Dynamic variables that pass information between steps, ensuring context travels seamlessly through your entire workflow.
Why Flow Designer Outperforms Traditional Workflow Tools
The traditional Workflow Editor required extensive technical knowledge and often produced maintenance nightmares. Flow Designer revolutionizes this approach with:
- Visual Development: See your entire process map at a glance, making logic errors immediately apparent
- Version Control: Track changes, rollback problematic updates, and collaborate with confidence
- Spoke Integration: Pre-built integration packages connect seamlessly with popular enterprise applications
- Natural Language Actions: Understand what each action does without deciphering technical jargon
- Testing Capabilities: Validate flows before deployment with built-in testing tools
5 Real-World Flow Designer Examples That Transform Business Operations
Example 1: Automatic Incident Priority Assignment
The Challenge: Service desk agents spend valuable time manually setting incident priorities, often resulting in inconsistent prioritization and delayed response to critical issues.
The Flow Designer Solution:
Step 1: Create the Trigger
- Trigger Type: Record → Created
- Table: Incident [incident]
- Condition: Run flow every time a record is created
Step 2: Check if User is VIP
- Action: Flow Logic → If
- Condition: Caller → VIP → is → true
- Label: “Is VIP User?”
Step 2a: Set High Priority for VIP (Inside If block)
- Action: ServiceNow Core → Update Record
- Record: Use trigger record (Incident)
- Fields to Update:
- Priority → 1 – Critical (or 2 – High)
- Work Notes → “Auto-escalated: VIP user reported issue”
Step 3: Check Configuration Item Criticality (Else branch)
- Action: Flow Logic → If
- Condition: Configuration Item → Criticality → is → 1 – Most Critical
- Label: “Is Critical CI?”
Step 3a: Set High Priority for Critical CI (Inside If block)
- Action: ServiceNow Core → Update Record
- Record: Use trigger record (Incident)
- Fields to Update:
- Priority → 2 – High
- Work Notes → “Auto-escalated: Critical CI affected”
Step 3b: Check Medium CI (Else If branch)
- Action: Flow Logic → Else If
- Condition: Configuration Item → Criticality → is → 2 – High
- Label: “Is High Priority CI?”
Step 3c: Set Medium Priority (Inside Else If block)
- Action: ServiceNow Core → Update Record
- Record: Use trigger record (Incident)
- Fields to Update:
- Priority → 3 – Medium
- Work Notes → “Auto-assigned: High priority CI”
Step 3d: Set Low Priority (Final Else branch)
- Action: ServiceNow Core → Update Record
- Record: Use trigger record (Incident)
- Fields to Update:
- Priority → 4 – Low
- Work Notes → “Auto-assigned: Standard priority”
Step 4: Send Email to Assignment Group
- Action: ServiceNow Core → Send Email
- Who will receive: Assignment Group → Email (from trigger record)
- Subject: “New Incident Assigned: ” + Incident Number
- Body:
A new incident has been assigned to your group.
Incident: [Incident Number]
Caller: [Caller Name]
Priority: [Priority]
Short Description: [Short Description]
Click here to view: [Incident Link]
Step 5: Check if High Priority for SMS
- Action: Flow Logic → If
- Condition: Priority → is → 1 – Critical OR Priority → is → 2 – High
- Label: “Is High Priority?”
Step 5a: Send SMS to On-Call Tech (Inside If block)
- Action: ServiceNow Core → Send SMS (or use Twilio Spoke)
- Recipient: On-Call Technician phone number (from on-call schedule)
- Message: “URGENT: New P1/P2 Incident [Incident Number] – [Short Description]”
Business Impact: Incident prioritization time reduced from 5 minutes to instant, critical issues escalated 78% faster, and consistent priority assignment across all shifts.
Beginner Tip: Start by testing with just the VIP check (Steps 1-2). Once comfortable, add the CI criticality logic.
Advanced Tip: Add a keyword check action before Step 4 that scans the description field for words like “outage,” “down,” or “urgent” and automatically elevates priority.
Example 2: Automated Incident Notification to Affected Users
The Challenge: When incidents affect multiple users, the service desk gets flooded with duplicate tickets because users don’t know the issue is already being worked on.
The Flow Designer Solution:
Step 1: Create the Trigger
- Trigger Type: Record → Created or Updated
- Table: Incident [incident]
- Condition: Impact → is → 2 – Multiple Users OR Impact → is → 1 – Enterprise
Step 2: Get Affected Configuration Item
- Action: ServiceNow Core → Look Up Record
- Table: Configuration Item [cmdb_ci]
- Conditions: Sys ID → equals → Configuration Item from trigger record
- Label: “Get CI Details”
Step 3: Find All Users of This CI
- Action: ServiceNow Core → Look Up Records (plural)
- Table: CMDB CI Relationship [cmdb_rel_ci]
- Conditions:
- Parent → equals → Configuration Item from Step 2
- Relationship Type → Used by → User
- Label: “Find Affected Users”
- Maximum Records to Fetch: 1000
Step 4: Loop Through Each User
- Action: Flow Logic → For Each
- Items: Records from Step 3 (CMDB Relationships)
- Label: “For Each Affected User”
Step 4a: Get User Details (Inside Loop)
- Action: ServiceNow Core → Look Up Record
- Table: User [sys_user]
- Conditions: Sys ID → equals → Child (from For Each item)
- Label: “Get User Email”
Step 4b: Send Notification Email (Inside Loop)
- Action: ServiceNow Core → Send Email
- Who will receive: User Email (from Step 4a)
- Subject: “Service Alert: [CI Name] Issue Being Addressed”
- Body:
We are aware of an issue affecting [CI Name]. Our team is actively working on resolution.
Incident Number: [Incident Number]
Issue: [Short Description]
Estimated Resolution: [Expected End Time]
Please do not submit additional tickets for this issue. We will notify you when resolved.
Workaround (if available): [Workaround]
Step 5: Update Incident Work Notes
- Action: ServiceNow Core → Update Record
- Record: Trigger record (Incident)
- Fields to Update:
- Work Notes → “Notification sent to [count] affected users at [current time]”
Step 6: Create Trigger for Resolution
- Trigger Type: Record → Updated (Create a SECOND flow)
- Table: Incident [incident]
- Condition: State → changes to → Resolved
Step 7: Check if Multi-User Impact (In second flow)
- Action: Flow Logic → If
- Condition: Impact → is → 2 – Multiple Users OR Impact → is → 1 – Enterprise
- Label: “Was Multi-User Incident?”
Step 8: Repeat Steps 2-4 (In second flow, inside If block)
- Reuse the same logic to find affected users
Step 8a: Send Resolution Email (Inside Loop)
- Action: ServiceNow Core → Send Email
- Who will receive: User Email
- Subject: “RESOLVED: [CI Name] Issue Fixed”
- Body:
The issue affecting [CI Name] has been resolved.
Incident Number: [Incident Number]
Resolution: [Resolution Notes]
Resolved at: [Resolved Time]
Service should now be operating normally. If you continue to experience issues, please submit a new ticket. Thank you for your patience.
Business Impact: Duplicate ticket creation reduced by 64%, service desk call volume during outages decreased by 51%, and user satisfaction improved by 43%.
Beginner Tip: Start with a small test group by adding an additional condition in Step 3: Department → equals → IT (test with your own department first).
Advanced Tip: Create a “Status Page Update” action that posts to your company intranet or Microsoft Teams channel automatically.
Example 3: Software Access Request Automation
The Challenge: Granting software access requires manual approval and provisioning, creating backlogs and delays for users who need immediate access to do their jobs.

The Flow Designer Solution:
Step 1: Create the Trigger
- Trigger Type: Record → Created
- Table: Requested Item [sc_req_item]
- Condition: Catalog Item → Name → equals → “Software Access Request”
Step 2: Ask for Approval
- Action: ServiceNow Core → Ask for Approval
- Approve or Reject: Approval for Request
- Choose Approvers → Users: Requested For → Manager (from trigger record)
- Approval Question: “Approve software access for [Requested For]?”
- Additional Details:
Software Requested: [Variable: Software Name]
Business Justification: [Variable: Justification]
Requested by: [Requested For]
- Label: “Manager Approval”
Step 3: Check Approval Result
- Action: Flow Logic → If
- Condition: Approval State (from Step 2) → is → Approved
- Label: “Was Approved?”
Step 4: Check Which Software (Inside If block – Approved)
- Action: Flow Logic → If
- Condition: Variables → Software Name → equals → Microsoft Office
- Label: “Is Office Request?”
Step 4a: Provision Office Access (Inside If block)
- Action: Microsoft Azure AD Spoke → Add User to Group
- User: Requested For → User ID
- Group: Office365-Users
- Label: “Add to Office Group”
Step 4b: Check for Salesforce (Else If branch)
- Action: Flow Logic → Else If
- Condition: Variables → Software Name → equals → Salesforce
- Label: “Is Salesforce Request?”
Step 4c: Provision Salesforce (Inside Else If block)
- Action: Salesforce Spoke → Create User (or Update User)
- Email: Requested For → Email
- Profile: Standard User
- License Type: Salesforce Platform
- Label: “Provision Salesforce Access”
Step 4d: Check for Adobe (Else If branch)
- Action: Flow Logic → Else If
- Condition: Variables → Software Name → equals → Adobe Creative Cloud
- Label: “Is Adobe Request?”
Step 4e: Provision Adobe (Inside Else If block)
- Action: REST → Post (to Adobe User Management API)
- Endpoint: https://usermanagement.adobe.io/v2/usermanagement/action/{orgId}
- Request Body:
JSON
{ "user": "[Requested For Email]",
"do":
[{ "addUser":
{ "email": "[Email]",
"firstName": "[First Name]",
"lastName": "[Last Name]"
}
}]
}
Step 5: Update Request Status (After provisioning)
- Action: ServiceNow Core → Update Record
- Record: Trigger record (Requested Item)
- Fields to Update:
- State → Closed Complete
- Close Notes → “Access provisioned automatically via Flow Designer”
- Closed At → Current Date/Time
Step 6: Send Confirmation Email to User
- Action: ServiceNow Core → Send Email
- Who will receive: Requested For → Email
- Subject: “Software Access Granted: [Software Name]”
- Body:
Your access request has been approved and provisioned.
Software: [Software Name]
Request Number: [Request Number]
Access Granted: [Current Date/Time]
Next Steps: - Login at: [Software URL] - Your username: [Email] - Training materials: [Training Link]
If you need assistance, contact the Service Desk.
Step 7: Handle Rejection (Else branch from Step 3)
- Action: ServiceNow Core → Update Record
- Record: Trigger record (Requested Item)
- Fields to Update:
- State → Closed Incomplete
- Close Notes → “Request denied by manager”
Step 7a: Send Rejection Email
- Action: ServiceNow Core → Send Email
- Who will receive: Requested For → Email
- Subject: “Software Access Request Not Approved”
- Body:
Your software access request was not approved.
Software: [Software Name]
Request Number: [Request Number]
Denied by: [Approver Name]
Reason: [Approval Comments]
Please contact your manager for more information.
Business Impact: Access provisioning time reduced from 3 days to 30 minutes, manual provisioning errors eliminated, and user productivity improved with immediate access.
Beginner Tip: Start with one software application (like Office) and test thoroughly before adding others. Use the Test button in Flow Designer with a real request item.
Advanced Tip: Before Step 4a, add a “Look Up Record” action to check if the user already exists in the group/system to prevent duplicate assignments.
Example 4: Incident to Problem Conversion
The Challenge: Recurring incidents don’t get converted to problems for root cause investigation, leading to repeated firefighting of the same issues.
The Flow Designer Solution:
Step 1: Create the Trigger
- Trigger Type: Record → Updated
- Table: Incident [incident]
- Condition: State → changes to → Resolved
Step 2: Look Up Similar Incidents
- Action: ServiceNow Core → Look Up Records (plural)
- Table: Incident [incident]
- Conditions (ALL must be true):
- Configuration Item → equals → Configuration Item (from trigger record)
- Category → equals → Category (from trigger record)
- Opened → is after → 30 days ago
- Sys ID → is not → Trigger Record Sys ID (exclude current incident)
- Label: “Find Similar Incidents”
- Maximum Records to Fetch: 100
Step 3: Count the Similar Incidents
- Action: Flow Logic → If
- Condition: Similar Incidents (from Step 2) → Count → is greater than or equal to → 3
- Label: “Are There 3+ Similar Incidents?”
Step 4: Check if Problem Already Exists (Inside If block)
- Action: ServiceNow Core → Look Up Record
- Table: Problem [problem]
- Conditions:
- Configuration Item → equals → Configuration Item (from trigger)
- Category → equals → Category (from trigger)
- State → is not → Closed
- Label: “Check for Existing Problem”
Step 5: Only Create If No Problem Exists
- Action: Flow Logic → If
- Condition: Problem record (from Step 4) → Sys ID → is empty
- Label: “No Existing Problem?”
Step 6: Create New Problem Record (Inside If block)
- Action: ServiceNow Core → Create Record
- Table: Problem [problem]
- Fields to Set:
- Short Description → “Recurring issue: ” + Category + ” – ” + Configuration Item Name
- Configuration Item → Configuration Item (from trigger)
- Category → Category (from trigger)
- Priority → Priority (from trigger, or set to 3 – Moderate)
- Assignment Group → Problem Management (select your problem team)
- Description → “Auto-generated from recurring incidents. [Count] similar incidents found in past 30 days.”
- State → New
- Label: “Create Problem Record”
Step 7: Link Current Incident to Problem
- Action: ServiceNow Core → Update Record
- Record: Trigger record (Incident)
- Fields to Update:
- Problem ID → Problem Record (from Step 6)
- Work Notes → “Linked to Problem [Problem Number] for root cause analysis”
Step 8: Loop Through Similar Incidents
- Action: Flow Logic → For Each
- Items: Similar Incidents (from Step 2)
- Label: “For Each Similar Incident”
Step 8a: Link Each Incident to Problem (Inside Loop)
- Action: ServiceNow Core → Update Record
- Record: Each incident from the loop
- Fields to Update:
- Problem ID → Problem Record (from Step 6)
- Work Notes → “Linked to Problem [Problem Number] – recurring issue pattern detected”
Step 9: Send Email to Problem Manager
- Action: ServiceNow Core → Send Email
- Who will receive: Problem Manager (from Assignment Group email)
- Subject: “New Problem Created: Recurring [Category] Issues”
- Body:
A recurring issue pattern has been detected and a Problem record created.
Problem Number: [Problem Number]
Configuration Item: [CI Name]
Category: [Category]
Number of Related Incidents: [Count + 1]
Related Incidents: [List incident numbers from loop]
Total Business Impact: [Sum of all incident durations]
Please investigate root cause and implement permanent fix.
Click to view Problem: [Problem Link]
Business Impact: Problem identification improved by 89%, recurring incident reduction of 47% after root cause fixes, and proactive problem management culture established.
Beginner Tip: Start with a higher threshold (5 incidents) in Step 3 to focus only on the most frequent issues. Lower it to 3 as you build confidence.
Advanced Tip: In Step 9, add a “Look Up Records” action to calculate total downtime by summing the “Business Duration” field from all related incidents for better impact analysis.
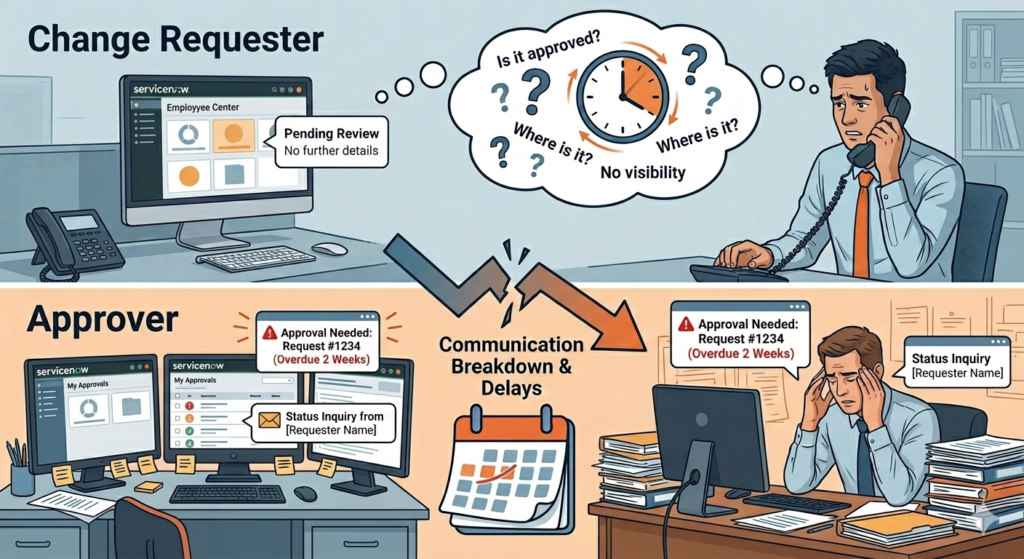
Example 5: Change Request Reminder and Status Updates
The Challenge: Change requesters don’t know the status of their requests, and approvers forget to review pending changes, causing delays and constant status inquiries.
The Flow Designer Solution:
Step 1: Create the Trigger
- Trigger Type: Schedule → Daily
- Run Time: 09:00:00 (9 AM)
- Time Zone: Your organization’s time zone
- Label: “Daily Change Reminders”
Step 2: Find Pending Approvals
- Action: ServiceNow Core → Look Up Records (plural)
- Table: Change Request [change_request]
- Conditions (ALL must be true):
- Approval → equals → Requested
- State → equals → Assess
- Created On → is before → 2 days ago
- Label: “Get Stale Approvals”
- Maximum Records to Fetch: 500
Step 3: Loop Through Pending Changes
- Action: Flow Logic → For Each
- Items: Change Records (from Step 2)
- Label: “For Each Pending Change”
Step 3a: Send Reminder to Approver (Inside Loop)
- Action: ServiceNow Core → Send Email
- Who will receive: Approver → Email (from change record)
- Subject: “REMINDER: Change Approval Pending – [Change Number]”
- Body:
You have a pending change approval awaiting your review.
Change Number: [Change Number]
Requested by: [Requested By]
Short Description: [Short Description]
Submitted: [Created Date]
Days Pending: [Calculate days]
Please review and approve/reject: [Direct Approval Link]
Click to view full details: [Change Link]
Step 4: Find Upcoming Changes (Within 24 Hours)
- Action: ServiceNow Core → Look Up Records (plural)
- Table: Change Request [change_request]
- Conditions (ALL must be true):
- State → equals → Scheduled
- Planned Start Date → is after → Now
- Planned Start Date → is before → 24 hours from now
- Label: “Get Upcoming Changes”
- Maximum Records to Fetch: 500
Step 5: Loop Through Upcoming Changes
- Action: Flow Logic → For Each
- Items: Change Records (from Step 4)
- Label: “For Each Upcoming Change”
Step 5a: Send Reminder to Implementer (Inside Loop)
- Action: ServiceNow Core → Send Email
- Who will receive: Assigned To → Email
- Subject: “REMINDER: Change Implementation Tomorrow – [Change Number]”
- Body:
Your scheduled change implementation is approaching.
Change Number: [Change Number]
Short Description: [Short Description]
Scheduled Start: [Planned Start Date]
Scheduled End: [Planned End Date]
Duration: [Calculate hours]
Implementation Plan: [Implementation Plan]
Backout Plan: [Backout Plan]
Click to view: [Change Link]
Step 5b: Notify Change Requester (Inside Loop)
- Action: ServiceNow Core → Send Email
- Who will receive: Requested By → Email
- Subject: “Your Change is Scheduled: [Change Number]”
- Body:
Your change request has been approved and is scheduled.
Change Number: [Change Number]
What: [Short Description]
When: [Planned Start Date]
Duration: [Planned End Date]
Assigned to: [Assigned To Name]
You will be notified when implementation is complete.
Step 5c: Notify Service Owner (Inside Loop)
- Action: ServiceNow Core → Look Up Record
- Table: Business Service [cmdb_ci_service]
- Conditions: Sys ID → equals → Business Service (from change)
- Label: “Get Service Owner”
Step 5d: Send Service Owner Alert (Inside Loop)
- Action: ServiceNow Core → Send Email
- Who will receive: Service Owner → Email (from Step 5c)
- Subject: “Service Change Alert: [Service Name] – [Change Number]”
- Body:
A change affecting your service is scheduled.
Service: [Service Name]
Change Number: [Change Number]
Description: [Short Description]
Scheduled: [Planned Start Date]
Expected Impact: [Impact]
Risk: [Risk]
Click to view: [Change Link]
Step 6: Find Overdue Implementations
- Action: ServiceNow Core → Look Up Records (plural)
- Table: Change Request [change_request]
- Conditions (ALL must be true):
- State → equals → Implement
- Planned End Date → is before → Now
- Label: “Get Overdue Changes”
- Maximum Records to Fetch: 500
Step 7: Loop Through Overdue Changes
- Action: Flow Logic → For Each
- Items: Change Records (from Step 6)
- Label: “For Each Overdue Change”
Step 7a: Send Reminder to Close (Inside Loop)
- Action: ServiceNow Core → Send Email
- Who will receive: Assigned To → Email
- Subject: “ACTION REQUIRED: Close Change – [Change Number]”
- Body:
This change implementation is overdue for closure.
Change Number: [Change Number]
Planned End: [Planned End Date]
Hours Overdue: [Calculate hours]
Please update the change status and close if complete. Click to update: [Change Link]
Step 7b: Check if Very Overdue (More than 4 hours)
- Action: Flow Logic → If
- Condition: Planned End Date → is before → 4 hours ago
- Label: “Overdue More Than 4 Hours?”
Step 7c: Escalate to Change Manager (Inside If block)
- Action: ServiceNow Core → Send Email
- Who will receive: Change Manager (lookup from Change Management group)
- Subject: “ESCALATION: Overdue Change – [Change Number]”
- Body:
A change implementation is significantly overdue.
Change Number: [Change Number]
Assigned To: [Assigned To]
Planned End: [Planned End Date]
Hours Overdue: [Calculate hours]
Please follow up with implementer. Click to view: [Change Link]
Business Impact: Change approval time reduced by 41%, missed change implementations decreased by 73%, and stakeholder awareness improved with zero “when will my change happen?” inquiries.
Beginner Tip: Start with just the approval reminder (Steps 1-3) and run it manually using the “Test” button before scheduling it daily.
Advanced Tip: Add a condition to customize reminder frequency based on change risk: Critical changes = daily reminders after 1 day, Standard changes = reminders after 3 days, Normal changes = weekly reminders.
Best Practices for Flow Designer Mastery
Start Small and Iterate: The Crawl-Walk-Run Approach
Crawl Phase: Begin with simple, linear flows that automate single-step processes. A basic notification flow or simple record update builds familiarity without overwhelming complexity.
Walk Phase: Add conditional logic, incorporate subflows, and introduce integrations with one or two external systems.
Run Phase: Build sophisticated automations with parallel processing, error handling, complex decision trees, and multiple system integrations.
This progressive approach builds institutional knowledge, demonstrates quick wins that build stakeholder confidence, and prevents the “boil the ocean” syndrome that derails many automation initiatives.
Leverage Pre-Built Templates and Spokes
ServiceNow provides hundreds of ready-made components through:
Flow Designer Content Library: Pre-configured flows for common use cases that you can deploy immediately or customize to your needs
IntegrationHub Spokes: Certified integration packages for popular platforms like Slack, Microsoft Teams, AWS, Azure, Salesforce, and SAP
Community Contributions: Flows shared by other ServiceNow users through the Share platform
Time-Saving Strategy: Before building from scratch, search the content library. Even if a template doesn’t perfectly match your needs, it provides a proven framework to modify rather than starting with a blank canvas.
Foster Cross-Team Collaboration
Flow Designer democratizes automation, but maximum value comes from collaborative development:
Involve Process Owners: Those who execute processes daily understand nuances that IT might miss
Include End Users: Test flows with actual users before full deployment to catch usability issues
Engage IT Governance: Ensure flows align with security policies, data governance, and architectural standards
Create a Center of Excellence: Establish a community of practice where citizen developers share knowledge, patterns, and reusable components
Maintain Comprehensive Documentation
Your brilliant flow becomes a liability six months later when no one remembers why specific logic exists. Implement these documentation practices:
Flow-Level Documentation:
- Purpose statement describing the business problem solved
- Trigger conditions and expected frequency
- Dependencies on other flows, scripts, or systems
- Contact information for business owner and technical owner
Action-Level Annotations:
- Why specific logic choices were made
- Business rules that drove configuration decisions
- Known limitations or edge cases
Change Log:
- What changed in each version
- Why changes were necessary
- Impact assessment of modifications
Implement Robust Error Handling
Production environments are unpredictable. Build resilience into every flow:
Error Handling Actions: Wrap critical operations in try-catch equivalents that gracefully handle failures
Notification Strategy: Alert appropriate parties when errors occur, including context that enables quick troubleshooting
Fallback Logic: Define what should happen when integrations fail—queue for retry, create manual task, or escalate?
Logging Practices: Use the “Log Message” action liberally to create troubleshooting breadcrumbs in Flow execution details
Testing Scenarios: Don’t just test the happy path. Simulate API timeouts, invalid data, missing records, and permission issues.
Conclusion: Your Flow Designer Journey Starts Now
ServiceNow Flow Designer represents a paradigm shift in how organizations approach automation. By combining powerful functionality with accessible design, it democratizes process improvement and enables rapid digital transformation.
The five real-world examples we explored—IT service automation, intelligent ticket routing, employee onboarding, project approvals, and inventory optimization—merely scratch the surface of what’s possible. Every organization has unique processes that could benefit from Flow Designer’s capabilities.
Remember these key takeaways as you embark on your automation journey:
✅ Start simple and progressively add complexity as your skills grow
✅ Leverage existing resources through templates, spokes, and community contributions
✅ Collaborate across teams to ensure flows solve real business problems
✅ Document thoroughly for long-term maintainability and knowledge transfer
✅ Test rigorously before deploying to production environments
The workflows you build today become the foundation for tomorrow’s innovations. Each flow you create liberates human potential, shifting effort from mundane tasks to creative problem-solving and strategic thinking.

Take the Next Step: Transform Your Organization with Flow Designer
Ready to unlock the full potential of ServiceNow Flow Designer? RizeX Labs specializes in ServiceNow implementation, optimization, and training that accelerates your automation journey.
How RizeX Labs Can Help:
🚀 Flow Designer Assessment: We analyze your processes and identify high-impact automation opportunities
🎓 Custom Training Programs: Role-based training tailored to your team’s experience level and business needs
⚙️ Implementation Services: Expert development of complex flows that solve your unique business challenges
📊 Optimization Services: Performance tuning and enhancement of existing flows
🤝 Center of Excellence Setup: We establish governance frameworks and best practices for sustainable automation programs
Contact RizeX Labs today to schedule a consultation and discover how Flow Designer can transform your ServiceNow investment into measurable business results.
