Salesforce has evolved far beyond a simple CRM platform—it’s now a comprehensive ecosystem that businesses rely on for customer data, analytics, automation, and more. As organizations grow and their tech stacks become more complex, the need to integrate Salesforce with external applications, services, and databases becomes critical.
That’s where Salesforce REST API integration comes in.
Whether you’re building a custom application, syncing data between systems, or automating workflows across platforms, understanding how to work with the Salesforce API is an essential skill for modern developers. In this comprehensive Salesforce API tutorial, we’ll walk through everything you need to know—from authentication and basic requests to advanced integration patterns and best practices.
By the end of this Salesforce integration guide, you’ll be able to:
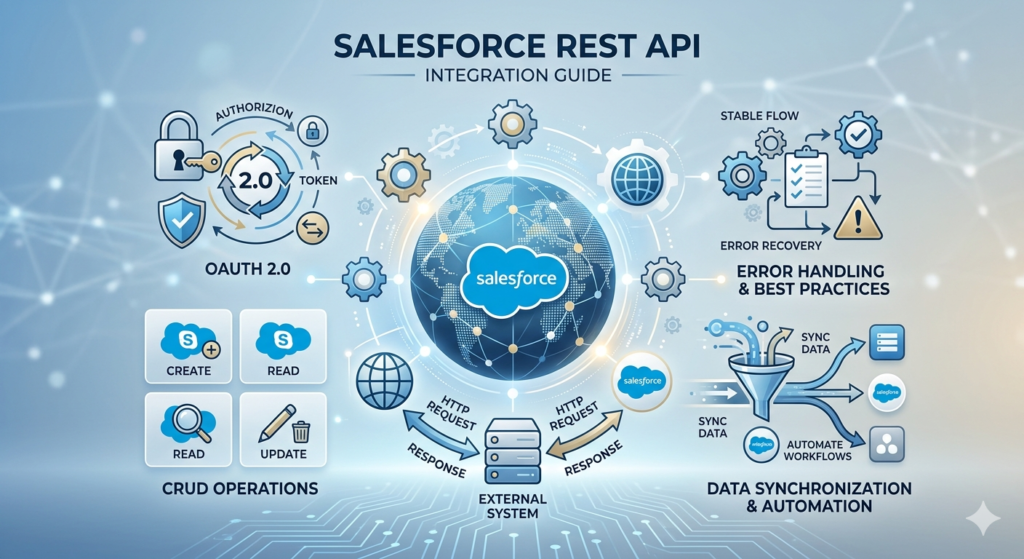
- Authenticate with Salesforce using OAuth 2.0
- Perform CRUD operations (Create, Read, Update, Delete) on Salesforce objects
- Execute Salesforce HTTP callouts from within Salesforce
- Handle errors gracefully and implement best practices
- Avoid common pitfalls that trip up developers
Let’s dive in.
What Is the Salesforce REST API?
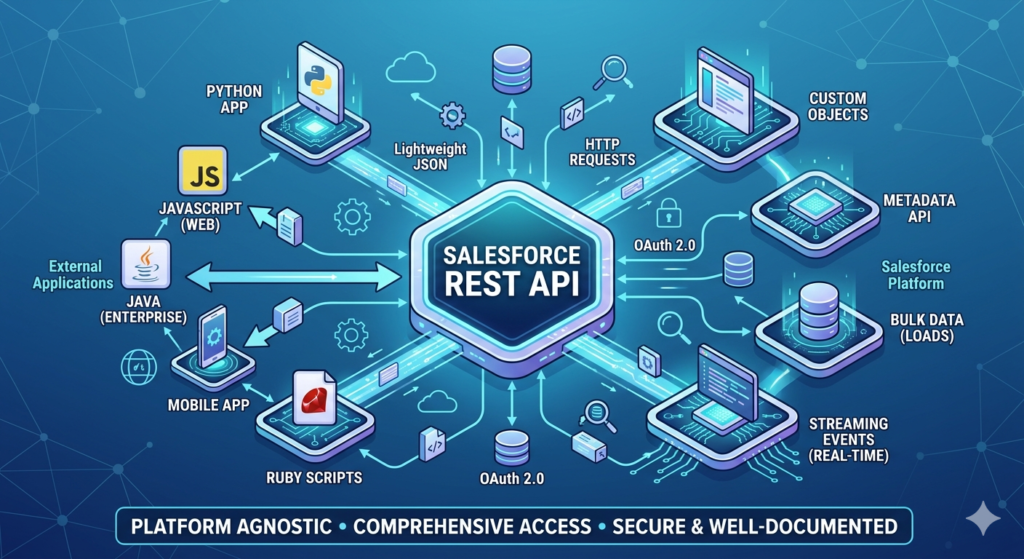
The Salesforce REST API is a powerful, flexible interface that allows external applications to interact with your Salesforce data using standard HTTP methods. It follows REST (Representational State Transfer) architectural principles, making it lightweight, stateless, and easy to use with virtually any programming language.
Why Use the Salesforce REST API?
- Platform Agnostic: Works with any language that can make HTTP requests (Python, JavaScript, Java, Ruby, etc.)
- Lightweight: Uses JSON for data exchange, making it efficient and human-readable
- Comprehensive: Access to almost all Salesforce functionality—objects, metadata, queries, and more
- Well-Documented: Extensive official documentation with versioning support
- OAuth 2.0 Security: Industry-standard authentication protocol
REST API vs. Other Salesforce APIs
Salesforce offers several APIs for different use cases:
- REST API: General-purpose, JSON-based, great for mobile and web applications
- SOAP API: XML-based, more verbose but feature-rich, often used for enterprise integrations
- Bulk API: Designed for loading or querying large data volumes asynchronously
- Streaming API: Real-time event-driven architecture using push technology
- Metadata API: For deploying and retrieving configuration changes
For most modern integrations, the REST API is the recommended choice due to its simplicity and flexibility.
Prerequisites
Before starting this Salesforce REST API integration tutorial, ensure you have:
- A Salesforce Account: Developer Edition (free) or any paid edition with API access
- API Access Enabled: Check with your Salesforce administrator
- Connected App Credentials: We’ll create this in the next section
- Basic HTTP/REST Knowledge: Understanding of GET, POST, PATCH, DELETE methods
- API Testing Tool: Postman, cURL, or similar
- Programming Environment (optional): For implementing integrations in your preferred language
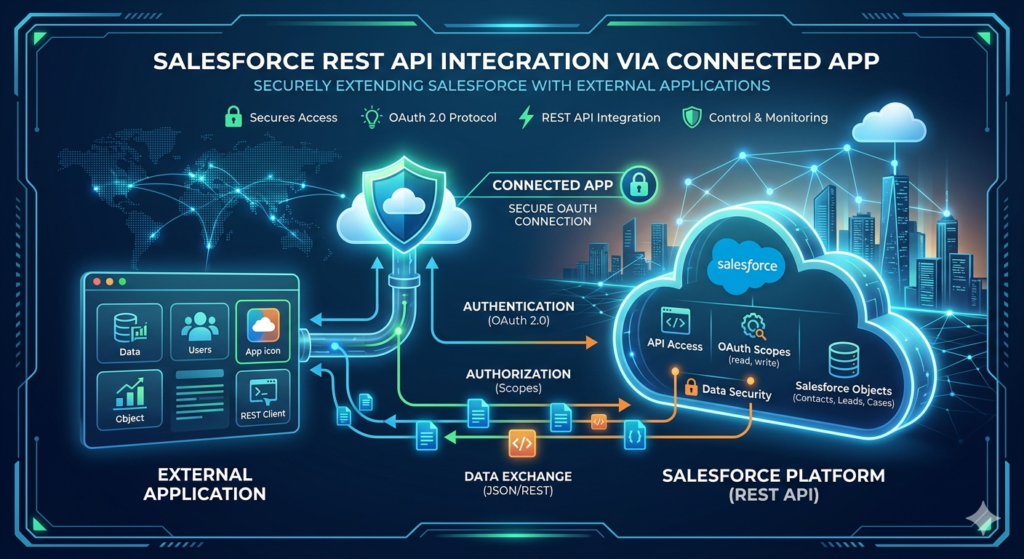
Step 1: Setting Up a Connected App in Salesforce
To integrate with Salesforce securely, you need to create a Connected App. This establishes an OAuth connection between your external application and Salesforce.
Creating a Connected App
- Log in to Salesforce and navigate to Setup
- In the Quick Find box, search for App Manager
- Click New Connected App
- Fill in the basic information:
- Connected App Name: My Integration App
- API Name: Auto-populated
- Contact Email: Your email address
- Enable OAuth Settings:
- Check Enable OAuth Settings
- Callback URL:
https://login.salesforce.com/services/oauth2/callback(or your application’s callback URL) - Selected OAuth Scopes: Add at minimum:
- Full access (full)
- Perform requests on your behalf at any time (refresh_token, offline_access)
- Access and manage your data (api)
- Click Save and then Continue
- Note your credentials:
- Consumer Key (Client ID)
- Consumer Secret (Click to reveal)
Important: Store these credentials securely. You’ll need them for authentication.
Step 2: Understanding OAuth 2.0 Authentication
Salesforce uses OAuth 2.0 for secure authentication. There are several OAuth flows, but we’ll focus on the two most common for API integration:
OAuth 2.0 Flows
- Username-Password Flow: Simple but less secure; good for server-to-server integrations
- Web Server Flow: More secure; requires user interaction; recommended for web applications
- JWT Bearer Token Flow: For server-to-server integrations using certificates

Username-Password Flow (Quick Start)
This flow is straightforward and doesn’t require user interaction, making it ideal for testing and backend integrations.
Request:
Bashcurl --location --request POST 'https://login.salesforce.com/services/oauth2/token' \
--header 'Content-Type: application/x-www-form-urlencoded' \
--data-urlencode 'grant_type=password' \
--data-urlencode 'client_id=YOUR_CONSUMER_KEY' \
--data-urlencode 'client_secret=YOUR_CONSUMER_SECRET' \
--data-urlencode 'username=YOUR_SALESFORCE_USERNAME' \
--data-urlencode 'password=YOUR_PASSWORD+SECURITY_TOKEN'
Important Note: The password should be your Salesforce password concatenated with your security token. If your password is MyPass123 and your security token is xyz789, use MyPass123xyz789.
Response:
JSON{
    "access_token": "00D5g000000abcd!AR8AQJXg.yxKLTL...",
    "instance_url": "https://yourinstance.salesforce.com",
    "id": "https://login.salesforce.com/id/00D5g000000abcd/0055g000000ABCD",
    "token_type": "Bearer",
    "issued_at": "1638360000000",
    "signature": "abc123def456..."
}
Key Response Fields:
access_token: Use this in all subsequent API requestsinstance_url: Base URL for your Salesforce instanceissued_at: Token creation timestamp
Setting Up Authentication in Postman
- Open Postman and create a new collection
- Add a POST request to:
https://login.salesforce.com/services/oauth2/token - Under Body, select x-www-form-urlencoded and add:
grant_type:passwordclient_id: Your Consumer Keyclient_secret: Your Consumer Secretusername: Your Salesforce usernamepassword: Your password + security token
- Send the request and save the
access_token
Step 3: Making Your First API Request
Now that you have an access token, let’s make your first Salesforce API call.
Retrieving Salesforce Version Information
This simple request confirms your authentication is working:
cURL Example:
Bashcurl --location --request GET 'https://yourinstance.salesforce.com/services/data/' \
--header 'Authorization: Bearer YOUR_ACCESS_TOKEN'
Response:
JSON[
    {
        "label": "Winter '21",
        "url": "/services/data/v50.0",
        "version": "50.0"
    },
    {
        "label": "Spring '21",
        "url": "/services/data/v51.0",
        "version": "51.0"
    },
    {
        "label": "Summer '21",
        "url": "/services/data/v52.0",
        "version": "52.0"
    }
]
This shows all available API versions. We’ll use the latest version (e.g., v58.0) for our examples.
Step 4: CRUD Operations with Salesforce REST API
Let’s explore the core operations you’ll perform in any Salesforce REST API integration.
Query Records (Read)
SOQL (Salesforce Object Query Language) is used to query Salesforce data, similar to SQL.
Example: Query Accounts
Bashcurl --location --request GET 'https://yourinstance.salesforce.com/services/data/v58.0/query?q=SELECT+Id,+Name,+Industry+FROM+Account+LIMIT+10' \
--header 'Authorization: Bearer YOUR_ACCESS_TOKEN'
Postman Setup:
- Method: GET
- URL:
https://yourinstance.salesforce.com/services/data/v58.0/query - Params:
q=SELECT Id, Name, Industry FROM Account LIMIT 10 - Headers:
Authorization=Bearer YOUR_ACCESS_TOKEN
Response:
JSON{
    "totalSize": 10,
    "done": true,
    "records": [
        {
            "attributes": {
                "type": "Account",
                "url": "/services/data/v58.0/sobjects/Account/0015g00000ABCDE"
            },
            "Id": "0015g00000ABCDE",
            "Name": "Acme Corporation",
            "Industry": "Technology"
        },
        {
            "attributes": {
                "type": "Account",
                "url": "/services/data/v58.0/sobjects/Account/0015g00000FGHIJ"
            },
            "Id": "0015g00000FGHIJ",
            "Name": "Global Industries",
            "Industry": "Manufacturing"
        }
    ]
}
Create a Record
Example: Create a New Contact
Bashcurl --location --request POST 'https://yourinstance.salesforce.com/services/data/v58.0/sobjects/Contact' \
--header 'Authorization: Bearer YOUR_ACCESS_TOKEN' \
--header 'Content-Type: application/json' \
--data-raw '{
    "FirstName": "John",
    "LastName": "Doe",
    "Email": "john.doe@example.com",
    "Phone": "555-1234"
}'
Response (Success):
JSON{
    "id": "0035g00000KLMNO",
    "success": true,
    "errors": []
}
Response (Error):
JSON{
    "message": "Required fields are missing: [LastName]",
    "errorCode": "REQUIRED_FIELD_MISSING",
    "fields": ["LastName"]
}
Update a Record
Example: Update an Account
Use PATCH to update existing records:
Bashcurl --location --request PATCH 'https://yourinstance.salesforce.com/services/data/v58.0/sobjects/Account/0015g00000ABCDE' \
--header 'Authorization: Bearer YOUR_ACCESS_TOKEN' \
--header 'Content-Type: application/json' \
--data-raw '{
    "Industry": "Healthcare",
    "Phone": "555-9999"
}'
Response (Success):
httpHTTP/1.1 204 No Content
A 204 response indicates successful update with no content returned.
Delete a Record
Example: Delete a Contact
Bashcurl --location --request DELETE 'https://yourinstance.salesforce.com/services/data/v58.0/sobjects/Contact/0035g00000KLMNO' \
--header 'Authorization: Bearer YOUR_ACCESS_TOKEN'
Response:
httpHTTP/1.1 204 No Content
Retrieve a Single Record
Example: Get Account Details
Bashcurl --location --request GET 'https://yourinstance.salesforce.com/services/data/v58.0/sobjects/Account/0015g00000ABCDE' \
--header 'Authorization: Bearer YOUR_ACCESS_TOKEN'
Response:
JSON{
    "attributes": {
        "type": "Account",
        "url": "/services/data/v58.0/sobjects/Account/0015g00000ABCDE"
    },
    "Id": "0015g00000ABCDE",
    "Name": "Acme Corporation",
    "Industry": "Healthcare",
    "Phone": "555-9999",
    "BillingCity": "San Francisco",
    "CreatedDate": "2023-01-15T10:30:00.000+0000"
}
Step 5: Salesforce HTTP Callouts (Apex)
Now let’s look at making Salesforce HTTP callouts—calling external APIs from within Salesforce using Apex code.
Why Use HTTP Callouts?
Common scenarios include:
- Integrating with third-party payment processors
- Fetching data from external databases
- Triggering webhooks or notifications
- Synchronizing data with external systems
Basic HTTP GET Callout Example
apexpublic class ExternalAPICallout {

    @future(callout=true)
    public static void getExternalData() {

        // Create HTTP request
        Http http = new Http();
        HttpRequest request = new HttpRequest();

        // Set endpoint and method
        request.setEndpoint('https://api.example.com/data');
        request.setMethod('GET');
        request.setHeader('Content-Type', 'application/json');

        // Send the request
        HttpResponse response = http.send(request);

        // Check response status
        if (response.getStatusCode() == 200) {
            // Parse JSON response
            String responseBody = response.getBody();
            System.debug('Response: ' + responseBody);

            // Process the data
            Map<String, Object> results = (Map<String, Object>) JSON.deserializeUntyped(responseBody);

        } else {
            System.debug('Error: ' + response.getStatus());
        }
    }
}
HTTP POST Callout with JSON Body
apexpublic class CreateExternalRecord {

    public static void createRecord() {

        Http http = new Http();
        HttpRequest request = new HttpRequest();

        request.setEndpoint('https://api.example.com/records');
        request.setMethod('POST');
        request.setHeader('Content-Type', 'application/json');
        request.setHeader('Authorization', 'Bearer YOUR_API_KEY');

        // Create JSON body
        Map<String, Object> requestBody = new Map<String, Object>();
        requestBody.put('name', 'New Record');
        requestBody.put('status', 'Active');

        request.setBody(JSON.serialize(requestBody));

        // Send request
        HttpResponse response = http.send(request);

        if (response.getStatusCode() == 201) {
            System.debug('Record created successfully');
        } else {
            System.debug('Error: ' + response.getStatusCode() + ' - ' + response.getBody());
        }
    }
}
Named Credentials for Secure Authentication
Instead of hardcoding credentials, use Named Credentials for better security:
- Navigate to Setup > Named Credentials
- Click New Named Credential
- Configure:
- Name: ExternalAPICredential
- URL: https://api.example.com
- Authentication: Set up OAuth or password-based auth
Using Named Credentials in Apex:
apexpublic class SecureCallout {

    public static void makeSecureCall() {

        Http http = new Http();
        HttpRequest request = new HttpRequest();

        // Use named credential in endpoint
        request.setEndpoint('callout:ExternalAPICredential/data');
        request.setMethod('GET');

        HttpResponse response = http.send(request);

        System.debug('Response: ' + response.getBody());
    }
}
Remote Site Settings
Before making callouts, you must whitelist external URLs:
- Go to Setup > Remote Site Settings
- Click New Remote Site
- Enter:
- Remote Site Name: ExternalAPI
- Remote Site URL: https://api.example.com
- Check Active and Save
Step 6: Advanced Integration Patterns
Composite API Requests
Execute multiple operations in a single request to improve efficiency:
Bashcurl --location --request POST 'https://yourinstance.salesforce.com/services/data/v58.0/composite/tree/Account' \
--header 'Authorization: Bearer YOUR_ACCESS_TOKEN' \
--header 'Content-Type: application/json' \
--data-raw '{
    "records": [
        {
            "attributes": {"type": "Account", "referenceId": "ref1"},
            "Name": "Parent Account",
            "Contacts": {
                "records": [
                    {
                        "attributes": {"type": "Contact", "referenceId": "ref2"},
                        "FirstName": "Jane",
                        "LastName": "Smith"
                    }
                ]
            }
        }
    ]
}'
Batch Operations
Process multiple records efficiently:
Bashcurl --location --request POST 'https://yourinstance.salesforce.com/services/data/v58.0/composite/batch' \
--header 'Authorization: Bearer YOUR_ACCESS_TOKEN' \
--header 'Content-Type: application/json' \
--data-raw '{
    "batchRequests": [
        {
            "method": "POST",
            "url": "v58.0/sobjects/Account",
            "richInput": {
                "Name": "First Account"
            }
        },
        {
            "method": "POST",
            "url": "v58.0/sobjects/Account",
            "richInput": {
                "Name": "Second Account"
            }
        }
    ]
}'
Handling Large Data Sets with Bulk API
For processing large volumes (thousands to millions of records), use the Bulk API:
Python# Python example using simple-salesforce library
from simple_salesforce import Salesforce, bulk

sf = Salesforce(username='user@example.com',
                password='password',
                security_token='token')

# Prepare bulk data
bulk_data = [
    {'Name': 'Account 1', 'Industry': 'Technology'},
    {'Name': 'Account 2', 'Industry': 'Finance'},
    # ... thousands more
]

# Insert in bulk
results = sf.bulk.Account.insert(bulk_data)
Step 7: Error Handling and Best Practices
Common HTTP Status Codes
| Status Code | Meaning | Action |
|---|---|---|
| 200 | Success | Process response data |
| 201 | Created | Record created successfully |
| 204 | No Content | Update/delete successful |
| 400 | Bad Request | Check request format/data |
| 401 | Unauthorized | Refresh access token |
| 403 | Forbidden | Check permissions |
| 404 | Not Found | Verify record ID/endpoint |
| 500 | Server Error | Retry with exponential backoff |
Robust Error Handling in Apex
apexpublic class RobustAPICallout {

    public static void makeCalloutWithErrorHandling() {

        Http http = new Http();
        HttpRequest request = new HttpRequest();

        request.setEndpoint('callout:ExternalAPI/data');
        request.setMethod('GET');
        request.setTimeout(120000); // 2 minutes

        try {
            HttpResponse response = http.send(request);

            // Handle different status codes
            if (response.getStatusCode() == 200) {
                processSuccessResponse(response.getBody());
            } else if (response.getStatusCode() == 401) {
                // Handle authentication error
                System.debug('Authentication failed. Token may be expired.');
                // Implement token refresh logic
            } else if (response.getStatusCode() >= 500) {
                // Server error - implement retry logic
                System.debug('Server error. Scheduling retry...');
                scheduleRetry();
            } else {
                System.debug('Error: ' + response.getStatusCode() + ' - ' + response.getBody());
            }

        } catch (System.CalloutException e) {
            System.debug('Callout exception: ' + e.getMessage());
            // Log error and notify admin
            logError(e);
        }
    }

    private static void processSuccessResponse(String body) {
        // Process response
    }

    private static void scheduleRetry() {
        // Implement retry logic
    }

    private static void logError(Exception e) {
        // Create error log record
    }
}
Best Practices for Salesforce REST API Integration
1. Use API Version Strategically
Always specify an API version in your requests. Salesforce maintains backward compatibility, but new features require newer versions:
text/services/data/v58.0/sobjects/Account
2. Implement Token Refresh
Access tokens expire. Implement automatic refresh using refresh tokens:
Bashcurl --request POST 'https://login.salesforce.com/services/oauth2/token' \
--header 'Content-Type: application/x-www-form-urlencoded' \
--data-urlencode 'grant_type=refresh_token' \
--data-urlencode 'client_id=YOUR_CONSUMER_KEY' \
--data-urlencode 'client_secret=YOUR_CONSUMER_SECRET' \
--data-urlencode 'refresh_token=YOUR_REFRESH_TOKEN'
3. Respect API Limits
Salesforce enforces API request limits based on license type:
- Developer Edition: 5,000 requests per 24 hours
- Enterprise Edition: 1,000 requests per user per 24 hours
- Unlimited Edition: 5,000 requests per user per 24 hours
Monitor limits using the Sforce-Limit-Info response header.
4. Use Field-Level Security
Only query fields you need to improve performance and respect field-level security:
SQLSELECT Id, Name, Email FROM Contact
-- Instead of: SELECT Id, Name, Email, CustomField__c, ... FROM Contact
5. Implement Exponential Backoff
When encountering rate limits or server errors, retry with increasing delays:
JavaScriptasync function makeRequestWithRetry(url, maxRetries = 3) {
    for (let i = 0; i < maxRetries; i++) {
        try {
            const response = await fetch(url);
            if (response.ok) return response;

            if (response.status >= 500) {
                const delay = Math.pow(2, i) * 1000; // Exponential backoff
                await new Promise(resolve => setTimeout(resolve, delay));
                continue;
            }
            throw new Error(`HTTP ${response.status}`);
        } catch (error) {
            if (i === maxRetries - 1) throw error;
        }
    }
}
6. Secure Your Credentials
- Never hardcode credentials in code
- Use environment variables or secure credential storage
- Implement the OAuth Web Server Flow for user-facing apps
- Rotate credentials regularly
- Use Named Credentials in Apex
7. Optimize SOQL Queries
- Use selective filters with indexed fields (Id, Name, CreatedDate, etc.)
- Avoid wildcards in LIKE clauses
- Limit result sets appropriately
- Use relationship queries to minimize requests:
SQLSELECT Id, Name, (SELECT FirstName, LastName FROM Contacts) FROM Account
8. Monitor and Log
Implement comprehensive logging:
apexpublic class APILogger {

    public static void logAPICall(String endpoint, String method,
                                   Integer statusCode, String responseBody) {
        API_Log__c log = new API_Log__c();
        log.Endpoint__c = endpoint;
        log.Method__c = method;
        log.Status_Code__c = statusCode;
        log.Response__c = responseBody.abbreviate(32768); // Long text area limit
        log.Timestamp__c = System.now();

        insert log;
    }
}
Common Mistakes to Avoid
1. Forgetting the Security Token
When using the Username-Password OAuth flow, concatenate your password with your security token.
2. Not URL-Encoding SOQL Queries
SOQL queries in URL parameters must be properly encoded:
textSELECT Id, Name FROM Account WHERE Name = 'Test & Co'
Becomes:
textSELECT%20Id%2C%20Name%20FROM%20Account%20WHERE%20Name%20%3D%20%27Test%20%26%20Co%27
3. Ignoring Governor Limits in Apex
When making callouts in Apex:
- Maximum 100 callouts per transaction
- Maximum 60-second timeout per callout
- Use
@future(callout=true)for asynchronous processing
4. Not Handling Null Values
Always check for null values when processing responses:
apexMap<String, Object> data = (Map<String, Object>) JSON.deserializeUntyped(responseBody);
String name = data.get('name') != null ? (String)data.get('name') : 'Unknown';
5. Using GET for Large Queries
URLs have length limits. For complex queries, use POST to /services/data/v58.0/query:
Bashcurl --request POST 'https://yourinstance.salesforce.com/services/data/v58.0/query' \
--header 'Authorization: Bearer YOUR_ACCESS_TOKEN' \
--header 'Content-Type: application/json' \
--data-raw '{
    "q": "SELECT Id, Name, CustomField1__c, CustomField2__c ... FROM Account"
}'
6. Not Testing in Sandbox
Always develop and test integrations in a Salesforce Sandbox before deploying to production.
Real-World Integration Example: Node.js
Here’s a complete example of a Salesforce REST API integration using Node.js:
JavaScriptconst axios = require('axios');

class SalesforceAPI {
    constructor(username, password, securityToken, clientId, clientSecret) {
        this.username = username;
        this.password = password + securityToken;
        this.clientId = clientId;
        this.clientSecret = clientSecret;
        this.instanceUrl = null;
        this.accessToken = null;
    }

    async authenticate() {
        try {
            const response = await axios.post(
                'https://login.salesforce.com/services/oauth2/token',
                new URLSearchParams({
                    grant_type: 'password',
                    client_id: this.clientId,
                    client_secret: this.clientSecret,
                    username: this.username,
                    password: this.password
                })
            );

            this.accessToken = response.data.access_token;
            this.instanceUrl = response.data.instance_url;
            console.log('Authentication successful');
            return true;
        } catch (error) {
            console.error('Authentication failed:', error.response?.data || error.message);
            return false;
        }
    }

    async query(soql) {
        if (!this.accessToken) {
            await this.authenticate();
        }

        try {
            const response = await axios.get(
                `${this.instanceUrl}/services/data/v58.0/query`,
                {
                    params: { q: soql },
                    headers: {
                        'Authorization': `Bearer ${this.accessToken}`,
                        'Content-Type': 'application/json'
                    }
                }
            );

            return response.data.records;
        } catch (error) {
            console.error('Query failed:', error.response?.data || error.message);
            throw error;
        }
    }

    async createRecord(sobject, data) {
        if (!this.accessToken) {
            await this.authenticate();
        }

        try {
            const response = await axios.post(
                `${this.instanceUrl}/services/data/v58.0/sobjects/${sobject}`,
                data,
                {
                    headers: {
                        'Authorization': `Bearer ${this.accessToken}`,
                        'Content-Type': 'application/json'
                    }
                }
            );

            return response.data;
        } catch (error) {
            console.error('Create failed:', error.response?.data || error.message);
            throw error;
        }
    }

    async updateRecord(sobject, recordId, data) {
        if (!this.accessToken) {
            await this.authenticate();
        }

        try {
            await axios.patch(
                `${this.instanceUrl}/services/data/v58.0/sobjects/${sobject}/${recordId}`,
                data,
                {
                    headers: {
                        'Authorization': `Bearer ${this.accessToken}`,
                        'Content-Type': 'application/json'
                    }
                }
            );

            return { success: true, id: recordId };
        } catch (error) {
            console.error('Update failed:', error.response?.data || error.message);
            throw error;
        }
    }
}

// Usage example
async function main() {
    const sf = new SalesforceAPI(
        process.env.SF_USERNAME,
        process.env.SF_PASSWORD,
        process.env.SF_SECURITY_TOKEN,
        process.env.SF_CLIENT_ID,
        process.env.SF_CLIENT_SECRET
    );

    // Query accounts
    const accounts = await sf.query('SELECT Id, Name FROM Account LIMIT 5');
    console.log('Accounts:', accounts);

    // Create a contact
    const newContact = await sf.createRecord('Contact', {
        FirstName: 'John',
        LastName: 'Doe',
        Email: 'john.doe@example.com'
    });
    console.log('Created contact:', newContact);

    // Update the contact
    await sf.updateRecord('Contact', newContact.id, {
        Phone: '555-1234'
    });
    console.log('Contact updated');
}

main().catch(console.error);
Testing Your Integration
Unit Testing Apex Callouts
Use mock responses for testing:
apex@isTest
public class ExternalAPICalloutTest {

    @isTest
    static void testSuccessfulCallout() {
        // Set mock response
        Test.setMock(HttpCalloutMock.class, new MockHttpResponseGenerator());

        // Test the callout
        Test.startTest();
        ExternalAPICallout.getExternalData();
        Test.stopTest();

        // Add assertions
        // Assert expected behavior
    }
}

// Mock class
public class MockHttpResponseGenerator implements HttpCalloutMock {
    public HTTPResponse respond(HTTPRequest req) {
        HttpResponse res = new HttpResponse();
        res.setHeader('Content-Type', 'application/json');
        res.setBody('{"status":"success","data":[]}');
        res.setStatusCode(200);
        return res;
    }
}
Integration Testing Checklist
- Test authentication flow
- Test CRUD operations on all relevant objects
- Test error handling (invalid credentials, network errors, etc.)
- Test rate limit handling
- Test with large data sets
- Test token refresh mechanism
- Verify field-level security
- Test in Sandbox before production
- Monitor API usage and limits
Conclusion
Mastering Salesforce REST API integration opens up endless possibilities for building powerful, connected applications. Whether you’re syncing customer data across platforms, automating business processes, or building custom integrations, the REST API provides a flexible, robust foundation.
In this Salesforce API tutorial, we’ve covered:
- Setting up Connected Apps for secure OAuth authentication
- Making HTTP requests with various methods (GET, POST, PATCH, DELETE)
- Performing CRUD operations on Salesforce objects
- Implementing Salesforce HTTP callouts with Apex
- Following best practices for security, performance, and error handling
- Avoiding common pitfalls that developers encounter
Key Takeaways
- Always authenticate securely using OAuth 2.0 flows appropriate for your use case
- Respect API limits and implement efficient querying strategies
- Handle errors gracefully with proper retry logic and user feedback
- Never hardcode credentials—use environment variables or Named Credentials
- Test thoroughly in Sandbox environments before production deployment
- Monitor and log API usage for troubleshooting and optimization
Next Steps
To continue your Salesforce integration journey:
- Explore the official Salesforce REST API documentation
- Experiment with the Bulk API for large-scale data operations
- Learn about Platform Events for event-driven integrations
- Build a complete integration project with your preferred programming language
- Join the Salesforce Developer community for support and best practices
The skills you’ve learned in this guide will serve as a foundation for building sophisticated, enterprise-grade integrations that connect Salesforce with your entire technology ecosystem.
Happy coding, and may your integrations be seamless and your API calls successful!
About RizeX Labs
We’re Pune’s leading IT training institute specializing in emerging technologies like Salesforce and data analytics. At RizeX Labs, we help professionals master complex integration patterns and architectural frameworks through hands-on training, real-world projects, and expert mentorship. Our programs are designed to transform technical learners into job-ready Salesforce Developers and Architects with a focus on enterprise-grade implementation and secure API management.
Internal Links:
- Salesforce REST API Authentication: A Deep Dive into OAuth 2.0
- Apex Callouts vs. External Services: Which Integration Pattern to Choose?
- Postman for Salesforce Developers: Testing Your API Integration
