Introduction: What Are Apex Triggers and Why Do They Matter?
Every serious Salesforce developer hits a point where Flow Builder simply isn’t enough.
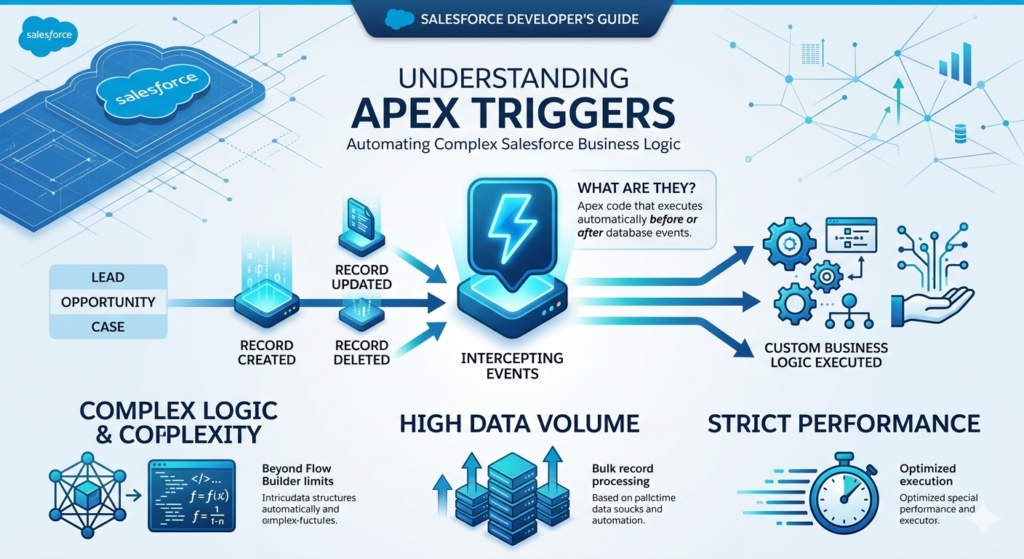
The business logic is too complex. The data volume is too large. The performance requirements are too strict. That’s the moment you reach for Salesforce Apex Triggers.
An Apex Trigger is a piece of Apex code that executes automatically before or after specific database events occur on a Salesforce record. When someone creates a new Lead, updates an Opportunity, or deletes a Case — triggers can intercept that action and run custom logic in response.
Think of a trigger as a database event listener that says: “Every time THIS happens on THIS object, run THIS code.”
Why Are Apex Triggers Used in Salesforce?
Triggers solve problems that declarative tools can’t handle:
- Complex conditional logic that goes beyond Decision elements
- Bulk data processing involving thousands of records simultaneously
- Cross-object operations requiring precise transactional control
- Performance-critical automations that need Before Save execution with full Apex capability
- Custom validation with sophisticated business rules across multiple objects
- Integration logic requiring precise error handling and retry mechanisms
When Should You Use Triggers Instead of Flow?
This is one of the most common Salesforce interview questions, so pay attention.
| Use Flow When | Use Apex Triggers When |
|---|---|
| Logic is straightforward | Logic is highly complex |
| Admins need to maintain it | Developer ownership is acceptable |
| Standard CRUD operations | Custom algorithms needed |
| Quick implementation needed | Performance is critical |
| No deep governor limit concerns | Precise limit management required |
The golden rule in 2026: Flow first. Apex Trigger only when Flow genuinely can’t do it — or when performance and complexity demand it.
With that foundation established, let’s go deep into Apex Triggers explained from syntax to real-world implementation.
What Is a Trigger in Salesforce?
A trigger in Salesforce is an Apex class with a special syntax that binds it to a specific object and one or more database events.
Every trigger:
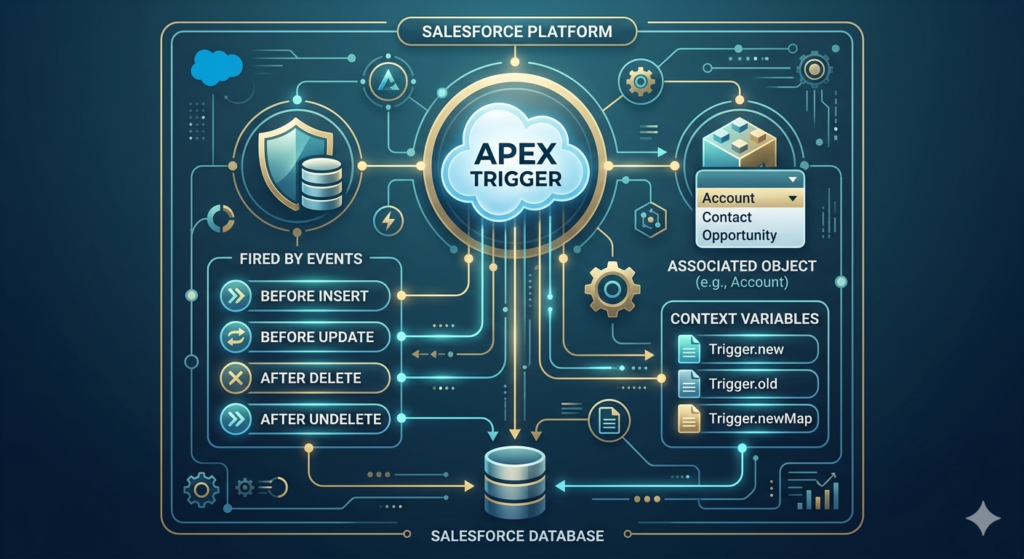
- Belongs to exactly one object (e.g., Account, Lead, Opportunity)
- Fires on one or more events (insert, update, delete, undelete)
- Executes before or after the database operation
- Has access to context variables containing the records being processed
Triggers live in the Salesforce metadata layer alongside other Apex code. They’re deployed like any other Apex class — through the Developer Console, VS Code with Salesforce CLI, or directly in Setup.
Where Triggers Fit in the Salesforce Order of Execution
Understanding when triggers fire is critical. Here’s the simplified order of execution when a record is saved:
text1. System validation rules
2. Before Triggers execute
3. Custom validation rules
4. Duplicate rules
5. Record saved to database (not committed yet)
6. After Triggers execute
7. Assignment rules, Auto-response rules, Workflow rules
8. Processes and Flows
9. Record committed to database
10. Post-commit logic (emails, async jobs)
Key insight: Before Triggers fire before validation rules. After Triggers fire after the record is saved but before the final commit. This order determines what you can and cannot do in each trigger type.
Types of Apex Triggers
Salesforce supports seven trigger events across two categories: Before and After.
Before Triggers
Execute before the record is saved to the database. The record exists in memory but hasn’t been committed.
| Trigger Event | When It Fires | Primary Use Case |
|---|---|---|
before insert | Before a new record is created | Set default field values, validate data |
before update | Before an existing record is modified | Validate changes, auto-calculate fields |
before delete | Before a record is deleted | Prevent deletion based on conditions |
Key characteristic: In Before Triggers, you can modify the records in Trigger.new directly without a DML statement. This is more efficient.
After Triggers
Execute after the record is saved to the database (but before final commit).
| Trigger Event | When It Fires | Primary Use Case |
|---|---|---|
after insert | After a new record is created | Create related records, send emails |
after update | After an existing record is modified | Update related/parent records |
after delete | After a record is deleted | Log deletions, update aggregates |
after undelete | After a record is restored from Recycle Bin | Restore related records, notify users |
Key characteristic: After Triggers have access to the record’s Id (just assigned). You must use DML statements to make any changes.
Trigger Syntax: The Foundation
Every Apex Trigger follows this basic syntax structure:
apextrigger TriggerName on ObjectName (trigger_events) {
    // Your logic goes here
}
Basic Trigger Example
apextrigger AccountTrigger on Account (before insert, before update,
                                    after insert, after update,
                                    before delete, after delete,
                                    after undelete) {

    if (Trigger.isBefore) {
        if (Trigger.isInsert) {
            // Logic for before insert
        }
        if (Trigger.isUpdate) {
            // Logic for before update
        }
        if (Trigger.isDelete) {
            // Logic for before delete
        }
    }

    if (Trigger.isAfter) {
        if (Trigger.isInsert) {
            // Logic for after insert
        }
        if (Trigger.isUpdate) {
            // Logic for after update
        }
        if (Trigger.isDelete) {
            // Logic for after delete
        }
        if (Trigger.isUndelete) {
            // Logic for after undelete
        }
    }
}
Important: This structure — one trigger with all events, using if/else to route logic — is the professional pattern you should follow. Never create multiple triggers for the same object.
Trigger Context Variables Explained
Context variables are automatically available inside every trigger. They give you access to the records being processed and information about the current operation.
The Most Important Context Variables
apexTrigger.new         // List of new versions of records (insert, update, undelete)
Trigger.old         // List of old versions of records (update, delete)
Trigger.newMap      // Map of Id → new record (update, after insert)
Trigger.oldMap      // Map of Id → old record (update, delete)
Trigger.operationType // Returns TriggerOperation enum value
Boolean Context Variables
apexTrigger.isInsert    // True if trigger fired on insert
Trigger.isUpdate    // True if trigger fired on update
Trigger.isDelete    // True if trigger fired on delete
Trigger.isUndelete  // True if trigger fired on undelete
Trigger.isBefore    // True if trigger fired before the operation
Trigger.isAfter     // True if trigger fired after the operation
Trigger.isExecuting // True if current context is a trigger
Context Variable Availability by Event
| Context Variable | Before Insert | Before Update | Before Delete | After Insert | After Update | After Delete | After Undelete |
|---|---|---|---|---|---|---|---|
Trigger.new | ✅ | ✅ | ❌ | ✅ | ✅ | ❌ | ✅ |
Trigger.old | ❌ | ✅ | ✅ | ❌ | ✅ | ✅ | ❌ |
Trigger.newMap | ❌ | ✅ | ❌ | ✅ | ✅ | ❌ | ✅ |
Trigger.oldMap | ❌ | ✅ | ✅ | ❌ | ✅ | ✅ | ❌ |
Practical Example: Comparing Old and New Values
apextrigger OpportunityTrigger on Opportunity (before update) {
    for (Opportunity opp : Trigger.new) {
        Opportunity oldOpp = Trigger.oldMap.get(opp.Id);

        // Check if the Stage actually changed
        if (opp.StageName != oldOpp.StageName) {
            // Stage was changed — run your logic here
            System.debug('Stage changed from: ' + oldOpp.StageName +
                        ' to: ' + opp.StageName);
        }
    }
}
This pattern — comparing Trigger.new against Trigger.oldMap — is used in nearly every apex trigger example you’ll encounter in real projects.
Before vs After Triggers: Clear Comparison
| Aspect | Before Trigger | After Trigger |
|---|---|---|
| Timing | Before database save | After database save |
| Record ID available | ❌ (not yet assigned on insert) | ✅ Always available |
| Modify Trigger.new directly | ✅ No DML needed | ❌ Must use DML |
| Create related records | ❌ No ID to relate to (on insert) | ✅ Yes |
| Send emails | ❌ Not recommended | ✅ Yes |
| Performance | ⚡ Faster (no extra DML) | 🐢 Slightly slower |
| Call external services | ❌ Not recommended | ✅ (via async) |
| Best for | Field updates on triggering record | Creating/updating other records |
Decision Rule:
- Modifying the record being saved? → Before Trigger
- Working with other records or external actions? → After Trigger
10 Real-World Apex Trigger Examples
This is the core of the guide. Every example is based on real business scenarios you’ll encounter in actual Salesforce projects and interviews.
Example 1: Auto-Update Fields Before Insert
Scenario: Your sales team forgets to populate the Rating field on new Accounts. Business rule: Any Account with AnnualRevenue over $1,000,000 should automatically get a Hot rating. Any Account under $100,000 should get Cold.
Trigger Type: before insert
apextrigger AccountRatingTrigger on Account (before insert) {

    for (Account acc : Trigger.new) {

        if (acc.AnnualRevenue != null) {

            if (acc.AnnualRevenue >= 1000000) {
                acc.Rating = 'Hot';
            } else if (acc.AnnualRevenue >= 100000) {
                acc.Rating = 'Warm';
            } else {
                acc.Rating = 'Cold';
            }
        }
    }
}
How it works:
- Fires before insert so we can modify
acc.Ratingdirectly (no DML needed) - Loops through all records being inserted (bulk-safe)
- Checks
AnnualRevenueand setsRatingbased on business thresholds - Since this modifies
Trigger.newdirectly, Salesforce saves the updated value automatically
Interview tip: Always mention “this is bulk-safe because we’re using a for loop over Trigger.new, not querying inside the loop.”
Example 2: Prevent Duplicate Records
Scenario: Your org allows duplicate Contacts to be created. You need to prevent any new Contact from being inserted if a Contact with the same Email already exists in the org.
Trigger Type: before insert
apextrigger PreventDuplicateContactTrigger on Contact (before insert) {

    // Step 1: Collect all emails from the incoming records
    Set<String> incomingEmails = new Set<String>();

    for (Contact con : Trigger.new) {
        if (con.Email != null) {
            incomingEmails.add(con.Email.toLowerCase());
        }
    }

    // Step 2: Query existing contacts with those emails (ONE query — outside loop)
    List<Contact> existingContacts = [
        SELECT Id, Email
        FROM Contact
        WHERE Email IN :incomingEmails
    ];

    // Step 3: Build a set of existing emails for fast lookup
    Set<String> existingEmails = new Set<String>();
    for (Contact existing : existingContacts) {
        if (existing.Email != null) {
            existingEmails.add(existing.Email.toLowerCase());
        }
    }

    // Step 4: Block any incoming contact with a duplicate email
    for (Contact con : Trigger.new) {
        if (con.Email != null &&
            existingEmails.contains(con.Email.toLowerCase())) {
            con.addError('A Contact with email ' + con.Email +
                        ' already exists. Duplicate contacts are not allowed.');
        }
    }
}
How it works:
- Collects all emails from incoming records into a
Set(no duplicates in the Set itself) - Runs one SOQL query outside the loop (critical — never query inside loops)
- Builds a Set of existing emails for O(1) lookup performance
- Uses
addError()to block the save and display a user-friendly error message - Fully bulkified — works whether 1 or 200 records are being inserted
Example 3: Validate Business Rules Before Update
Scenario: Sales managers have a rule — an Opportunity cannot be moved to Closed Won unless the CloseDate is today or in the past AND the Amount is greater than zero.
Trigger Type: before update
apextrigger OpportunityValidationTrigger on Opportunity (before update) {

    for (Opportunity opp : Trigger.new) {
        Opportunity oldOpp = Trigger.oldMap.get(opp.Id);

        // Check if the stage is being changed to 'Closed Won'
        Boolean stageChangedToClosedWon =
            opp.StageName == 'Closed Won' &&
            oldOpp.StageName != 'Closed Won';

        if (stageChangedToClosedWon) {

            // Validation 1: Close Date must not be in the future
            if (opp.CloseDate > Date.today()) {
                opp.StageName.addError(
                    'Cannot set to Closed Won: Close Date must be today or in the past.'
                );
            }

            // Validation 2: Amount must be greater than zero
            if (opp.Amount == null || opp.Amount <= 0) {
                opp.Amount.addError(
                    'Cannot set to Closed Won: Amount must be greater than zero.'
                );
            }
        }
    }
}
How it works:
- Detects the specific field change using
Trigger.oldMapcomparison - Only applies validation when the stage is actually changing to
Closed Won(not on every update) - Uses field-level addError (e.g.,
opp.StageName.addError()) to highlight the exact problem field in the UI - Multiple independent validations run in the same loop pass
Example 4: Send Email Notification After Insert
Scenario: When a new high-priority Case is created, the account’s owner should immediately receive an email alert.
Trigger Type: after insert
apextrigger CaseEmailNotificationTrigger on Case (after insert) {

    // Step 1: Collect Account IDs from high-priority cases
    Set<Id> accountIds = new Set<Id>();

    for (Case c : Trigger.new) {
        if (c.Priority == 'High' && c.AccountId != null) {
            accountIds.add(c.AccountId);
        }
    }

    if (accountIds.isEmpty()) return; // No high-priority cases — exit early

    // Step 2: Get Account owners' email addresses (one query)
    Map<Id, Account> accountMap = new Map<Id, Account>([
        SELECT Id, OwnerId, Owner.Email, Owner.Name, Name
        FROM Account
        WHERE Id IN :accountIds
    ]);

    // Step 3: Build email messages
    List<Messaging.SingleEmailMessage> emails =
        new List<Messaging.SingleEmailMessage>();

    for (Case c : Trigger.new) {
        if (c.Priority == 'High' && c.AccountId != null) {

            Account acc = accountMap.get(c.AccountId);

            if (acc != null && acc.Owner.Email != null) {

                Messaging.SingleEmailMessage email =
                    new Messaging.SingleEmailMessage();

                email.setToAddresses(
                    new List<String>{acc.Owner.Email}
                );
                email.setSubject(
                    'High Priority Case Created: ' + c.CaseNumber
                );
                email.setPlainTextBody(
                    'Hi ' + acc.Owner.Name + ',\n\n' +
                    'A new High Priority case has been created for account: ' +
                    acc.Name + '\n\n' +
                    'Case Subject: ' + c.Subject + '\n' +
                    'Case Number: ' + c.CaseNumber + '\n' +
                    'Priority: ' + c.Priority + '\n\n' +
                    'Please review and respond immediately.\n\n' +
                    'Salesforce Automation'
                );

                emails.add(email);
            }
        }
    }

    // Step 4: Send all emails in one call
    if (!emails.isEmpty()) {
        Messaging.sendEmail(emails);
    }
}
How it works:
- Uses
after insertbecause we need the Case ID and CaseNumber (only available after save) - Exits early with
returnif no high-priority cases exist (performance optimization) - Runs exactly one SOQL query to get all account data
- Builds all email messages in a list and sends them in one
sendEmail()call (bulk-safe)
Example 5: Update Related Parent Record (Child-to-Parent)
Scenario: When a Contact is updated and their Title changes to “CEO,” automatically update the parent Account’s Rating to “Hot.”
Trigger Type: after update
apextrigger ContactTitleTrigger on Contact (after update) {

    // Step 1: Find contacts whose Title changed to 'CEO'
    Set<Id> accountIdsToUpdate = new Set<Id>();

    for (Contact con : Trigger.new) {
        Contact oldCon = Trigger.oldMap.get(con.Id);

        Boolean titleChangedToCEO =
            con.Title == 'CEO' &&
            oldCon.Title != 'CEO' &&
            con.AccountId != null;

        if (titleChangedToCEO) {
            accountIdsToUpdate.add(con.AccountId);
        }
    }

    if (accountIdsToUpdate.isEmpty()) return;

    // Step 2: Query accounts to update
    List<Account> accountsToUpdate = [
        SELECT Id, Rating
        FROM Account
        WHERE Id IN :accountIdsToUpdate
    ];

    // Step 3: Update the Rating field
    for (Account acc : accountsToUpdate) {
        acc.Rating = 'Hot';
    }

    // Step 4: Perform bulk DML update
    if (!accountsToUpdate.isEmpty()) {
        update accountsToUpdate;
    }
}
How it works:
- Uses
after updatebecause we’re updating a different object (Account), not the triggering Contact - Detects only the specific change (Title → “CEO”) to avoid unnecessary processing
- Uses
Set<Id>to collect unique Account IDs (handles multiple contacts from the same account) - One SOQL query, one DML statement — fully bulkified
Example 6: Create Related Records Automatically
Scenario: When a new Account is created, automatically create three standard onboarding Tasks for the account owner: “Send Welcome Email,” “Schedule Intro Call,” and “Send Product Brochure.”
Trigger Type: after insert
apextrigger AccountOnboardingTasksTrigger on Account (after insert) {

    List<Task> tasksToCreate = new List<Task>();

    // Task templates for every new account
    List<String> taskSubjects = new List<String>{
        'Send Welcome Email',
        'Schedule Intro Call',
        'Send Product Brochure'
    };

    for (Account acc : Trigger.new) {

        for (String subject : taskSubjects) {

            Task t = new Task();
            t.Subject      = subject;
            t.WhatId       = acc.Id;          // Links task to the Account
            t.OwnerId      = acc.OwnerId;     // Assigns to Account owner
            t.Status       = 'Not Started';
            t.Priority     = 'Normal';
            t.ActivityDate = Date.today() + 7; // Due in 7 days

            tasksToCreate.add(t);
        }
    }

    // Single DML insert for all tasks across all accounts
    if (!tasksToCreate.isEmpty()) {
        insert tasksToCreate;
    }
}
How it works:
- Uses
after insertbecause we need the Account’sIdto link tasks withWhatId - Builds all tasks in memory first (nested loop is fine — no DML inside loops)
- Inserts all tasks in one DML statement regardless of how many accounts were created
- If 200 accounts are inserted, 600 tasks are created in a single
insertcall (governor-limit safe)
Example 7: Restrict Deletion Based on Conditions
Scenario: Accounts with at least one closed Opportunity should never be deleted. If a user tries to delete such an account, block it with a clear error message.
Trigger Type: before delete
apextrigger PreventAccountDeletionTrigger on Account (before delete) {

    // Step 1: Collect the Account IDs being deleted
    Set<Id> accountIds = new Set<Id>(Trigger.oldMap.keySet());

    // Step 2: Find any closed opportunities linked to these accounts
    List<Opportunity> closedOpps = [
        SELECT Id, AccountId, Name, StageName
        FROM Opportunity
        WHERE AccountId IN :accountIds
        AND IsClosed = true
        LIMIT 50000
    ];

    // Step 3: Build a set of accounts that have closed opportunities
    Set<Id> accountsWithClosedOpps = new Set<Id>();
    for (Opportunity opp : closedOpps) {
        accountsWithClosedOpps.add(opp.AccountId);
    }

    // Step 4: Block deletion for those accounts
    for (Account acc : Trigger.old) {
        if (accountsWithClosedOpps.contains(acc.Id)) {
            acc.addError(
                'Cannot delete account "' + acc.Name +
                '": This account has closed opportunities and cannot be removed.'
            );
        }
    }
}
How it works:
- Uses
before delete— the only opportunity to block deletion before it happens - Uses
Trigger.oldandTrigger.oldMap(Trigger.new doesn’t exist on delete events) - Single SOQL query fetches all relevant opportunities for all accounts being deleted
addError()on the account record prevents deletion and rolls back the transaction
Example 8: Log Changes for Auditing
Scenario: Your compliance team needs a complete audit trail whenever an Opportunity’s Amount or StageName changes. Log these changes to a custom object called Opportunity_Audit_Log__c.
Trigger Type: after update
apextrigger OpportunityAuditTrigger on Opportunity (after update) {

    List<Opportunity_Audit_Log__c> auditLogs =
        new List<Opportunity_Audit_Log__c>();

    for (Opportunity opp : Trigger.new) {
        Opportunity oldOpp = Trigger.oldMap.get(opp.Id);

        // Check if Amount changed
        if (opp.Amount != oldOpp.Amount) {

            Opportunity_Audit_Log__c log = new Opportunity_Audit_Log__c();
            log.Opportunity__c   = opp.Id;
            log.Field_Changed__c = 'Amount';
            log.Old_Value__c     = oldOpp.Amount != null ?
                                   String.valueOf(oldOpp.Amount) : 'null';
            log.New_Value__c     = opp.Amount != null ?
                                   String.valueOf(opp.Amount) : 'null';
            log.Changed_By__c    = UserInfo.getUserId();
            log.Changed_Date__c  = DateTime.now();

            auditLogs.add(log);
        }

        // Check if Stage changed
        if (opp.StageName != oldOpp.StageName) {

            Opportunity_Audit_Log__c log = new Opportunity_Audit_Log__c();
            log.Opportunity__c   = opp.Id;
            log.Field_Changed__c = 'Stage Name';
            log.Old_Value__c     = oldOpp.StageName;
            log.New_Value__c     = opp.StageName;
            log.Changed_By__c    = UserInfo.getUserId();
            log.Changed_Date__c  = DateTime.now();

            auditLogs.add(log);
        }
    }

    // Single DML — insert all logs at once
    if (!auditLogs.isEmpty()) {
        insert auditLogs;
    }
}
How it works:
- Uses
after updateto capture finalized field values - Tracks two fields independently — one change can generate two log records
- Uses
UserInfo.getUserId()to capture who made the change - All log records are collected in a list and inserted in one DML operation
Custom Object Fields Required:
Opportunity__c— Lookup to OpportunityField_Changed__c— Text (100)Old_Value__c— Text (255)New_Value__c— Text (255)Changed_By__c— Lookup to UserChanged_Date__c— DateTime
Example 9: Bulk Data Handling — The Right Way
Scenario: When Opportunities are updated to Closed Won, update the parent Account’s Last_Won_Opportunity_Date__c custom field with today’s date. This must work correctly when 500 records are updated simultaneously via Data Loader.
Trigger Type: after update
apextrigger OpportunityClosedWonTrigger on Opportunity (after update) {

    // Step 1: Collect Account IDs where opp just became 'Closed Won'
    Set<Id> accountIds = new Set<Id>();

    for (Opportunity opp : Trigger.new) {
        Opportunity oldOpp = Trigger.oldMap.get(opp.Id);

        Boolean justClosedWon =
            opp.StageName == 'Closed Won' &&
            oldOpp.StageName != 'Closed Won' &&
            opp.AccountId != null;

        if (justClosedWon) {
            accountIds.add(opp.AccountId);
        }
    }

    if (accountIds.isEmpty()) return; // Early exit if no relevant changes

    // Step 2: Query only the accounts we need (one SOQL query)
    List<Account> accountsToUpdate = [
        SELECT Id, Last_Won_Opportunity_Date__c
        FROM Account
        WHERE Id IN :accountIds
    ];

    // Step 3: Update the field on each account
    for (Account acc : accountsToUpdate) {
        acc.Last_Won_Opportunity_Date__c = Date.today();
    }

    // Step 4: One DML update — no matter how many records
    if (!accountsToUpdate.isEmpty()) {
        update accountsToUpdate;
    }
}
Why this is the correct bulk pattern:
text❌ BAD (fails with 200+ records):
for (Opportunity opp : Trigger.new) {
    Account acc = [SELECT Id FROM Account WHERE Id = :opp.AccountId]; // SOQL in loop!
    acc.Last_Won_Opportunity_Date__c = Date.today();
    update acc; // DML in loop!
}

✅ GOOD (handles 10,000 records):
Collect IDs → One SOQL → Update in memory → One DML
The bad pattern hits the SOQL 101 limit and DML 150 limit almost immediately. The good pattern uses exactly 1 SOQL and 1 DML regardless of how many records are processed.
Example 10: Trigger with Handler Class (Professional Best Practice)
Scenario: You need a professional, maintainable trigger architecture for the Account object that handles all events through a dedicated handler class.
This is how triggers should be written in every production Salesforce org.
Step 1: The Trigger (Thin — Just a Router)
apextrigger AccountTrigger on Account (before insert, before update, before delete,
                                   after insert, after update, after delete,
                                   after undelete) {

    AccountTriggerHandler handler = new AccountTriggerHandler();

    if (Trigger.isBefore) {
        if (Trigger.isInsert)   handler.beforeInsert(Trigger.new);
        if (Trigger.isUpdate)   handler.beforeUpdate(Trigger.new, Trigger.oldMap);
        if (Trigger.isDelete)   handler.beforeDelete(Trigger.old, Trigger.oldMap);
    }

    if (Trigger.isAfter) {
        if (Trigger.isInsert)   handler.afterInsert(Trigger.new, Trigger.newMap);
        if (Trigger.isUpdate)   handler.afterUpdate(Trigger.new, Trigger.newMap,
                                                     Trigger.oldMap);
        if (Trigger.isDelete)   handler.afterDelete(Trigger.old, Trigger.oldMap);
        if (Trigger.isUndelete) handler.afterUndelete(Trigger.new);
    }
}
Step 2: The Handler Class (Where All Logic Lives)
apexpublic class AccountTriggerHandler {

    // ==========================================
    // BEFORE INSERT
    // ==========================================
    public void beforeInsert(List<Account> newAccounts) {
        AccountTriggerHelper.setAccountRating(newAccounts);
    }

    // ==========================================
    // BEFORE UPDATE
    // ==========================================
    public void beforeUpdate(List<Account> newAccounts,
                              Map<Id, Account> oldAccountMap) {
        AccountTriggerHelper.validateAccountChanges(newAccounts, oldAccountMap);
    }

    // ==========================================
    // BEFORE DELETE
    // ==========================================
    public void beforeDelete(List<Account> oldAccounts,
                              Map<Id, Account> oldAccountMap) {
        AccountTriggerHelper.preventDeletion(oldAccounts);
    }

    // ==========================================
    // AFTER INSERT
    // ==========================================
    public void afterInsert(List<Account> newAccounts,
                             Map<Id, Account> newAccountMap) {
        AccountTriggerHelper.createOnboardingTasks(newAccounts);
    }

    // ==========================================
    // AFTER UPDATE
    // ==========================================
    public void afterUpdate(List<Account> newAccounts,
                             Map<Id, Account> newAccountMap,
                             Map<Id, Account> oldAccountMap) {
        AccountTriggerHelper.syncChildContacts(newAccounts, oldAccountMap);
        AccountTriggerHelper.logCriticalChanges(newAccounts, oldAccountMap);
    }

    // ==========================================
    // AFTER DELETE
    // ==========================================
    public void afterDelete(List<Account> oldAccounts,
                             Map<Id, Account> oldAccountMap) {
        AccountTriggerHelper.logDeletion(oldAccounts);
    }

    // ==========================================
    // AFTER UNDELETE
    // ==========================================
    public void afterUndelete(List<Account> newAccounts) {
        AccountTriggerHelper.restoreRelatedRecords(newAccounts);
    }
}
Step 3: The Helper Class (Business Logic Methods)
apexpublic class AccountTriggerHelper {

    public static void setAccountRating(List<Account> accounts) {
        for (Account acc : accounts) {
            if (acc.AnnualRevenue != null) {
                if (acc.AnnualRevenue >= 1000000) {
                    acc.Rating = 'Hot';
                } else if (acc.AnnualRevenue >= 100000) {
                    acc.Rating = 'Warm';
                } else {
                    acc.Rating = 'Cold';
                }
            }
        }
    }

    public static void preventDeletion(List<Account> accounts) {
        Set<Id> accountIds = new Map<Id, Account>(accounts).keySet();

        List<Opportunity> closedOpps = [
            SELECT Id, AccountId
            FROM Opportunity
            WHERE AccountId IN :accountIds
            AND IsClosed = true
        ];

        Set<Id> protectedIds = new Set<Id>();
        for (Opportunity opp : closedOpps) {
            protectedIds.add(opp.AccountId);
        }

        for (Account acc : accounts) {
            if (protectedIds.contains(acc.Id)) {
                acc.addError('Cannot delete: Account has closed opportunities.');
            }
        }
    }

    public static void createOnboardingTasks(List<Account> accounts) {
        List<Task> tasks = new List<Task>();
        List<String> subjects = new List<String>{
            'Send Welcome Email',
            'Schedule Intro Call',
            'Send Product Brochure'
        };

        for (Account acc : accounts) {
            for (String subject : subjects) {
                tasks.add(new Task(
                    Subject      = subject,
                    WhatId       = acc.Id,
                    OwnerId      = acc.OwnerId,
                    Status       = 'Not Started',
                    ActivityDate = Date.today() + 7
                ));
            }
        }

        if (!tasks.isEmpty()) insert tasks;
    }

    // Additional methods would follow the same pattern...
    public static void validateAccountChanges(List<Account> accounts,
                                               Map<Id, Account> oldMap) { }
    public static void syncChildContacts(List<Account> accounts,
                                          Map<Id, Account> oldMap) { }
    public static void logCriticalChanges(List<Account> accounts,
                                           Map<Id, Account> oldMap) { }
    public static void logDeletion(List<Account> accounts) { }
    public static void restoreRelatedRecords(List<Account> accounts) { }
}
Why this architecture is the professional standard:
| Concern | Thin Trigger Approach | Handler Pattern |
|---|---|---|
| Readability | ❌ All logic in one file | ✅ Separated by responsibility |
| Testability | ❌ Hard to test in isolation | ✅ Each method tested independently |
| Maintainability | ❌ Change one thing, break another | ✅ Changes are isolated |
| Reusability | ❌ Logic locked in trigger | ✅ Helper methods reusable anywhere |
| Team collaboration | ❌ Merge conflicts guaranteed | ✅ Developers work on separate methods |
Best Practices for Apex Triggers
These best practices come directly from Salesforce’s own documentation, real project experience, and what technical architects evaluate in code reviews.
1. One Trigger Per Object — No Exceptions
apex// ❌ WRONG: Two triggers on Account
trigger AccountInsertTrigger on Account (after insert) { ... }
trigger AccountUpdateTrigger on Account (after update) { ... }

// ✅ CORRECT: One trigger handles all events
trigger AccountTrigger on Account (before insert, before update,
                                   after insert, after update, ...) {
    // Route to handler
}
Why: Multiple triggers on the same object have unpredictable execution order. You cannot control which one fires first.
2. Always Use a Trigger Handler Class
The trigger file itself should contain zero business logic — just routing calls to the handler. Business logic belongs in handler and helper classes where it can be:
- Unit tested in isolation
- Reused from other contexts (Batch jobs, REST APIs)
- Modified safely without touching the trigger metadata
3. Never Put SOQL or DML Inside Loops
apex// ❌ WRONG — Will hit governor limits
for (Account acc : Trigger.new) {
    List<Contact> contacts = [SELECT Id FROM Contact WHERE AccountId = :acc.Id];
    // This runs one SOQL per account!
}

// ✅ CORRECT — One SOQL for all accounts
Set<Id> accountIds = new Map<Id, Account>(Trigger.new).keySet();
Map<Id, List<Contact>> contactsByAccount = new Map<Id, List<Contact>>();

List<Contact> allContacts = [
    SELECT Id, AccountId FROM Contact WHERE AccountId IN :accountIds
];
// Process in memory...
4. Bulkification Is Not Optional
Your trigger will be called with up to 200 records in a single execution (Salesforce processes records in batches of 200). When using Data Loader or API integrations, bulk operations are the norm.
Bulkification checklist:
- ✅ Loop over
Trigger.neworTrigger.old— never index with[0] - ✅ Collect IDs in Sets before querying
- ✅ Use Maps for O(1) record lookup
- ✅ Build lists of records to insert/update, then do one DML call
- ✅ Test with 200+ records before every deployment
5. Use addError() for User-Visible Validation
apex// Field-level error (highlights the specific field)
opp.StageName.addError('Invalid stage for this record type.');

// Record-level error (appears at the top of the page)
opp.addError('This opportunity cannot be modified during quarter close.');
6. Always Handle Null Values
apex// ❌ NullPointerException waiting to happen
if (opp.Amount > 1000000) { }

// ✅ Safe null check
if (opp.Amount != null && opp.Amount > 1000000) { }
7. Write Test Classes With Minimum 75% Coverage (Aim for 90%+)
Every trigger requires a test class. Salesforce requires 75% code coverage for deployment to production, but professional orgs target 90%+ with meaningful assertions.
apex@isTest
private class AccountTriggerTest {

    @testSetup
    static void setupTestData() {
        // Create test data once for all test methods
    }

    @isTest
    static void testRatingSetForHighRevenueAccount() {
        Account acc = new Account(Name = 'Test Corp', AnnualRevenue = 5000000);

        Test.startTest();
        insert acc;
        Test.stopTest();

        Account inserted = [SELECT Rating FROM Account WHERE Id = :acc.Id];
        System.assertEquals('Hot', inserted.Rating,
                           'High revenue account should have Hot rating');
    }
}
Common Mistakes Beginners Make
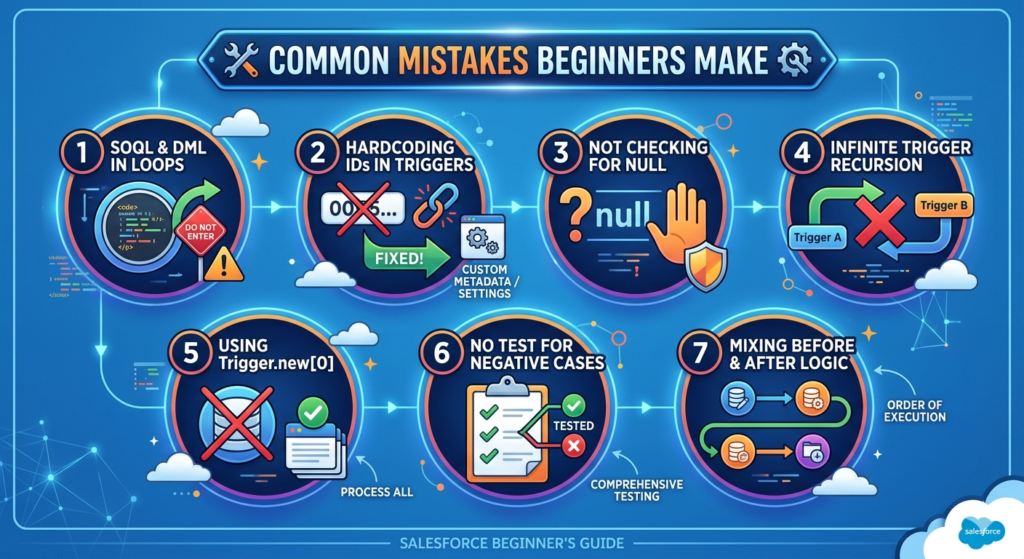
Mistake 1: SOQL and DML Inside Loops
Already covered in best practices, but worth repeating — this is the #1 mistake in every beginner’s trigger code. It will work fine in your developer org with 5 records. It will fail spectacularly in production with 200 records.
Mistake 2: Hardcoding IDs in Triggers
apex// ❌ NEVER do this
if (opp.OwnerId == '0051234567890ABCD') { }

// ✅ Query the ID or use Custom Metadata/Custom Settings
Record IDs are environment-specific. Hardcoded IDs in sandbox will break in production. Always use Custom Metadata Types or Custom Settings to store configurable values.
Mistake 3: Not Checking for Null Before Accessing Fields
Every field in Salesforce can be null. Treat it that way.
Mistake 4: Infinite Trigger Recursion
Scenario: Trigger A updates Account → triggers Trigger B → Trigger B updates Contact → triggers something that updates Account again → Trigger A fires again → infinite loop.
Fix: Use a static Boolean variable to prevent re-entry:
apexpublic class TriggerRecursionGuard {
    public static Boolean isRunning = false;
}

trigger AccountTrigger on Account (after update) {
    if (TriggerRecursionGuard.isRunning) return;
    TriggerRecursionGuard.isRunning = true;

    // Your logic here

    TriggerRecursionGuard.isRunning = false;
}
Mistake 5: Using Trigger.new[0] Instead of Looping
apex// ❌ Only processes one record — breaks with bulk operations
Account acc = Trigger.new[0];

// ✅ Processes all records
for (Account acc : Trigger.new) { }
Mistake 6: No Test for Negative Cases
Your tests must verify that the trigger does not fire when it shouldn’t. Test both the condition being true AND the condition being false.
Mistake 7: Mixing Before and After Logic
Don’t try to do After Trigger operations (like creating related records) inside a Before Trigger. The triggering record’s ID doesn’t exist yet on insert. Understand the order of execution and choose the right trigger event.
Apex Triggers vs Flow Builder: Final Comparison
| Criteria | Apex Triggers | Flow Builder |
|---|---|---|
| Code required | Yes — Apex | No — point and click |
| Maintenance | Developer required | Admin can maintain |
| Performance | ⚡ Excellent (especially before save) | Good (before save flows are competitive) |
| Bulk handling | Manual bulkification required | Automatic (mostly) |
| Complex algorithms | ✅ Full Apex power | ❌ Limited |
| External API calls | ✅ Full control | ✅ Via HTTP callout actions |
| Debugging | Debug logs (complex) | Built-in debug mode (easier) |
| Learning curve | High | Low-Medium |
| Unit testing | Required (enforced) | Not enforced |
| Before delete | ✅ Yes | ✅ Yes (Flow) |
| Recursion control | Manual (static variables) | Built-in recursion prevention |
| Best for | Complex logic, performance, developer-owned | Standard automation, admin-owned |
The 2026 recommendation:
- Try to solve it with Flow Builder first
- If Flow can’t handle it → Apex Trigger
- If you need both → Flow calls Invocable Apex or Trigger calls Flow (hybrid approach)
About RizeX Labs
At RizeX Labs, we specialize in delivering cutting-edge Salesforce solutions, including advanced Apex development and automation using triggers. Our expertise combines deep technical knowledge, industry best practices, and real-world implementation experience to help businesses build scalable and efficient Salesforce applications.
We empower organizations to transform their business logic—from manual processes to fully automated, event-driven systems using Apex Triggers that ensure data consistency, automation, and performance optimization.
Internal Link:
- Link to your Salesforce course page
- DevOps Roadmap for Salesforce: Tools, Skills, and Certifications You Need in 2026
- How to Build a Salesforce Portfolio That Gets You Hired (With Project Ideas
- Salesforce Admin vs Developer: Which Career Path is Right for You in 2026?
- Wealth Management App in Financial Services Cloud
- Enroll in Salesforce Dev batch
External Link:
- Salesforce official website
- Apex Triggers documentation
- Salesforce Developer Guide
- Salesforce AppExchange
- DocuSign eSignature platform
- Adobe Acrobat Sign
Quick Summary
Apex Triggers in Salesforce are powerful tools that allow developers to execute custom logic automatically before or after changes to Salesforce records. They play a critical role in enforcing business rules, automating workflows, and maintaining data integrity.
By leveraging Apex Triggers, businesses can implement complex automation scenarios such as validation, integration, and real-time processing. With proper design and best practices, triggers help reduce manual effort, improve system efficiency, and enable scalable application development.
Understanding real-world use cases—such as updating related records, enforcing validation rules, integrating with external systems, and automating notifications—makes Apex Triggers an essential skill for every Salesforce developer.
Quick Summary
This comprehensive Salesforce Apex Triggers tutorial explains trigger fundamentals and provides 10 production-ready code examples for beginners and intermediate developers. The guide covers all seven trigger events (before insert, before update, before delete, after insert, after update, after delete, after undelete), trigger syntax, and context variables including Trigger.new, Trigger.old, Trigger.newMap, Trigger.oldMap, isInsert, isUpdate, isBefore, and isAfter. Ten real-world examples are provided with complete Apex code: auto-updating fields, preventing duplicate records, validating business rules, sending email notifications, updating parent records from child triggers, creating related records automatically, restricting record deletion, logging field changes for auditing, handling bulk data operations correctly, and implementing the professional trigger handler class pattern. The tutorial also covers best practices including one trigger per object, bulkification, avoiding SOQL/DML inside loops, recursion prevention, and a detailed comparison of Apex Triggers versus Flow Builder with interview preparation tips.

