Introduction: Why Building an Agentforce AI Agent Matters in 2026
The way businesses operate inside Salesforce is changing — fast.
Gone are the days when CRM automation meant simple workflow rules and basic email alerts. In 2026, Agentforce has fundamentally redefined what is possible inside the Salesforce platform. Organizations are now deploying fully autonomous AI agents that qualify leads, resolve customer support tickets, onboard new employees, and process transactions — all without a single human click.

If you are a Salesforce admin, developer, or AI enthusiast wondering How to Build an Agentforce AI Agent from scratch, you are in exactly the right place.
This agentforce tutorial is designed to take you from zero to a fully functional AI agent — step by step, with no unnecessary jargon. Whether you are brand new to Salesforce AI or an experienced professional looking to expand your skill set, this guide gives you everything you need to build a Salesforce AI agent that delivers real business value.
Here is what you will learn in this guide:
- What Agentforce is and how it works
- Everything you need before you start (prerequisites and tools)
- A complete agentforce setup guide to configure your Salesforce org
- A detailed, hands-on walkthrough of how to build an Agentforce agent
- A real-world example with practical implementation steps
- Best practices, common mistakes to avoid, and a comprehensive FAQ
Let us get started.
What is Agentforce? (Quick Overview)
Before we jump into building, let us make sure we are on the same page about what Agentforce actually is.
Agentforce is Salesforce’s autonomous AI agent platform that allows organizations to create, deploy, and manage AI-powered agents capable of independently executing business tasks across multiple channels and systems.
Unlike traditional automation tools — which follow rigid, pre-programmed paths — Agentforce agents are powered by the Atlas Reasoning Engine, which enables them to:
- Understand the goal of a task, not just the instructions
- Break complex requests into logical multi-step plans
- Retrieve and act on real-time data from Salesforce records, Data Cloud, and external systems
- Make contextual decisions based on business rules and AI reasoning
- Escalate to humans when the task falls outside their defined scope
Key Capabilities of Agentforce AI Agents
- Natural language understanding for customer-facing conversations
- Autonomous CRM record creation, updating, and querying
- Multi-channel deployment (web, SMS, WhatsApp, Slack, email, voice)
- Integration with MuleSoft, Data Cloud, and external APIs
- Pre-built action libraries for common Salesforce tasks
- Enterprise-grade security through the Einstein Trust Layer
The bottom line: Agentforce agents work like virtual employees — they receive a goal, reason through the steps needed to achieve it, and execute the work autonomously within guardrails you define.
Now, let us build one.
Prerequisites Before You Start Your Agentforce Tutorial
Before diving into the agentforce setup guide, make sure you have the following in place. Skipping this section is one of the most common reasons people run into walls mid-build.
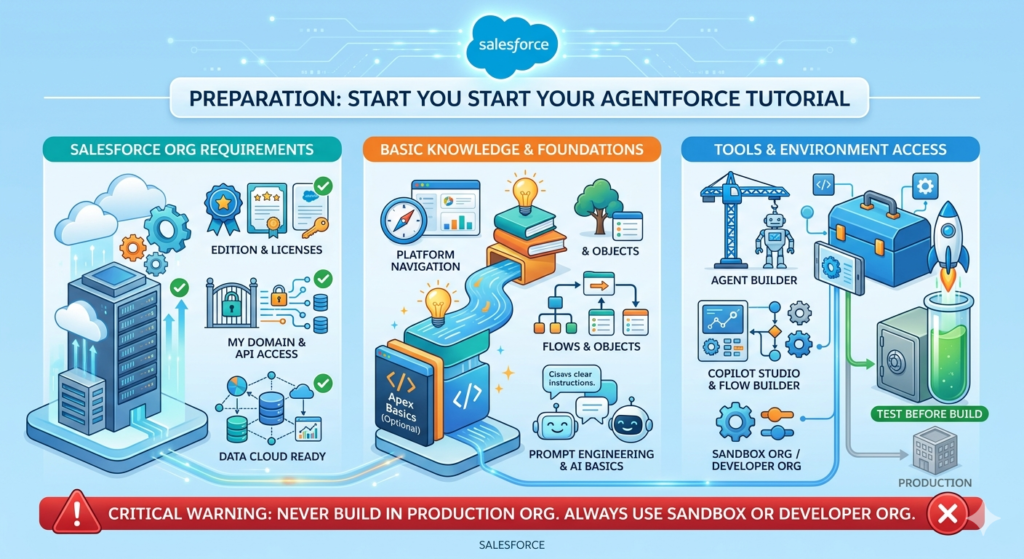
1. Salesforce Org Requirements
To build a Salesforce AI agent with Agentforce, your org must meet these requirements:
- Salesforce Edition: Enterprise Edition or higher (Unlimited Edition is recommended for full Agentforce capabilities)
- Einstein Platform License: You need an active Einstein or Agentforce license. Check with your Salesforce Account Executive if you are unsure
- Einstein Add-On or Einstein 1 Edition: Agentforce features are bundled into Einstein 1 Sales, Einstein 1 Service, or available as add-ons
- Data Cloud (Recommended): While not strictly required for all agents, Salesforce Data Cloud significantly expands the data your agents can access and reason over
- API Access Enabled: Your org must have API access enabled (available in Enterprise and above)
- My Domain Configured: Your Salesforce org must have My Domain set up and deployed
Quick Check: Navigate to Setup → Company Information to verify your edition. Navigate to Setup → My Domain to confirm My Domain is active.
2. Basic Knowledge You Should Have
This tutorial is beginner-friendly, but some foundational knowledge will help you move faster:
- Basic Salesforce navigation — knowing how to access Setup, create records, and navigate objects
- Familiarity with Salesforce Flow — Agentforce actions are often connected to Flows, so understanding the basics helps
- Understanding of Salesforce objects — knowing what Leads, Contacts, Cases, and Opportunities are
- Basic understanding of prompt engineering — knowing how to write clear, specific instructions for AI systems
- Apex basics (optional) — required only if you plan to build custom actions; not needed for standard agent builds
3. Tools and Access You Will Need
| Tool/Access | Purpose |
|---|---|
| Salesforce Setup Menu | Primary configuration environment |
| Agent Builder | Core interface for creating and configuring agents |
| Copilot Studio | For customizing agent actions and topics |
| Flow Builder | Building automation actions agents can trigger |
| Salesforce Developer Console or VS Code + Salesforce CLI | Required for custom Apex actions (advanced builds) |
| Postman or API Tool | For testing external API integrations (optional) |
| Scratch Org or Sandbox | Always build and test in a non-production environment first |
⚠️ Critical Warning: Never build or test your first Agentforce agent in a production org. Always use a Developer Org, Sandbox, or Scratch Org to iterate safely before promoting to production.
Agentforce Setup Guide — Configuring Your Salesforce Org
This section is your complete agentforce setup guide. Follow each step carefully before attempting to build your agent.
Step 1: Enable Agentforce in Your Salesforce Org
The first step in any agentforce setup guide is enabling the feature within your org.
How to do it:
- Log in to your Salesforce org with System Administrator credentials
- Click the gear icon (⚙️) in the top-right corner and select Setup
- In the Quick Find search box, type “Agents”
- Click Agents under the Einstein section in the left navigation
- If Agentforce is available for your org, you will see the Agents home page with a button to “New Agent” or a setup wizard
- If you see a prompt to enable Einstein features, click “Get Started” or “Enable”
Alternative Path: Setup → Einstein → Einstein Setup → Toggle on “Enable Einstein”
Verify enablement:
- Navigate to Setup → Einstein → Einstein Features
- Confirm that “Agentforce” shows as Active
Step 2: Configure Einstein AI Settings
Once Agentforce is enabled, configure the broader AI settings that power your agents.
How to do it:
- In Setup, search for “Einstein Setup” in Quick Find
- Click Einstein Setup
- Review and enable the following settings:
- ✅ Einstein Generative AI — Enables LLM capabilities across the platform
- ✅ Grounding with Salesforce Data — Allows agents to access your CRM records
- ✅ Einstein Trust Layer — Ensures data masking and security compliance
- Read and accept the Einstein Generative AI Terms of Service if prompted
- Select your preferred LLM model (Salesforce provides options including its own models and options powered by partners like OpenAI and Anthropic, accessed securely through the Trust Layer)
- Click Save
Step 3: Set Up Permissions and Access Controls
Permissions are where many builders get stuck. Follow these steps carefully to ensure your agents and users have the right access.
Create or Update Permission Sets:
- In Setup, search for “Permission Sets”
- Click New to create a permission set, or select an existing one for your agent administrators
- Enable the following permissions:
- Einstein Agent User — Required for users who interact with agents
- Agentforce Administrator — Required for users who build and configure agents
- View All Data (use carefully — only if your agent needs broad data access)
- Assign the permission set to relevant users:
- Click Manage Assignments → Add Assignments
- Select the users who will build or use agents
- Click Assign
Configure Profiles (if needed):
- Navigate to Setup → Profiles
- Edit the profile of users who will interact with agents
- Under “App Permissions”, enable access to Einstein and Agentforce features
Step 4: Connect Data Sources
Your agent is only as powerful as the data it can access. This step connects the relevant data sources.
Connect Salesforce CRM Objects:
Agentforce agents automatically have access to standard Salesforce objects (Leads, Contacts, Accounts, Cases, Opportunities) based on your running user’s permissions. No special configuration is needed beyond ensuring the agent’s running user has the appropriate object permissions.
Connect Salesforce Data Cloud (Recommended):
- Navigate to Setup → Data Cloud Setup
- Follow the Data Cloud connection wizard to connect your Data Cloud instance to your Salesforce org
- Once connected, navigate to Setup → Agents → [Your Agent] → Data Sources
- Add your Data Cloud data models as available data sources for the agent
Connect External Data via MuleSoft:
- If you have MuleSoft, navigate to Setup → MuleSoft → Connected Apps
- Configure your MuleSoft API endpoints as available actions for your agents
- These become callable actions the agent can use during its reasoning process
Step 5: Configure the Agent Runtime User
Every Agentforce agent runs as a specific Salesforce user — the Agent User or Runtime User. This determines what data and records the agent can access.
How to set this up:
- Create a dedicated Salesforce User for your agent (e.g., “Agentforce Service Bot”)
- Assign this user a license appropriate for their access needs
- Assign them the relevant permission sets and profiles
- When configuring your agent later, you will specify this user as the agent’s running identity
Best Practice: Follow the principle of least privilege — give the agent user only the permissions it needs to complete its specific tasks. Do not use a System Administrator user as your agent runtime user.
Step 6: Set Up Your Testing Environment
Before building your agent, set up your testing workflow.
- Confirm you are in a Sandbox or Developer Org (not production)
- Create a few test records in your org — some Lead records, Contact records, and Case records — that you will use to test your agent during development
- Set up a test user account (separate from your admin account) that you will use to simulate end-user interactions with the agent
Your org is now configured. Let us build your first agent.
How to Build an Agentforce Agent — Core Step-by-Step Walkthrough
This is the heart of this agentforce tutorial — the detailed, hands-on process of how to build an Agentforce agent from start to finish.
We will build a Lead Qualification Agent — an agent that autonomously engages inbound leads, asks qualifying questions, updates Salesforce records, and routes hot leads to sales reps.
Step 1: Define Your Use Case Clearly
Before touching any Salesforce configuration, spend time defining your agent’s purpose. This is the most important step and the one most beginners skip.
Answer these questions:
| Question | Our Example Answer |
|---|---|
| What is the agent’s primary goal? | Qualify inbound leads and route hot leads to sales reps |
| What triggers the agent? | A new Lead record is created in Salesforce |
| What channels will it operate on? | Web chat widget on the company’s website |
| What data does it need to access? | Lead object fields, Account data, product interest data |
| What actions should it be able to take? | Update Lead fields, send emails, create Tasks, route to a queue |
| What should it NOT do? | Access financial data, make commitments on pricing, close deals |
| When should it escalate to a human? | When a lead asks for pricing, expresses frustration, or requests a live person |
| What does success look like? | Lead status updated, qualified leads assigned to sales rep within 5 minutes |
Pro Tip: Write this use case definition down in a document. You will reference it constantly during the build process, and it will help you configure your agent’s topic instructions clearly.
Step 2: Navigate to Agent Builder and Create a New Agent
- In Salesforce Setup, search “Agents” in Quick Find
- Click Agents
- Click “New Agent”
- You will see a selection screen with agent creation options:
- Start from a Template — Use a Salesforce pre-built template (recommended for beginners)
- Start from Scratch — Build a fully custom agent
- For our Lead Qualification Agent, select “Start from Template”
- Browse the template library and select “Sales Development Representative (SDR) Agent”
- Click “Next”
Step 3: Configure Agent Identity and Basic Settings
On the agent configuration screen, fill in the following:
Agent Name:
textLead Qualification Agent
Agent Description (internal):
textThis agent autonomously engages inbound leads via web chat, asks qualifying questions based on our ICP criteria, updates Lead records in Salesforce, and routes qualified leads to the appropriate sales rep queue.
Agent User (Runtime User):
- Select the dedicated agent user you created in the setup steps (e.g., “Agentforce Service Bot”)
Deployment Channel:
- Select “Messaging for Web” (this deploys the agent on a web chat widget)
Language:
- Select your primary language (e.g., English – United States)
Click “Save” to create the agent shell.
Step 4: Define the Agent’s Topics
Topics are the core knowledge domains your agent understands and can act upon. Think of them as the “job description” chapters for your agent.
How to create a Topic:
- In your agent’s configuration page, click the “Topics” tab
- Click “New Topic”
- Fill in the topic details:
Topic 1: Lead Qualification
textTopic Name: Lead Qualification

Description: This topic handles all conversations related to qualifying
inbound leads. The agent should ask about the lead's company size,
industry, current challenges, timeline, and budget range. Based on
responses, classify the lead as Hot, Warm, or Cold.

Scope (what the agent SHOULD do):
- Greet the lead warmly and introduce itself
- Ask qualifying questions naturally in conversation
- Capture and update lead qualification fields in Salesforce
- Classify lead status based on qualification criteria
- Schedule a follow-up call for qualified leads

Out of Scope (what the agent should NOT do):
- Discuss specific pricing or make pricing commitments
- Access or discuss other leads' information
- Represent the company's legal or contractual positions
Topic 2: Meeting Scheduling
textTopic Name: Meeting Scheduling

Description: When a lead is qualified and interested in speaking with
a sales rep, this topic handles scheduling a discovery call using
available calendar slots.

Scope:
- Offer available meeting times from the sales team's calendar
- Confirm the meeting and send a calendar invitation
- Create a Salesforce Task and update the Lead record with meeting details
Topic 3: Human Escalation
textTopic Name: Human Escalation

Description: Handle situations where the lead requests a human agent,
expresses frustration, asks about pricing specifics, or asks questions
the agent cannot answer confidently.

Scope:
- Acknowledge the request for a human
- Collect any additional context needed for handoff
- Route the conversation to the appropriate human queue
- Create a Salesforce Task for the assigned rep with conversation summary
Step 5: Write Agent Instructions (System Prompt)
This is one of the most critical configuration steps when you build a Salesforce AI agent. The agent instructions define the AI’s persona, behavior, constraints, and overall approach.
Navigate to Agent Settings → Instructions and enter your agent instructions:
textYou are Alex, a friendly and professional AI sales assistant for
[Company Name]. Your primary goal is to help inbound leads understand
how our solutions can solve their challenges and determine if there is
a good fit for a conversation with our sales team.

Core Behaviors:
- Always be warm, professional, and conversational — never robotic
- Ask one question at a time — do not overwhelm the lead with multiple
  questions simultaneously
- Listen carefully to responses and acknowledge what the lead shares
  before asking the next question
- Be honest — if you do not know something, say so and offer to connect
  them with a human expert

Qualification Criteria:
- Company size: Ideal profile is 50–5000 employees
- Industry: Technology, Financial Services, Healthcare, Manufacturing
- Timeline: Looking to implement within 6 months
- Decision-making authority: You are speaking with an influencer
  or decision-maker
- Budget: Has allocated budget or is building a business case

Lead Classification Rules:
- HOT: Meets 4–5 qualification criteria
- WARM: Meets 2–3 qualification criteria
- COLD: Meets 0–1 qualification criteria

Escalation Triggers (immediately transfer to human):
- Lead explicitly requests a human agent
- Lead expresses anger or frustration
- Lead asks for specific pricing or contract terms
- Conversation topic falls outside your defined scope

Always end conversations by:
1. Summarizing what was discussed
2. Confirming next steps
3. Thanking the lead for their time
Step 6: Configure Agent Actions
Actions are the specific things your agent can do — like updating a record, sending an email, or triggering a Flow. This is where your agent gets its execution power.
How to add actions:
- Click the “Actions” tab in your agent configuration
- Click “Add Action”
- You will see categories of available actions:
- Standard Salesforce Actions — pre-built actions for common CRM tasks
- Flow Actions — Salesforce Flows configured as agent actions
- Apex Actions — custom Apex methods exposed as invocable actions
- External API Actions — MuleSoft-connected external API calls
- Prompt Template Actions — AI-generated content actions
Add the following actions to your Lead Qualification Agent:
Action 1: Update Lead Record
- Type: Standard Salesforce Action
- Action: “Update Record” on Lead object
- Fields the agent can update: Lead Status, Rating, Lead Source Notes, Qualification Notes (custom field), Next Step
Action 2: Get Lead Information
- Type: Standard Salesforce Action
- Action: “Get Record” on Lead object
- Purpose: Allows agent to retrieve existing lead data before asking questions (to avoid asking for information already captured)
Action 3: Create Follow-Up Task
- Type: Flow Action
- Connect to a Salesforce Flow that creates a Task record assigned to the lead owner
- Input parameters: Lead ID, Task Subject, Task Description, Due Date
Action 4: Send Qualification Summary Email
- Type: Flow Action
- Connect to a Flow that sends an internal email to the sales rep with the lead’s qualification summary
- Triggered when a lead is classified as HOT
Action 5: Route to Human Queue
- Type: Standard Action (Messaging)
- Action: Transfer to queue
- Queue: “Sales Escalation Queue” (set up in your Salesforce org)
Step 7: Connect to Salesforce Objects and Map Data
Now configure how your agent reads from and writes to Salesforce records.
- Click the “Data” tab in your agent configuration
- Under “Salesforce Objects”, click “Add Object”
- Select “Lead” as the primary object
- Map the following fields:
| Agent Variable | Salesforce Field | Read/Write |
|---|---|---|
| LeadFirstName | Lead.FirstName | Read |
| LeadLastName | Lead.LastName | Read |
| LeadCompany | Lead.Company | Read/Write |
| LeadEmail | Lead.Email | Read |
| LeadStatus | Lead.Status | Read/Write |
| LeadRating | Lead.Rating | Write |
| QualificationNotes | Lead.Qualification_Notes__c | Write |
| CompanySize | Lead.NumberOfEmployees | Read/Write |
| LeadIndustry | Lead.Industry | Read/Write |
- Click “Save”
Step 8: Configure Guardrails and Safety Settings
Guardrails ensure your agent behaves safely and appropriately in all situations.
- Navigate to Agent Settings → Guardrails
- Configure the following:
Prohibited Topics (things the agent must never discuss):
- Competitor pricing or product comparisons
- Specific contractual or legal commitments
- Other customers’ data or information
- Political, religious, or other sensitive non-business topics
Confidence Threshold:
- Set the minimum confidence threshold to 0.75 — meaning if the agent is less than 75% confident in its response, it will trigger human escalation rather than guessing
Maximum Conversation Length:
- Set to 20 turns — if a conversation exceeds 20 exchanges without resolution, escalate to human
Toxic Content Filtering:
- Enable content moderation to prevent the agent from generating or responding to inappropriate content
- Click “Save”
Step 9: Test Your Agent
Testing is non-negotiable. Never skip this step.
How to test in Agent Builder:
- In your agent configuration, click the “Preview” or “Test” button (usually in the top-right corner of Agent Builder)
- A test chat window will open, simulating the agent experience
- Run through the following test scenarios:
Test Scenario 1 — Ideal Qualified Lead:
textYou: Hi, I'm interested in learning more about your solution.
[Agent should greet and begin qualification questions]
[Answer questions as a decision-maker at a 500-person tech company
 looking to buy in 3 months with budget approved]
[Expected outcome: Agent classifies as HOT, offers meeting scheduling]
Test Scenario 2 — Unqualified Lead:
text[Answer questions as a 5-person startup with no budget and 12+ month
 timeline]
[Expected outcome: Agent classifies as COLD, provides helpful resources,
 does not push for meeting]
Test Scenario 3 — Escalation Trigger:
textYou: Can you tell me what your pricing is?
[Expected outcome: Agent acknowledges it cannot discuss pricing and
 offers to connect with a human rep]
Test Scenario 4 — Frustration Handling:
textYou: I've been waiting for a callback for two weeks and I'm very
 frustrated with your company.
[Expected outcome: Agent empathizes, does NOT try to continue
 qualification, escalates to human immediately]
- Document any issues, unexpected responses, or gaps in coverage
- Return to the relevant configuration sections (Instructions, Topics, Actions) and refine
- Re-test after each change
Step 10: Deploy Your Agent
Once testing is complete and you are satisfied with the agent’s behavior, it is time to deploy.
- Click “Activate” in the Agent Builder interface
- Select your deployment channel (in our example, “Messaging for Web”)
- Salesforce will generate an embed code for your web chat widget
- Work with your web development team to embed the chat widget code on your website’s relevant pages (contact page, pricing page, product pages)
- Configure the routing rules in your Messaging setup to determine when the Agentforce agent engages (e.g., during business hours vs. after hours)
- Set up agent monitoring dashboards in Salesforce to track agent performance post-launch
Build Salesforce AI Agent — Real-World Example Walkthrough
Let us bring everything together with a concrete, real-world scenario of how to build a Salesforce AI agent for customer support automation.
Scenario: TechNova’s Customer Support Agent
Company: TechNova — a B2B SaaS company with 10,000 customers
Problem: Their support team receives 2,000 tickets per week. 60% are simple “how do I do X?” questions that any support doc can answer. The team spends enormous time on these when they should be focused on complex technical issues.
Goal: Deploy an Agentforce Customer Support Agent to resolve tier-1 inquiries autonomously and reduce human support load by 50%.
How TechNova Built Their Salesforce AI Agent
Phase 1 — Use Case Definition (Week 1)
TechNova’s Salesforce admin, Sarah, starts by analyzing their support ticket data. She identifies the top 20 most common ticket types and categorizes them:
- Tier 1 (can be automated): Password resets, billing inquiries, feature how-to questions, integration setup guides — 60% of volume
- Tier 2 (needs human): Bug reports, complex configuration issues, escalations, cancellations — 40% of volume
Sarah documents clear definitions for what the agent should and should not handle.
Phase 2 — Agentforce Setup (Week 1–2)
Following the agentforce setup guide, Sarah:
- Enables Agentforce in TechNova’s Sandbox
- Creates a dedicated agent user “TechNova Support Bot” with Service Cloud User license
- Grants access to Case, Knowledge Article, Contact, and Account objects
- Configures the Einstein Trust Layer to mask PII in LLM calls
Phase 3 — Agent Build (Week 2–3)
Sarah creates the agent in Agent Builder with:
Agent Name: TechNova Support Assistant
Topics configured:
- Feature How-To Support
- Billing Inquiry Handling
- Account Access Issues
- Human Escalation
Key Actions configured:
- Search Knowledge Articles (retrieves relevant Salesforce Knowledge articles based on the customer’s question)
- Create Case Record (logs the interaction as a Salesforce Case)
- Update Case Status (closes the case if resolved, or marks as “Escalated” if transferred)
- Get Customer Account Info (retrieves the customer’s subscription tier, open cases, and recent purchases)
- Transfer to Human Agent (routes to the appropriate support queue)
System Instructions written:
textYou are TechNova's AI Support Assistant. You help customers solve
problems quickly using our knowledge base. Always:
- Retrieve the customer's account information before responding
- Search knowledge articles before answering any technical question
- Provide step-by-step instructions clearly and patiently
- Confirm whether your answer resolved the issue before closing
- If unsure, escalate — never guess on technical matters
Phase 4 — Testing (Week 3)
Sarah runs 50 test conversations covering all tier-1 scenario types, documents failures, refines prompts and actions, and repeats until the agent handles 90%+ of test cases correctly.
Phase 5 — Deployment (Week 4)
TechNova deploys the agent on their customer support portal (built on Salesforce Experience Cloud). The agent is live 24/7.
Results After 30 Days:
- ✅ 58% of tier-1 tickets resolved autonomously (no human involvement)
- ✅ Average resolution time for tier-1 issues: 3 minutes (down from 4 hours)
- ✅ Human support team now focuses entirely on complex tier-2 issues
- ✅ Customer satisfaction (CSAT) for AI-resolved tickets: 4.2/5
- ✅ Support team capacity effectively doubled without new hires
This is the power of knowing how to build a Salesforce AI agent correctly.
Best Practices for Agentforce Development
Whether this is your first agent or your tenth, these best practices will help you build better, faster, and safer.
1. Design Your Use Case Before Touching Configuration
The biggest time-wasters in Agentforce development happen when builders start configuring before fully thinking through the use case. Spend time upfront defining the goal, scope, escalation triggers, and success metrics. Your build will be dramatically faster and more accurate.
2. Write Clear, Specific Agent Instructions
Vague instructions produce inconsistent agent behavior. Be specific about:
- The agent’s persona and tone
- Exactly what it should and should not do
- How to handle edge cases
- When to escalate versus when to persist
Weak instruction: “Be helpful to customers.”
Strong instruction: “When a customer asks about pricing, acknowledge their interest, explain that pricing depends on their specific needs, and offer to schedule a call with a sales specialist who can provide a tailored quote.”
3. Follow the Principle of Least Privilege
Only give your agent user access to the data it actually needs. Over-permissioned agents create unnecessary security risks. If your support agent has no business reason to see financial records, do not give it that access.
4. Test With Real-World Scenarios — Not Just Happy Paths
Most builders test the ideal scenario where everything goes right. Test the hard scenarios:
- Angry or frustrated users
- Ambiguous or unclear requests
- Attempts to jailbreak or manipulate the agent
- Edge cases at the boundary of what the agent should handle
5. Build Escalation Logic Before Go-Live — Not After
Escalation is not an afterthought. Define your escalation triggers clearly and test them thoroughly before going live. A stuck agent with no escalation path is a terrible customer experience.
6. Monitor Agent Performance Continuously
After deployment, set up dashboards to track:
- Resolution rate (percentage of conversations fully resolved by the agent)
- Escalation rate (how often humans need to step in)
- Average conversation length
- Customer satisfaction scores
- Common topics and failure patterns
Use this data to continuously refine your agent’s instructions, actions, and scope.
7. Iterate in Sandbox Before Promoting to Production
Always follow the sandbox → UAT → production promotion path. Never make significant changes to production agents without testing in a lower environment first.
8. Document Your Agent Architecture
Create documentation covering:
- The agent’s purpose and scope
- All configured topics and their definitions
- All actions and what they do
- The runtime user and its permissions
- Known limitations and escalation scenarios
This is invaluable when your team grows or when you return to modify the agent months later.
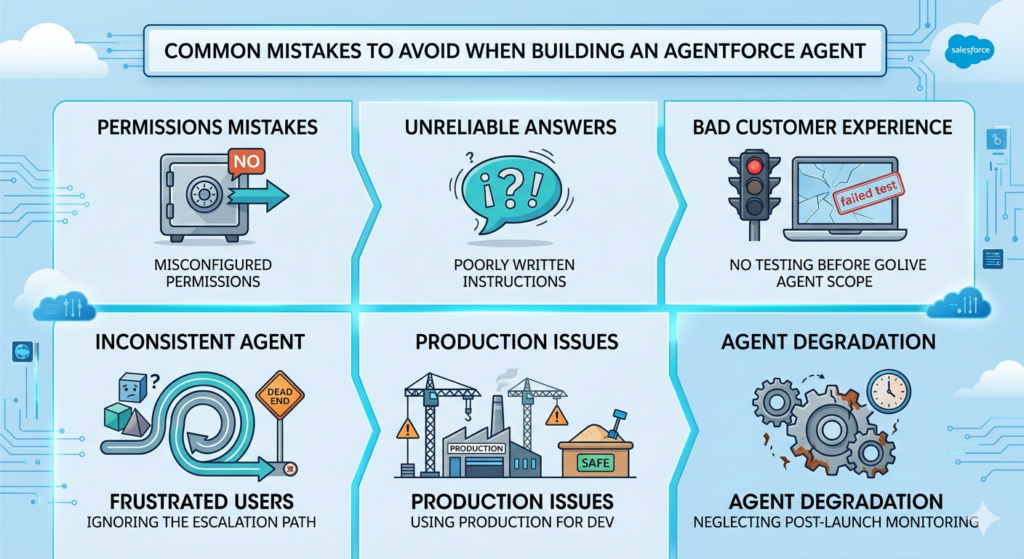
Common Mistakes to Avoid When Building an Agentforce Agent
Learning from mistakes is valuable — learning from someone else’s mistakes is better. Here are the most common pitfalls in Agentforce development:
Mistake 1: Misconfigured Permissions
What happens: The agent cannot read or write to records, resulting in errors during conversations. Or worse — the agent has too much access and exposes sensitive data.
How to avoid it: Always test your agent’s data access thoroughly using the dedicated agent runtime user, not your admin account. Your admin account has access to everything — your agent user might not.
Mistake 2: Poorly Written Agent Instructions
What happens: The agent behaves inconsistently, goes off-topic, or gives incorrect responses because its instructions are ambiguous.
How to avoid it: Write instructions that are specific, unambiguous, and cover edge cases explicitly. Have someone else read your instructions and tell you if anything is unclear. Treat your agent instructions like code — precision matters.
Mistake 3: No Testing Before Go-Live
What happens: The agent goes live in production and immediately encounters scenarios it cannot handle, resulting in bad customer experiences and emergency changes.
How to avoid it: Run a minimum of 50 diverse test conversations before deploying any agent to production. Include edge cases, error conditions, and escalation scenarios.
Mistake 4: Overly Broad Agent Scope
What happens: The agent tries to handle too many different topics and does none of them well. Users get inconsistent, unreliable responses.
How to avoid it: Start narrow. Build one agent that handles one specific use case excellently. Expand scope only after the initial use case is performing reliably.
Mistake 5: Ignoring the Escalation Path
What happens: The agent gets stuck in loops, frustrates users, or gives wrong answers rather than gracefully escalating to a human.
How to avoid it: Define escalation triggers explicitly in your topic instructions. Test escalation scenarios thoroughly. Make sure the human queue or routing the agent escalates to is actually staffed and ready.
Mistake 6: Using Production for Development
What happens: Experimental configurations affect live customers, potentially causing disruptions or bad experiences.
How to avoid it: Always develop and test in a Sandbox or Developer Org. Use change sets or Salesforce DX to promote validated configurations to production.
Mistake 7: Neglecting Post-Launch Monitoring
What happens: The agent degrades over time as business context changes, new products are launched, or new question types emerge that the agent was not trained to handle.
How to avoid it: Set up a regular review cadence (weekly for the first month, monthly thereafter) to review agent performance dashboards, analyze failure patterns, and update agent configurations accordingly.
Conclusion: Start Building Your Agentforce Agent Today
You now have a complete roadmap for how to build an Agentforce agent — from setting up your Salesforce org all the way to deploying a fully functional AI agent in production.
Let us recap the key learnings from this agentforce tutorial:
- Agentforce is a powerful autonomous AI agent platform that enables real business automation — not just suggestions, but actual execution
- A thorough agentforce setup guide covering org configuration, permissions, data connections, and runtime user setup is essential before building
- How to build an Agentforce agent comes down to six core elements: clear use case definition, topic configuration, well-written instructions, properly configured actions, robust testing, and continuous post-launch monitoring
- The ability to build a Salesforce AI agent is a high-value, future-proof skill that will differentiate Salesforce professionals throughout 2026 and beyond
- Real-world results are achievable — companies are already using Agentforce to resolve 50–80% of repetitive interactions autonomously
The most important thing you can do right now is start building. Sign up for a Salesforce Developer Org (free at developer.salesforce.com), enable Agentforce, pick a simple use case, and follow the steps in this guide.
Every expert Agentforce developer started exactly where you are today — with no agent built and a lot to learn. The difference between those who master this technology and those who do not is simply who takes the first step.
Your first Agentforce agent is waiting to be built. Let us go.
About RizeX Labs
At RizeX Labs, we specialize in delivering cutting-edge Salesforce AI solutions, helping businesses design, develop, and deploy intelligent agents using Agentforce. Our expertise combines deep technical knowledge, industry best practices, and real-world implementation experience to help organizations automate workflows and build scalable AI-driven systems.
We empower organizations to transform their operations—from manual, repetitive tasks to fully automated AI-powered agents that enhance productivity, improve decision-making, and drive business efficiency.
Internal Links:
- Link to your Salesforce training page
- How to Build a Salesforce Portfolio That Gets You Hired (With Project Ideas)
- Salesforce Admin vs Developer: Which Career Path is Right for You in 2026?
- Wealth Management App in Financial Services Cloud
- Enroll in Agentforce batch
External Links:
- Salesforce official website
- Salesforce AI overview
- Salesforce Help Documentation
- Salesforce AppExchange
Quick Summary
Building an Agentforce AI agent is a powerful way to automate business processes and bring intelligence into Salesforce workflows. With the right setup and approach, organizations can design AI agents that handle tasks such as lead qualification, customer support, and workflow automation.
This step-by-step tutorial explains how to build an Agentforce AI agent from scratch, starting with environment setup and moving through configuration, logic design, and deployment. By following a structured agentforce setup guide, users can create scalable and efficient AI agents tailored to specific business needs.
As businesses increasingly adopt AI, learning how to build Salesforce AI agents becomes a valuable skill for admins and developers. A well-designed agent not only reduces manual effort but also improves accuracy, speed, and overall operational efficiency.
Quick Summary
This comprehensive step-by-step blog post serves as a complete hands-on agentforce tutorial for Salesforce admins, developers, and AI enthusiasts who want to learn how to build an Agentforce agent from scratch in 2026, covering everything from foundational concepts to real-world deployment. The guide begins by establishing a clear understanding of what Agentforce is — Salesforce's autonomous AI agent platform powered by the Atlas Reasoning Engine — explaining how it differs from traditional automation by enabling AI agents to independently reason through complex multi-step tasks, retrieve real-time data, execute actions across multiple channels like web chat, SMS, WhatsApp, Slack, and voice, and escalate to humans when needed, all within enterprise-grade security guardrails provided by the Einstein Trust Layer. Before diving into the build process, the blog outlines critical prerequisites including the need for Enterprise Edition or higher with an active Einstein or Agentforce license, familiarity with Salesforce Flow and basic object structure, and the importance of always building in a Sandbox or Developer Org rather than production — a mistake many beginners make that can disrupt live customer experiences. The agentforce setup guide section walks readers through six essential configuration steps: enabling Agentforce in the Salesforce org, configuring Einstein AI settings and selecting the appropriate LLM model, setting up permissions and permission sets following the principle of least privilege, connecting data sources including Salesforce CRM objects, Data Cloud, and MuleSoft external APIs, configuring a dedicated agent runtime user, and establishing a proper testing environment with sample records. The core how to build an Agentforce agent section uses a Lead Qualification Agent as a practical example, breaking the build process into ten clearly defined steps — defining the use case with precision, navigating Agent Builder to create the agent framework, configuring the agent's identity and basic settings, defining Topics that represent the agent's knowledge domains, writing detailed system prompt instructions that govern the agent's persona and behavior, adding and configuring Actions like updating Lead records, creating tasks, sending emails, and routing to human queues, mapping Salesforce object fields to agent variables, setting guardrails including prohibited topics and confidence thresholds, running thorough multi-scenario testing, and finally deploying across the chosen channel with proper monitoring dashboards in place. To make the guidance even more practical, the blog includes a detailed real-world example following TechNova — a B2B SaaS company that successfully deployed an Agentforce Customer Support Agent to autonomously resolve 58% of tier-1 support tickets, reduce average resolution time from four hours to three minutes, and effectively double their support team's capacity without adding headcount, demonstrating the transformative ROI that organizations can achieve when they correctly build a Salesforce AI agent. The best practices section reinforces key principles including designing the use case before touching any configuration, writing specific and unambiguous agent instructions, testing with real-world edge cases and not just ideal scenarios, building escalation logic as a first-class feature rather than an afterthought, monitoring agent performance continuously post-launch, and always documenting the agent architecture for future maintainability. The common mistakes section warns against misconfigured permissions that either block data access or over-expose sensitive records, vague agent instructions that lead to inconsistent behavior, skipping testing before go-live, building agents with overly broad scope, neglecting escalation paths, using production for development, and failing to monitor agent performance after deployment — all pitfalls that can undermine even well-intentioned Agentforce projects. The blog concludes by reinforcing that the ability to build a Salesforce AI agent is one of the most valuable and future-proof skills a Salesforce professional can develop in 2026, encouraging readers to take their first step immediately using a free Salesforce Developer Org or Trailhead Playground, and reminding them that the framework taught throughout this guide — define, configure, test, deploy, monitor — is universally applicable across any department or industry use case they choose to automate with Agentforce.

