Introduction
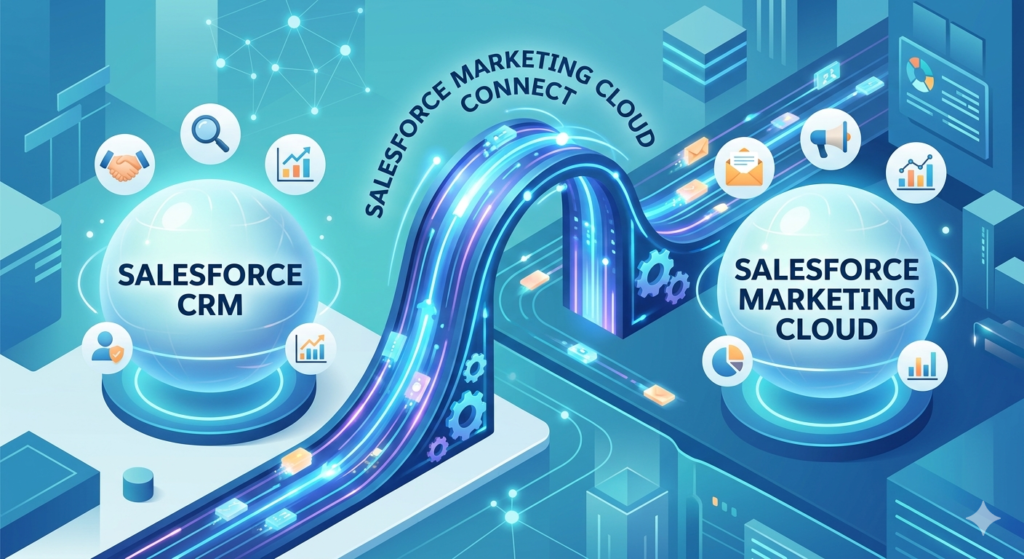
Imagine having two incredibly powerful business tools — Salesforce CRM and Salesforce Marketing Cloud — but they’re operating in complete isolation from each other. Your sales team is managing leads and customer relationships in Salesforce CRM while your marketing team is running campaigns in Marketing Cloud, but neither team has visibility into what the other is doing. Sound familiar?
This disconnect is a real problem for thousands of businesses, and it leads to missed opportunities, duplicated efforts, inconsistent customer experiences, and wasted marketing spend. The solution? Salesforce Marketing Cloud Connect — the integration bridge that brings these two powerful platforms together into one unified, data-driven marketing and sales engine.
In this comprehensive guide, we’ll explain everything you need to know about Salesforce Marketing Cloud Connect, from what it is and why it matters, to a detailed step-by-step MC Connect setup walkthrough that even beginners can follow. Whether you’re a marketing professional looking to leverage CRM data in your campaigns, or a Salesforce administrator tasked with connecting two systems, this guide has you covered.
By the end of this post, you’ll understand:
- What Salesforce Marketing Cloud Connect is and how it works
- The business benefits of marketing cloud CRM sync
- How to set up the integration step by step
- How data flows between systems
- Real-world use cases, best practices, and common challenges
Let’s get started.
What is Salesforce Marketing Cloud Connect?
Salesforce Marketing Cloud Connect is an official integration package developed by Salesforce that creates a seamless connection between Salesforce CRM (Sales Cloud or Service Cloud) and Salesforce Marketing Cloud. Think of it as a sophisticated data pipeline that allows both platforms to communicate with each other in near real-time, sharing customer data, behavioral information, and campaign metrics across the two systems.
At its core, SFMC Salesforce integration via Marketing Cloud Connect allows you to:
- Access Salesforce CRM records (Contacts, Leads, Accounts, Campaigns, and custom objects) directly within Marketing Cloud
- Use CRM data to build highly targeted audience segments for email and multi-channel campaigns
- Trigger automated marketing messages based on events that happen in Salesforce CRM (like a lead being created or an opportunity being closed)
- Sync email engagement data (opens, clicks, unsubscribes, bounces) back from Marketing Cloud into Salesforce CRM records
- Give sales representatives visibility into marketing campaign interactions directly within their Salesforce CRM interface
- Create connected customer journeys that respond to both marketing engagement and CRM activity
How Does It Work Technically?
Marketing Cloud Connect uses Salesforce’s API infrastructure to establish a secure, bidirectional connection between the two platforms. When configured correctly, the integration:
- Creates synchronized data objects in Marketing Cloud that mirror CRM records (Contacts, Leads, etc.)
- Establishes regular sync cycles that keep data updated across both systems
- Installs a managed package in Salesforce CRM that adds Marketing Cloud functionality directly within the CRM interface
- Enables API communication between the two platforms using a dedicated integration user with appropriate permissions
Sales Cloud vs. Service Cloud Integration
Marketing Cloud Connect works with both:
Sales Cloud Integration:
- Sync Leads and Contacts from Sales Cloud into Marketing Cloud
- Use opportunity data to trigger sales follow-up campaigns
- Create campaigns in Sales Cloud that are executed through Marketing Cloud
- Give account executives visibility into prospect email engagement
Service Cloud Integration:
- Sync Cases and Service Contacts into Marketing Cloud
- Trigger transactional emails based on case status changes
- Create customer satisfaction (CSAT) survey campaigns post-case resolution
- Build re-engagement journeys for customers who’ve had support interactions
Whether you’re using Sales Cloud, Service Cloud, or both, Salesforce Marketing Cloud Connect provides the same core integration capabilities with configuration options specific to each cloud.
Benefits of Marketing Cloud CRM Sync
Before diving into the technical setup, it’s worth understanding why marketing cloud CRM sync is such a game-changer for businesses. The benefits extend far beyond simple data sharing — they fundamentally transform how marketing and sales teams work together.
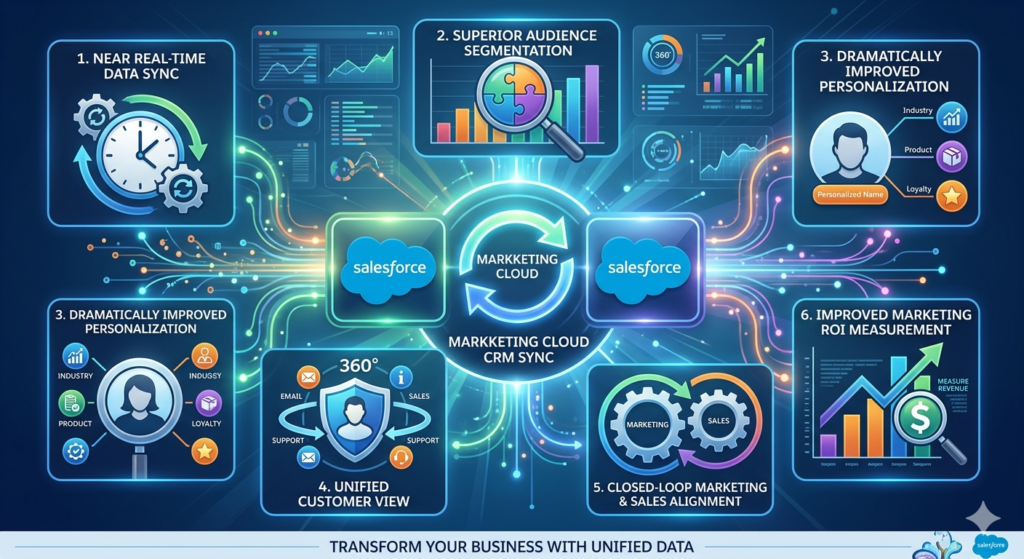
1. Near Real-Time Data Synchronization
Without integration, marketing teams often work with stale data. They export a list from CRM, import it into their email tool, and by the time the campaign sends, half the data has changed. People have been promoted, phone numbers have changed, deals have been closed.
With marketing cloud CRM sync, data stays current. When a sales rep updates a contact’s information in Salesforce CRM, that update flows into Marketing Cloud automatically. When a contact unsubscribes from an email, that preference is reflected back in CRM. You’re always working with fresh, accurate data.
Business impact: No more embarrassing emails sent to people with the wrong name, outdated job title, or to contacts who should have been excluded from a campaign.
2. Superior Audience Segmentation
One of the biggest advantages of SFMC Salesforce integration is the ability to segment audiences based on rich CRM data that simply isn’t available in a standalone marketing tool.
With CRM data flowing into Marketing Cloud, you can build audience segments based on:
- Lead source: Target prospects who came from specific channels (trade shows, web forms, partner referrals)
- Opportunity stage: Send different messages to prospects at different stages of the sales pipeline
- Account type: Differentiate messaging for enterprise vs. SMB customers
- Purchase history: Target customers based on what they’ve bought, when they bought it, and how much they spent
- Service history: Exclude customers who have open support tickets from promotional campaigns
- Geographic data: Personalize campaigns based on account location or territory
- Custom CRM fields: Use any custom data field your business has created in Salesforce CRM
This level of segmentation granularity is simply not possible without a proper CRM integration.
3. Dramatically Improved Personalization
Personalization is the cornerstone of effective modern marketing. Research consistently shows that personalized campaigns outperform generic ones — with personalized emails delivering 6x higher transaction rates according to Experian.
Salesforce Marketing Cloud Connect puts an enormous amount of personalization data at your fingertips:
- Address prospects by name, company, and industry
- Reference their specific product interests or recent purchases
- Acknowledge their relationship stage (“As a loyal customer for 3 years…”)
- Tailor content based on their role or persona
- Reference interactions with your sales team
- Show products or services relevant to their account type or industry
When marketing messages feel personally crafted rather than mass-produced, engagement rates — opens, clicks, and conversions — improve dramatically.
4. Unified Customer View
One of the most frustrating aspects of siloed marketing and CRM systems is that no one has a complete picture of the customer. Sales reps don’t know what marketing emails a prospect has received or how they’ve engaged. Marketing teams don’t know where a prospect is in the sales pipeline.
Marketing cloud CRM sync creates a unified customer profile that combines:
- CRM data (demographics, company info, relationship history, opportunities)
- Marketing engagement data (emails opened, links clicked, forms submitted, webinars attended)
- Behavioral data (website visits, content downloaded, product pages viewed)
- Sales activity data (calls made, meetings held, proposals sent)
- Support history (cases opened, issues resolved, satisfaction scores)
With this 360-degree view, both marketing and sales teams can make smarter decisions and have more meaningful conversations with prospects and customers.
5. Closed-Loop Marketing and Sales Alignment
One of the perennial challenges in B2B organizations is the disconnect between marketing and sales — what’s often called the “marketing-sales gap.” Marketing generates leads that sales ignores; sales complains that marketing leads aren’t qualified; nobody agrees on what’s working.
Salesforce Marketing Cloud Connect helps close this loop by:
- Showing sales reps which marketing campaigns a lead has engaged with
- Allowing sales to trigger personalized marketing sequences directly from CRM
- Enabling marketing to see which campaigns are generating closed deals (not just leads)
- Creating shared campaign objects that both teams contribute to and measure
- Facilitating better data feedback so marketing can optimize based on sales outcomes
6. Improved Marketing ROI Measurement
When your marketing and CRM data live in separate silos, it’s nearly impossible to accurately measure marketing’s contribution to revenue. With integration, you can:
- Track leads from first marketing touch to closed deal
- Calculate the revenue influenced by specific campaigns
- Measure multi-touch attribution across the customer journey
- Report on marketing pipeline contribution
- Justify marketing investment with concrete revenue data
Key Features of Salesforce Marketing Cloud Connect
Understanding the features available through Salesforce Marketing Cloud Connect helps you plan how to leverage the integration effectively in your marketing programs.
1. Synchronized Data Sources
Marketing Cloud Connect creates Synchronized Data Sources — special data connections within Marketing Cloud that mirror specific CRM objects. Out of the box, the integration supports synchronization of:
Standard Salesforce CRM Objects:
- Contacts: People with established relationships in your CRM
- Leads: Prospects who haven’t yet been converted to contacts
- Accounts: Company or organization records
- Campaigns: Salesforce CRM campaign records
- Campaign Members: Individual members of CRM campaigns
- Cases: Customer service and support tickets
- Opportunities: Deal records in the sales pipeline
- Users: Salesforce CRM user records (useful for personalizing sales follow-up emails with the assigned rep’s information)
Custom Objects:
Beyond standard objects, you can configure synchronization for custom Salesforce CRM objects your organization has built — product catalogs, event registrations, subscription records, etc.
Each synchronized object creates a corresponding Synchronized Data Extension in Marketing Cloud that is continuously updated to reflect the current state of the CRM data.
2. Triggered Sends
Triggered sends are automated, one-to-one emails that fire in response to specific events in Salesforce CRM. Unlike scheduled campaign emails that go to a defined audience at a set time, triggered sends are individual and immediate.
Examples of triggered sends powered by Marketing Cloud Connect:
- A welcome email sent the moment a new Lead is created in CRM
- A proposal follow-up email sent when an Opportunity moves to a specific stage
- A congratulations email sent when a deal is marked as “Closed Won”
- A case confirmation email sent when a new support Case is created
- A renewal reminder email triggered when an account’s contract is approaching its end date
- A re-engagement email sent when a Contact’s status changes to “Inactive”
Triggered sends are configured using the Triggered Send Definition feature in Marketing Cloud, linked to a Workflow Rule, Process Builder, or Flow in Salesforce CRM that fires the trigger.
3. Journey Builder Integration
One of the most powerful capabilities unlocked by SFMC Salesforce integration is the ability to use Marketing Cloud’s Journey Builder with CRM data as both the entry source and the journey trigger.
Journey Builder integration enables:
CRM-Triggered Journey Entry:
- Enter contacts into journeys based on CRM data changes
- Start a nurture journey when a lead is assigned to a sales rep
- Begin an onboarding journey when an opportunity is marked “Closed Won”
- Trigger a re-engagement journey when a contact’s engagement score drops
CRM Data for Journey Personalization:
- Use any synchronized CRM field to personalize journey content
- Adjust journey paths based on account type, opportunity value, or lead score
- Reference the assigned sales representative’s information for personal touchpoints
Sales Alerts within Journeys:
- Send notifications to CRM users (sales reps) within journeys using the “Send Notification” activity
- Alert a rep when their prospect opens a specific email
- Notify account managers when a customer completes an onboarding journey
Journey Outcomes Writing Back to CRM:
- Update CRM records based on journey behavior
- Write email engagement data to Salesforce CRM fields
- Update lead status when a prospect completes specific journey stages
4. Tracking and Reporting
Marketing Cloud Connect creates a bidirectional flow of tracking data, giving both marketing and sales teams unprecedented visibility into campaign performance.
In Marketing Cloud:
- Standard email tracking metrics (opens, clicks, bounces, unsubscribes)
- Journey analytics showing path progression and dropout points
- Individual contact engagement history
Pushed back to Salesforce CRM:
- Email send, open, click, bounce, and unsubscribe events appear as Individual Email Results on Contact and Lead records
- Campaign performance metrics appear on Salesforce Campaign records
- A dedicated Marketing Cloud Email Sends related list on Contact/Lead records
- Email engagement data can trigger CRM workflows and scoring rules
For Sales Reps:
- A complete marketing interaction history on every Contact and Lead record
- Ability to see which emails a prospect has received and engaged with
- Context for outbound sales calls (“I see you clicked our pricing page email…”)
Prerequisites for MC Connect Setup
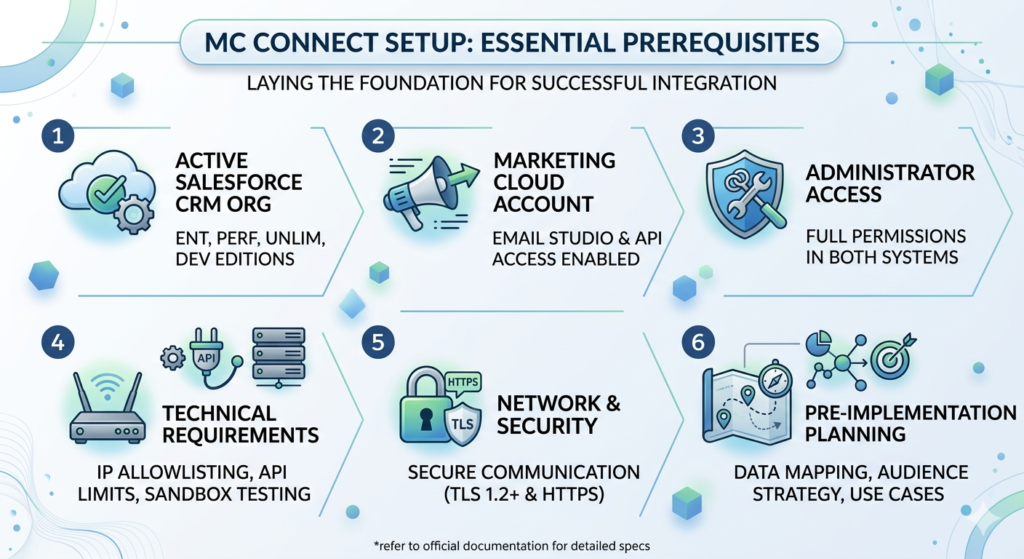
Before you begin the MC Connect setup process, it’s essential to ensure you have everything in place. Missing prerequisites are the most common cause of failed or problematic implementations.
1. Active Salesforce CRM Organization
You need an active Salesforce CRM org running one of these editions:
- Enterprise Edition (minimum requirement for full functionality)
- Performance Edition
- Unlimited Edition
- Developer Edition (for sandbox testing)
Note: Professional Edition has significant API limitations that can impact integration functionality. Contact Salesforce to understand the specific limitations if you’re on Professional Edition.
2. Salesforce Marketing Cloud Account
You need an active Salesforce Marketing Cloud account with:
- Email Studio enabled (at minimum)
- Appropriate contact volume capacity for your CRM database
- API access enabled on your SFMC account
The specific Marketing Cloud edition you have may affect which integration features are available:
- Core/Basic: Limited integration features
- Corporate/Enterprise: Full integration capabilities recommended
3. Administrator Access in Both Systems
You need administrator-level access in both platforms during the setup process:
In Salesforce CRM:
- System Administrator profile (or equivalent custom profile with full permissions)
- Ability to install managed packages
- Ability to create users and modify profiles
- Ability to configure workflow rules or flows
In Salesforce Marketing Cloud:
- Administrator role in SFMC
- Ability to create API users and manage permissions
- Access to Setup and Administration settings
4. Required Technical Prerequisites
IP Allowlisting:
- Marketing Cloud’s IP addresses must be allowlisted in your Salesforce CRM org’s network settings to allow API communication
- The specific IP ranges to allowlist are available in Salesforce Marketing Cloud documentation and vary by region/data center
API Limits:
- Understand your Salesforce CRM API limit — the integration consumes API calls
- Enterprise Edition orgs have 1,000,000 API calls per day (shared across all integrations)
- Monitor API usage to ensure the integration doesn’t impact other integrations
Salesforce CRM Org Type:
- Decide whether to configure the integration in your Production org, Sandbox org, or both
- Always test the MC Connect setup in a sandbox first before implementing in production
- Note that you’ll need a Marketing Cloud sandbox to test in sandbox CRM
Supported Salesforce CRM Versions:
- Marketing Cloud Connect supports Salesforce CRM API version 26.0 and higher
- Ensure your org is running a compatible API version
5. Network and Security Requirements
- TLS 1.2 or higher must be supported in your network environment
- HTTPS communication must be enabled
- Any firewalls between the two systems must allow API communication on standard HTTPS ports
- If your organization uses a Salesforce Shield or enhanced security features, additional configuration may be required
6. Pre-Implementation Planning
Before starting MC Connect setup, we strongly recommend completing a planning exercise:
- Data mapping: Identify which CRM fields you need in Marketing Cloud and how they map to Data Extension fields
- Audience strategy: Plan which CRM objects and records you need to synchronize
- Use case prioritization: Identify the top 3-5 marketing use cases you want to enable first
- Governance planning: Establish data governance rules for how integrated data will be managed
- Testing plan: Define how you’ll validate the integration is working correctly
Step-by-Step MC Connect Setup Guide
Now let’s walk through the complete MC Connect setup process. This step-by-step guide covers the essential configuration steps to establish your SFMC Salesforce integration.
Important disclaimer: The specific UI steps may vary slightly based on your SFMC and Salesforce CRM versions, as Salesforce updates both platforms regularly. Always refer to current Salesforce documentation for version-specific guidance, and engage a certified Salesforce consultant for enterprise implementations.
Step 1: Configure Your Salesforce CRM Org
The first step in MC Connect setup begins in your Salesforce CRM environment.
1.1 Verify Your Edition and API Access
- Log in to your Salesforce CRM org as a System Administrator
- Navigate to Setup (gear icon → Setup)
- In the Quick Find box, type “Company Information”
- Click Company Information
- Note your Salesforce Edition and Organization ID — you’ll need the Org ID later
- Navigate to Setup → API to verify API access is enabled
1.2 Create a Dedicated Integration User
Salesforce best practice requires creating a dedicated System Administrator user specifically for the Marketing Cloud integration. This user is called the MC Connect Integration User or API User in Salesforce CRM.
- Go to Setup → Users → Users
- Click New User
- Fill in the user details:
- First Name: MC Connect (or similar descriptive name)
- Last Name: Integration User
- Email: Use a monitored team email address (e.g., sfmc-integration@yourcompany.com)
- Username: Must be unique across all Salesforce orgs (e.g., mcconnect.integration@yourcompany.com.prod)
- User License: Salesforce
- Profile: System Administrator
- Click Save
- Activate the user and set a strong password
- Enable API Only user setting if you want to prevent this user from logging into the CRM UI (recommended for security)
Why a dedicated user? Using a named employee’s account creates risk — if they leave the company and their account is deactivated, the integration breaks. A dedicated integration user ensures continuity.
1.3 Configure User Permissions
The integration user needs specific permissions. Verify the System Administrator profile includes:
- API Enabled
- Modify All Data
- View All Data
- Author Apex (optional, for advanced use cases)
- Manage Users (if you want the integration to create users)
For organizations following least-privilege security principles, work with your Salesforce administrator to create a custom profile with only the specific permissions required for the integration.
1.4 Enable Required Features in CRM
Navigate to Setup and ensure these features are enabled:
- Email to Salesforce (Setup → Email → Email to Salesforce)
- Salesforce Campaigns (Setup → Campaigns → Campaign Settings)
- API Access is enabled for the integration user’s profile
Step 2: Set Up Your Marketing Cloud Account
Before connecting the two systems, configure the necessary settings in your Marketing Cloud account.
2.1 Verify Marketing Cloud Configuration
- Log in to Salesforce Marketing Cloud as an Administrator
- Navigate to Setup (gear icon in the top navigation)
- In the Platform section, click Platform Tools → Apps → Installed Packages
- Note any existing packages to avoid conflicts
- Navigate to Administration → Users to verify you have Administrator access
- Check Account Settings to ensure your account has the necessary features enabled:
- Email Studio: Enabled
- API Access: Enabled
2.2 Create a Marketing Cloud API User
Similar to Salesforce CRM, you’ll need a dedicated API user in Marketing Cloud:
- Go to Setup → Administration → Users → Users
- Click Create to create a new user
- Fill in user details:
- Name: MC Connect API User
- Email: Use a monitored team email
- Username: Something descriptive like mcconnect.api@yourcompany.com
- Assign the Administrator role to this user
- Under API User, check the API User checkbox
- Set a strong password
- Click Save
2.3 Note Your Marketing Cloud Account Details
Gather the following information — you’ll need it during the connection process:
- Marketing Cloud Account ID (visible in Setup → Account Settings)
- Marketing Cloud Admin User credentials (the API user you just created)
- Marketing Cloud Endpoint URL (depends on your data center/region)
- Production:
https://mc.exacttarget.com - S1:
https://mc.s1.exacttarget.com - S4:
https://mc.s4.exacttarget.com - S7:
https://mc.s7.exacttarget.com
- Production:
Step 3: Install the Marketing Cloud Connect Package in Salesforce CRM
The Marketing Cloud Connect managed package is what installs the integration functionality into your Salesforce CRM org.
3.1 Find the Installation Link
The Marketing Cloud Connect package is available on the Salesforce AppExchange:
- Visit Salesforce AppExchange (appexchange.salesforce.com)
- Search for “Salesforce Marketing Cloud Connect”
- Alternatively, navigate directly using the installation URL provided in Salesforce’s official Marketing Cloud Connect documentation (the URL changes with package versions, so always use the most current link from Salesforce Help)
3.2 Install the Package
- Click Get It Now on the AppExchange listing
- Log in with your Salesforce CRM System Administrator credentials
- Choose the installation environment:
- Install in Sandbox (strongly recommended for initial setup)
- Install in Production (only after successful sandbox testing)
- Click Continue
- Review the API access requirements and click Next
- Choose security settings:
- Install for Admins Only (recommended initially)
- Install for All Users (adjust after initial setup)
- Install for Specific Profiles (most controlled approach)
- Click Install
- If prompted about third-party access, check the confirmation box and click Continue
- Wait for the installation to complete (may take 5-15 minutes)
- Click Done when installation is confirmed
3.3 Verify Package Installation
- Go to Setup → Installed Packages
- Look for “Salesforce Marketing Cloud” in the list
- Verify the package version is current
- Note the package namespace (typically
et4ae5)
3.4 Post-Installation Configuration in CRM
After installing the package:
- Navigate to Setup → Custom Settings
- Find Marketing Cloud Settings (added by the package)
- Click Manage → New to create the settings record
- You’ll configure these settings in the next steps
Step 4: Configure API User and Permissions
This step establishes the API credentials and permissions that allow Marketing Cloud Connect to communicate between systems.
4.1 Configure Connected App (OAuth)
For modern SFMC Salesforce integration, Salesforce recommends using OAuth 2.0 for authentication:
- In Salesforce CRM, go to Setup → App Manager
- Click New Connected App
- Fill in the details:
- Connected App Name: Marketing Cloud Connect
- API Name: Marketing_Cloud_Connect (auto-populated)
- Contact Email: Your admin email address
- Under API (Enable OAuth Settings):
- Check Enable OAuth Settings
- Callback URL: Enter the Marketing Cloud endpoint URL
- Selected OAuth Scopes: Add “Full access (full)”
- Click Save
- Note the Consumer Key and Consumer Secret — these are your OAuth credentials
4.2 Assign the Marketing Cloud Connect Permission Set
The managed package installs permission sets that need to be assigned to the appropriate users:
- Go to Setup → Users → Permission Sets
- Look for permission sets starting with “Marketing Cloud” (added by the package)
- The key permission sets typically include:
- Marketing Cloud Administrator: For users who will manage the integration
- Marketing Cloud User: For standard users who will use Marketing Cloud features in CRM
- Click on the Marketing Cloud Administrator permission set
- Click Manage Assignments
- Click Add Assignments
- Select the integration user and any admin users who need access
- Click Assign
4.3 Assign Page Layouts
The package adds new fields and related lists to Contact and Lead records. Update page layouts to make these visible:
- Go to Setup → Object Manager → Contact
- Click Page Layouts
- Click on your Contact page layout to edit it
- Look for the new Marketing Cloud fields in the field list:
- Has Opted Out of Email (CRM): For subscription management
- Marketing Cloud Email Opt Out: Sync field
- Drag relevant fields onto the page layout
- Add the Email Opt Out related list if desired
- Save the page layout
- Repeat for Lead object
Step 5: Connect Both Systems
This is the pivotal step where you establish the actual connection between Salesforce CRM and Marketing Cloud.
5.1 Access Marketing Cloud Connect Settings in CRM
After package installation, a new tab or item appears in Salesforce CRM:
- In Salesforce CRM, navigate to the App Launcher (the nine-dot grid icon)
- Search for “Marketing Cloud”
- Click on Marketing Cloud to open the Marketing Cloud Connect interface within CRM
- You’ll see the Marketing Cloud Connect configuration screen
5.2 Enter Marketing Cloud Credentials
- In the Marketing Cloud Connect configuration screen, enter:
- Marketing Cloud User Name: The API user email you created in Step 2
- Marketing Cloud Password: The API user’s password
- Marketing Cloud URL Endpoint: Your Marketing Cloud data center URL
- Click Save
- The system will attempt to verify the credentials and establish a connection
5.3 Configure the Connection Settings
Once credentials are verified, configure additional connection settings:
Org-Wide Settings:
- Enable Marketing Cloud Connect: Toggle to ON
- Enable Triggers: Toggle to ON (allows CRM events to trigger Marketing Cloud emails)
- Create Lead on Click-Through: Choose whether a lead is created in CRM when someone clicks through from a Marketing Cloud email (useful for anonymous visitors who then self-identify)
Scope of Integration:
- Sync Contacts: Toggle to ON
- Sync Leads: Toggle to ON (if applicable)
- Sync Accounts: Configure as needed
Email Address Precedence:
- Configure which email field is the “primary” email for Marketing Cloud communication if your CRM has multiple email fields
5.4 Configure Organization-Wide Email Addresses
Marketing Cloud will send emails on behalf of CRM users. Configure the allowed sender email addresses:
- In Salesforce CRM, go to Setup → Email → Organization-Wide Addresses
- Add email addresses that Marketing Cloud is authorized to send from
- Verify each email address through the verification process
5.5 Configure Marketing Cloud Connect in Marketing Cloud
Certain configuration steps are completed within Marketing Cloud itself:
- Log in to Marketing Cloud
- Navigate to Administration → Account Settings
- Under Integrations, look for Salesforce Integration settings
- Verify the connection status shows as Connected
- Configure the Synchronized Data Sources:
- Navigate to Email Studio → Subscribers → Synchronized Data Sources
- You should see the CRM objects available for synchronization
- Configure which objects to sync and any field filters
Step 6: Verify Synchronization
After completing the connection, verify everything is working correctly before using the integration for live campaigns.
6.1 Check Connection Status
- In Salesforce CRM, navigate to the Marketing Cloud Connect settings
- Look for a Connection Status indicator — it should show “Connected” or a green status
- Check for any error messages and resolve them if present
6.2 Verify Synchronized Data Extensions
- Log in to Marketing Cloud
- Navigate to Email Studio → Subscribers → Data Extensions
- Look for the Synchronized Data Extensions folder
- You should see data extensions corresponding to your synchronized CRM objects:
- Contact Salesforce Data Extension
- Lead Salesforce Data Extension
- Account Salesforce Data Extension
- (And any other configured objects)
- Click on the Contact data extension and verify records are appearing
- Check that the field values match what’s in your CRM
6.3 Perform a Test Send
Conduct a controlled test to verify end-to-end functionality:
- Create a simple test email in Marketing Cloud Content Builder
- Use a Synchronized Data Extension (Contact or Lead) as the sending audience
- Filter the audience to include only test contacts (e.g., contacts with email addresses ending in your company domain)
- Send the test email
- Verify:
- The email was received
- Personalization fields populated correctly with CRM data
- The send event appears on the Contact/Lead record in Salesforce CRM (check the Marketing Cloud Email Sends related list)
6.4 Verify Tracking Data Flows Back to CRM
- Open the email sent in the test above
- Click one of the links
- Wait 15-30 minutes (tracking data doesn’t always sync instantaneously)
- Navigate to the Contact or Lead record in Salesforce CRM
- Check the Email Sends related list or the Individual Email Results section
- Verify you can see the open and click events recorded on the CRM record
6.5 Troubleshoot Common Setup Issues
If synchronization isn’t working after setup, check these common issues:
| Issue | Likely Cause | Solution |
|---|---|---|
| “Connection Failed” error | Incorrect credentials or endpoint URL | Re-enter API credentials; verify endpoint URL for your data center |
| No records in Sync DEs | Sync hasn’t run yet or filter is too restrictive | Wait 15 minutes; check sync filter settings |
| Missing fields in Marketing Cloud | Fields not mapped during setup | Review and update field mapping configuration |
| Permission errors | Integration user lacks required permissions | Review and update integration user profile |
| API limit errors | Too many API calls | Check API usage; consider reducing sync frequency |
How Data Sync Works in Marketing Cloud
Understanding how data actually flows between the two systems helps you design better campaigns and troubleshoot issues when they arise. This is one of the more technical aspects of Salesforce Marketing Cloud Connect, but we’ll keep the explanation practical and digestible.
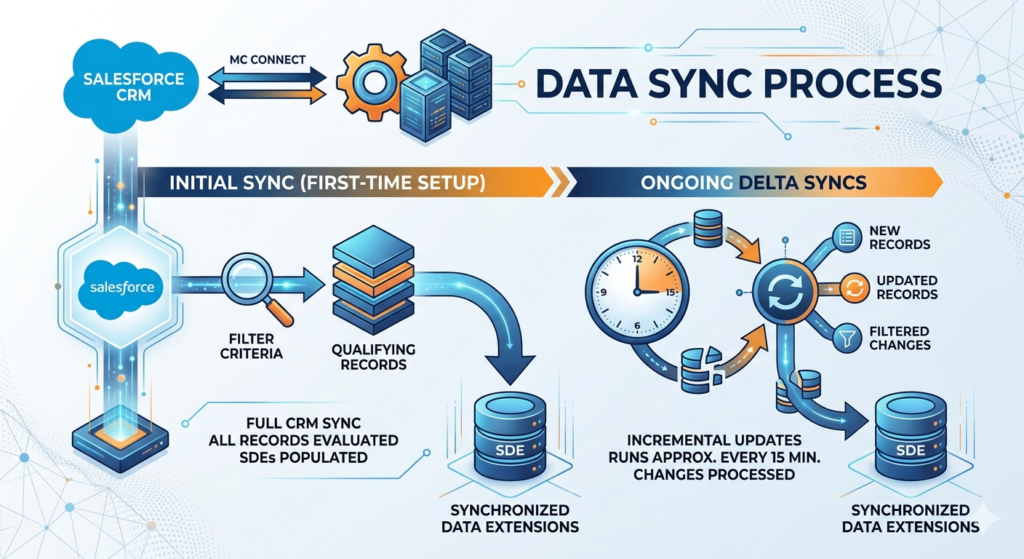
The Sync Process Explained
marketing cloud CRM sync doesn’t happen by magic — it follows a specific process and schedule. Here’s what happens behind the scenes:
Initial Sync (First-Time Setup):
When you first configure synchronization, Marketing Cloud performs a full sync of all qualifying CRM records. Depending on the size of your CRM database, this initial sync can take anywhere from a few minutes to several hours. During this process:
- SFMC sends API requests to Salesforce CRM to retrieve all records from configured objects
- Records are evaluated against any configured filters (e.g., “Only sync Contacts where Opt Out = False”)
- Qualifying records are written to the corresponding Synchronized Data Extensions in Marketing Cloud
- The initial sync timestamp is recorded
Ongoing Delta Syncs:
After the initial sync, Marketing Cloud performs delta syncs — incremental updates that process only records that have changed since the last sync. Delta syncs run approximately every 15 minutes by default, though this can vary based on system load and configuration.
Delta syncs process:
- New CRM records that meet sync criteria
- Updated records where field values have changed
- Records that no longer meet sync criteria (these are typically flagged rather than deleted)
Understanding Sync Frequency:
| Sync Type | Frequency | What It Processes |
|---|---|---|
| Delta Sync | ~15 minutes | New and modified records |
| Full Sync | Manual or scheduled | All qualifying records |
| Triggered Sends | Real-time | Specific record events |
Contacts vs. Leads Data Sync
Contact Sync:
- Salesforce Contacts are synced to the Contact Salesforce Data Extension in Marketing Cloud
- Each Contact is identified by their Salesforce Contact ID (unique identifier)
- The Contact’s email address serves as the Marketing Cloud subscriber key (or you can use the Contact ID — this is a configuration decision)
- Contact data extensions contain all standard Contact fields plus any custom fields you’ve configured for sync
- Opt-out status is bidirectionally synced — unsubscribes in Marketing Cloud update the Email Opt Out field in CRM and vice versa
Lead Sync:
- Salesforce Leads are synced to the Lead Salesforce Data Extension in Marketing Cloud
- Leads and Contacts are managed separately in Marketing Cloud because they’re separate objects in CRM
- When a Lead is converted to a Contact in CRM, the integration handles the transition
- Important: You typically cannot combine Contacts and Leads in the same Marketing Cloud send — they need to be managed separately or carefully combined using SQL queries
Data Extensions Explained in the Context of MC Connect
In the SFMC Salesforce integration context, you’ll encounter several types of data extensions:
Synchronized Data Extensions:
- Automatically created and maintained by Marketing Cloud Connect
- Named with the Salesforce object name (e.g., “Contact Salesforce Data Extension”)
- Read-only in Marketing Cloud — you cannot manually edit records
- Updated automatically during sync cycles
- Sendable (you can use them directly as campaign audiences)
Filtered Data Extensions:
- Created by marketers to filter Synchronized Data Extensions for specific campaigns
- For example: “Contacts — Enterprise Accounts — USA” is a filtered view of the Contact Synchronized Data Extension
- Can be scheduled to refresh automatically
Query-Based Data Extensions:
- Created using SQL queries in Automation Studio
- Can join multiple Synchronized Data Extensions for complex audience segments
- Example: Contacts who have open opportunities AND have engaged with at least 3 emails in the last 90 days
- Must be scheduled to refresh regularly
Use Cases for Different Campaign Types
| Campaign Type | Data Source | Sync Type |
|---|---|---|
| Newsletter | Contact or Lead Sync DE | Delta Sync |
| Pipeline nurture | Opportunity-filtered Contact DE | Query Activity |
| New lead welcome | Triggered Send on Lead creation | Real-time Trigger |
| Win/Loss survey | Closed Opportunity Campaign Members | Manual Refresh |
| Customer onboarding | Converted Lead → Contact Journey | Journey Builder Entry |
Common Use Cases for Salesforce Marketing Cloud Connect
Understanding how other organizations use Salesforce Marketing Cloud Connect in practice can spark ideas for your own marketing programs.
1. Lead Nurturing Campaigns
Lead nurturing is perhaps the most common use case for SFMC Salesforce integration in B2B organizations.
The Scenario:
A prospect fills out a web form and becomes a Lead in Salesforce CRM. The sales team won’t immediately follow up — the lead needs to be qualified first. In the meantime, marketing needs to nurture this prospect with relevant content that moves them toward becoming sales-ready.
How Marketing Cloud Connect Enables It:
- A new Lead is created in Salesforce CRM (via web-to-lead form, manual entry, or list import)
- The Lead is synced to Marketing Cloud within 15 minutes via the Lead Synchronized Data Extension
- A Journey Builder journey, set up with the Lead Synchronized Data Extension as its entry source, automatically detects the new record
- The lead enters a multi-email nurture journey:
- Day 1: Welcome email introducing the company and key value propositions
- Day 4: Case study relevant to their industry (personalized using CRM industry field)
- Day 8: Webinar invitation or educational content
- Day 15: Product demonstration offer
- As the lead engages with emails (opens, clicks), their engagement score increases in CRM
- When they hit a threshold engagement score, Journey Builder triggers a task in Salesforce CRM notifying the assigned sales rep that the lead is ready for outreach
- The sales rep can see exactly which emails the lead received and engaged with, giving them intelligent context for the sales conversation
Results: Organizations using this approach typically see 20-40% improvement in lead-to-opportunity conversion rates and significantly shorter sales cycles.
2. Customer Onboarding Journeys
The moment a deal closes is the beginning of the most important marketing moment — customer onboarding. Getting customers to adopt your product or service quickly is critical for retention.
The Scenario:
A sales rep marks an Opportunity as “Closed Won” in Salesforce CRM. The customer needs to be welcomed, onboarded, and educated on how to get value from their purchase quickly.
How Marketing Cloud Connect Enables It:
- When the Opportunity stage changes to “Closed Won,” a CRM Flow fires a triggered send to Marketing Cloud
- The Contact associated with the Opportunity enters an onboarding journey in Journey Builder
- Journey Builder uses CRM data to personalize the onboarding experience:
- The specific product they purchased determines which onboarding track they follow
- The account size determines the level of detail in onboarding content
- The assigned Customer Success Manager’s information is pulled from CRM for personalized communications
- The onboarding journey includes:
- Day 0 (Closed Won): Welcome email from CEO or CSM
- Day 2: Product setup guide with login credentials
- Day 5: Best practices email for their industry
- Day 10: Check-in email from assigned CSM with scheduling link
- Day 30: First milestone celebration and advanced features introduction
- Journey decision splits check for product adoption signals (integrated from your product database)
- Non-engaged customers trigger CRM alerts to the CSM for human intervention
3. Re-Engagement Campaigns
Over time, customers and prospects become disengaged. They stop opening emails, logging into your product, or responding to sales outreach. Re-engagement campaigns, powered by marketing cloud CRM sync, can win these relationships back.
The Scenario:
Customers who haven’t logged into your product in 60 days or prospects who haven’t opened a marketing email in 90 days need targeted re-engagement outreach.
How Marketing Cloud Connect Enables It:
- An Automation Studio scheduled query runs nightly, identifying:
- Contacts with no email opens in 90 days (from Marketing Cloud tracking data)
- Customers with no product logins in 60 days (synced from your product database via CRM)
- Identified records are added to a Re-Engagement Data Extension
- Journey Builder detects new entries in this data extension
- A re-engagement journey begins with a series of increasingly personalized attempts:
- Email 1: “We miss you” email with a compelling value reminder
- Email 2 (Day 7): “Here’s what you’ve missed” — product updates or new content
- Email 3 (Day 14): Exclusive offer or incentive to re-engage
- Wait step: If no engagement after Email 3, update their CRM record status to “At Risk”
- CRM Alert: Notify account manager to attempt personal outreach
- If the contact re-engages at any point, they exit the re-engagement journey and re-enter normal communication flows
- Contacts who remain unengaged after all attempts are flagged in CRM for potential suppression from future campaigns
4. Event-Based Campaigns
Events (webinars, conferences, product launches) are high-engagement marketing moments that benefit enormously from CRM integration.
The Scenario:
Your company is hosting a regional conference and needs to manage invitations, registrations, reminders, and post-event follow-up — all personalized based on CRM data.
How Marketing Cloud Connect Enables It:
- A Salesforce Campaign is created in CRM for the event
- Target audience (Contacts in the relevant geographic territory with appropriate job titles) is identified using CRM data
- Marketing Cloud sends personalized invitations using the Salesforce Campaign as both the audience source and the campaign tracking object
- As contacts register (via a form that updates their CRM Campaign Member status), they automatically receive:
- Confirmation email (triggered send)
- Calendar invite
- Pre-event preparation materials
- Non-registrants receive a follow-up reminder invitation
- Post-event, registered attendees receive a personalized follow-up based on which sessions they attended (tracked via event app integration)
- Sales receives CRM alerts when high-priority accounts or hot leads engage with event emails
Common Challenges and How to Fix Them
Even well-configured SFMC Salesforce integration implementations encounter issues. Here are the most common challenges and their solutions.
Challenge 1: Sync Delays or Data Not Appearing in Marketing Cloud
Symptoms:
- Records created in CRM don’t appear in Marketing Cloud Synchronized Data Extensions
- Recently updated CRM data isn’t reflected in Marketing Cloud
- Campaigns send with stale data
Common Causes:
- Sync job is failing silently
- API limits have been reached in Salesforce CRM
- Filter criteria are excluding records unintentionally
- The initial full sync is still running
Solutions:
- Navigate to Email Studio → Subscribers → Synchronized Data Sources and check the sync status of each data source — look for error indicators
- Check Salesforce CRM API usage under Setup → System Overview — if you’re approaching your daily API limit, the sync will slow down or stop
- Review your sync filter criteria to ensure records you expect to sync aren’t being excluded
- Check the Marketing Cloud Connect Error Log in Salesforce CRM (usually available in the MC Connect app) for specific error messages
- If the initial sync is taking longer than expected, contact Salesforce Support — extremely large initial syncs sometimes need assistance
Challenge 2: Permission Errors
Symptoms:
- “Insufficient Privileges” errors in Marketing Cloud Connect
- Integration user can’t access certain CRM objects or fields
- Workflow triggers aren’t firing
Common Causes:
- The integration user’s profile doesn’t have access to all required objects and fields
- Field-level security is restricting access to specific fields
- Object permissions are missing for custom objects
- Marketing Cloud Connect permission sets not assigned to all required users
Solutions:
- Review the integration user’s profile permissions in Salesforce CRM — compare against Salesforce’s documentation for required permissions
- Check field-level security for any custom fields you’re trying to sync
- Ensure the Marketing Cloud Connect managed package permission sets are assigned to all users who need to use Marketing Cloud features from within CRM
- Review sharing rules that might restrict the integration user’s access to certain records
Challenge 3: Data Mismatch Between Systems
Symptoms:
- CRM field values don’t match what appears in Marketing Cloud Data Extensions
- Personalization fields populate with incorrect data
- Opt-out status is out of sync between systems
Common Causes:
- Field mapping was configured incorrectly during setup
- Data type mismatches (e.g., a CRM field mapped to an incompatible Marketing Cloud data type)
- Multiple email fields in CRM causing confusion about which email is the “primary” for marketing
- Opt-out sync isn’t bidirectional or has a delay
Solutions:
- Review your field mapping configuration in Marketing Cloud Connect settings — compare CRM field names and types with their Marketing Cloud counterparts
- Check for data type compatibility issues (a CRM Text field shouldn’t be mapped to a Marketing Cloud Number field, for example)
- Ensure the primary email address configuration in Marketing Cloud Connect settings correctly identifies the email field to use for communication
- For opt-out sync issues, check that the ExactTarget Email Opt Out field in CRM is properly mapped to the Marketing Cloud subscriber status
Challenge 4: Triggered Sends Not Firing
Symptoms:
- CRM workflow rules are being triggered, but Marketing Cloud emails aren’t sending
- Some triggered sends work while others don’t
- Triggered send emails are sending with significant delays
Common Causes:
- Triggered send definitions in Marketing Cloud are paused or inactive
- CRM workflow rules or flows are not properly configured to call Marketing Cloud
- The triggered send audience is not correctly configured
- API errors are preventing the trigger from reaching Marketing Cloud
Solutions:
- Verify the Triggered Send Definition in Marketing Cloud is set to Active status
- Check the CRM Workflow Rule or Flow configuration — ensure the Marketing Cloud action is correctly defined
- Review the Triggered Send error log in Marketing Cloud (available in the tracking section)
- Test the trigger manually by creating a test record that should activate the workflow
Challenge 5: Duplicate Records
Symptoms:
- Same subscriber appearing multiple times in Marketing Cloud
- Both Contact and Lead records for the same person causing duplicate sends
Common Causes:
- A person exists as both a Lead and a Contact in Salesforce CRM
- Deduplication wasn’t performed before the initial sync
- Multiple CRM Contact records exist for the same email address
Solutions:
- Deduplicate your CRM data before the initial sync if possible — this is much easier than cleaning duplicates after they’re in Marketing Cloud
- Implement a deduplication strategy for handling individuals who exist as both Lead and Contact
- Use suppression lists in Marketing Cloud to prevent duplicates from receiving the same email twice
- Consider using the Salesforce CRM Contact ID as the Marketing Cloud Subscriber Key rather than email address — this allows proper handling of people with multiple email addresses
Best Practices for Salesforce Marketing Cloud Connect
Getting the MC Connect setup right is just the beginning. Following these best practices ensures your marketing cloud CRM sync delivers maximum value over the long term.
1. Start with Clean and Structured CRM Data
The most common reason SFMC Salesforce integration implementations underperform is dirty CRM data. Garbage in, garbage out.
Before you sync, ensure your CRM data is:
- Complete: Key fields (email address, first name, last name, company) are populated for most records
- Valid: Email addresses are properly formatted and validated
- Deduplicated: No duplicate Contact or Lead records for the same individual
- Accurate: Data reflects current reality (people haven’t moved companies, emails haven’t changed)
- Compliant: All contacts have given appropriate consent for marketing communication
Practical steps to clean your data:
- Run a duplicate detection and merge process in Salesforce CRM before the initial sync
- Use a data validation tool to identify invalid email addresses
- Standardize field formats (phone number formats, state abbreviations, etc.)
- Work with sales to update outdated records
- Implement data entry validation rules to prevent bad data going forward
2. Design Your Subscriber Key Strategy Carefully
The Subscriber Key is the unique identifier that Marketing Cloud uses to identify each subscriber. Choosing the right subscriber key strategy is one of the most important architectural decisions in your integration.
Option 1: Email Address as Subscriber Key
- Simple to implement
- Works for organizations where each person has exactly one email address in CRM
- Can cause issues if a person’s email address changes
Option 2: Salesforce Contact ID as Subscriber Key
- More robust — the Contact ID never changes even if the email address does
- Better for organizations with complex data relationships
- Requires additional configuration
- Recommended for most enterprise implementations
Option 3: Custom Unique Identifier
- Use a custom identifier from your system of record (customer number, employee ID, etc.)
- Maximum flexibility and consistency
- Most complex to implement
Choose your subscriber key strategy before the initial sync and stick with it — changing it later is extremely difficult and disruptive.
3. Use Segmentation Thoughtfully and Strategically
Just because you have access to all your CRM data in Marketing Cloud doesn’t mean you should use all of it for every campaign. Effective segmentation means sending the right message to the right people, not the biggest message to the most people.
Segmentation best practices:
- Start with your campaign objective and work backward to identify the right audience
- Use exclusion lists to protect customer relationships (don’t send promotional emails to people with open support tickets)
- Respect sales territory rules — coordinate with sales before sending campaigns that might overlap with their outreach
- Segment by engagement level — your most engaged subscribers can receive more frequent communication than disengaged ones
- Test with small segments first before scaling to your full CRM database
4. Monitor Sync Health Regularly
Marketing cloud CRM sync isn’t something you set up once and forget. Regular monitoring is essential to catch and address issues before they impact campaigns.
Establish a monitoring routine:
- Daily: Check the Marketing Cloud Connect error log for any sync failures
- Weekly: Compare record counts in Marketing Cloud Synchronized Data Extensions against CRM to verify completeness
- Monthly: Audit API usage to ensure you’re not approaching limits
- Before major campaigns: Manually verify that the audience data extension has refreshed and contains current data
- After Salesforce updates: Salesforce releases updates three times per year — verify integration is still functioning after each release
Set up automated monitoring:
- Create a simple dashboard in Salesforce CRM showing integration health metrics
- Configure alerts for API limit thresholds
- Consider investing in third-party monitoring tools for enterprise implementations
5. Maintain Documentation
As your SFMC Salesforce integration grows in complexity, documentation becomes invaluable.
Document the following:
- Integration architecture diagram showing data flows
- Field mapping between CRM objects and Marketing Cloud Data Extensions
- List of all active triggered sends and the CRM events that trigger them
- Journey Builder journeys and their entry sources
- API user credentials (stored securely)
- Known issues and their resolutions
- Change log recording all configuration changes
6. Govern the Integration Jointly
Salesforce Marketing Cloud Connect sits at the intersection of marketing and IT/CRM administration. Without clear ownership and governance, configurations get made without coordination and issues arise.
Governance recommendations:
- Designate a Marketing Cloud Admin and a Salesforce CRM Admin who are jointly responsible for the integration
- Establish a change management process — any changes to the integration should be documented and reviewed
- Create a regular cadence (monthly) between marketing and CRM teams to discuss integration performance and upcoming needs
- Define data governance policies for what data can be used for marketing purposes
7. Plan for Scale from the Beginning
Design your integration to handle growth. What works for 10,000 CRM records might not work efficiently for 1,000,000.
Scalability considerations:
- API limits: Calculate expected API consumption at different data volumes and plan accordingly
- Data extension size: Understand Marketing Cloud’s data extension size limits and plan your data architecture accordingly
- Query performance: SQL queries that run quickly against 100,000 records may time out against 5,000,000 records
- Sync frequency: As your database grows, sync jobs take longer — factor this into your campaign timing
Conclusion
Salesforce Marketing Cloud Connect is more than just a technical integration — it’s a fundamental business capability that bridges the gap between your CRM and marketing operations, enabling smarter, more relevant, and more effective marketing programs.
Throughout this guide, we’ve covered the full spectrum of SFMC Salesforce integration — from understanding what Marketing Cloud Connect is and why it matters, to walking through the complete MC Connect setup process step by step. We’ve explored how marketing cloud CRM sync works under the hood, examined real-world use cases across different marketing scenarios, and equipped you with best practices and troubleshooting knowledge to keep your integration healthy and performant.
Let’s recap the key takeaways:
- Salesforce Marketing Cloud Connect is the official integration bridge between Salesforce CRM and Marketing Cloud, enabling bidirectional data flow between the two platforms
- MC Connect setup requires careful preparation — including creating dedicated integration users, installing the managed package, configuring API credentials, and verifying synchronization
- Marketing cloud CRM sync unlocks capabilities that simply aren’t possible with siloed tools: real-time data currency, rich audience segmentation, deep personalization, and closed-loop marketing measurement
- The integration supports powerful use cases including lead nurturing, customer onboarding, re-engagement campaigns, and event marketing
- Success with SFMC Salesforce integration requires ongoing attention — clean data, regular monitoring, thoughtful governance, and continuous optimization
Whether you’re just beginning to explore what Marketing Cloud Connect can do for your organization or you’re preparing to implement it for the first time, the most important step is the one you take next: start planning, start testing, and start connecting.
The organizations that invest in properly integrating their CRM and marketing tools consistently outperform those that don’t. Their marketing is more relevant, their sales and marketing teams are better aligned, and their customers receive a more consistent, personalized experience across every touchpoint.
Now it’s your turn. Take what you’ve learned in this guide, roll up your sleeves, and start building your SFMC Salesforce integration. Your customers — and your revenue numbers — will thank you.
About RizeX Labs
At RizeX Labs, we specialize in delivering advanced Salesforce solutions, including seamless integration between Salesforce CRM and Salesforce Marketing Cloud using Marketing Cloud Connect.
Our expertise combines deep technical knowledge, real-world implementation experience, and best practices to help businesses unify customer data, automate personalized marketing, and improve engagement across channels.
We empower organizations to move from disconnected systems to a fully integrated ecosystem—where CRM data and marketing automation work together in real time to drive smarter campaigns and higher ROI.
Internal Links:
- Link to your Salesforce training page
- How to Build a Salesforce Portfolio That Gets You Hired (With Project Ideas)
- Salesforce Admin vs Developer: Which Career Path is Right for You in 2026?
- Wealth Management App in Financial Services Cloud
- Enroll in SFMC batch
External Links:
- Salesforce official website
- Marketing Cloud overview
- Marketing Cloud Connect documentation
- Salesforce AppExchange
- Journey Builder overview
Quick Summary
Marketing Cloud Connect is a powerful integration that connects Salesforce CRM (Sales Cloud/Service Cloud) with Marketing Cloud, enabling real-time data synchronization between sales, service, and marketing teams.
With this integration, businesses can:
- Sync Leads, Contacts, and Campaign data directly into Marketing Cloud
- Trigger personalized journeys using CRM events
- Track campaign performance back in CRM
- Maintain a single source of truth for customer data
By leveraging Marketing Cloud Connect, organizations can eliminate data silos, improve targeting accuracy, and deliver highly personalized customer experiences across email, mobile, and digital channels.
As companies scale, integrating CRM with marketing automation becomes essential—not optional—for delivering consistent, data-driven customer engagement.
Quick Summary
This in-depth blog post serves as a complete beginner-to-intermediate guide on Salesforce Marketing Cloud Connect — the official Salesforce integration package that creates a seamless, bidirectional data bridge between Salesforce CRM (Sales Cloud or Service Cloud) and Salesforce Marketing Cloud. The guide opens by addressing a common business pain point: marketing and CRM tools operating in silos, leading to missed opportunities, inconsistent customer experiences, and poor marketing ROI. It then introduces Salesforce Marketing Cloud Connect as the solution that enables unified, data-driven marketing operations. The blog thoroughly explains what Marketing Cloud Connect is, how SFMC Salesforce integration works technically, and how it differs when used with Sales Cloud versus Service Cloud. It outlines six major business benefits of marketing cloud CRM sync — including near real-time data synchronization, superior audience segmentation, deep personalization, unified customer view, marketing-sales alignment, and improved ROI measurement. A dedicated section covers the four key features of Marketing Cloud Connect: Synchronized Data Sources, Triggered Sends, Journey Builder Integration, and Tracking and Reporting capabilities. The prerequisites section ensures readers understand exactly what's needed before starting their MC Connect setup — including CRM edition requirements, admin access, API configuration, and pre-implementation planning. The core of the guide is a detailed six-step MC Connect setup walkthrough covering CRM configuration, Marketing Cloud account preparation, managed package installation, API user and permissions setup, system connection, and synchronization verification with troubleshooting guidance. The blog further explains how marketing cloud CRM sync works — covering delta syncs, Contact versus Lead synchronization, and different data extension types. It presents four detailed real-world use cases: lead nurturing, customer onboarding, re-engagement, and event-based campaigns. Five common challenges are addressed with practical solutions, followed by seven strategic best practices for long-term integration success. The conclusion reinforces the business value of SFMC Salesforce integration and encourages readers to begin implementation.
