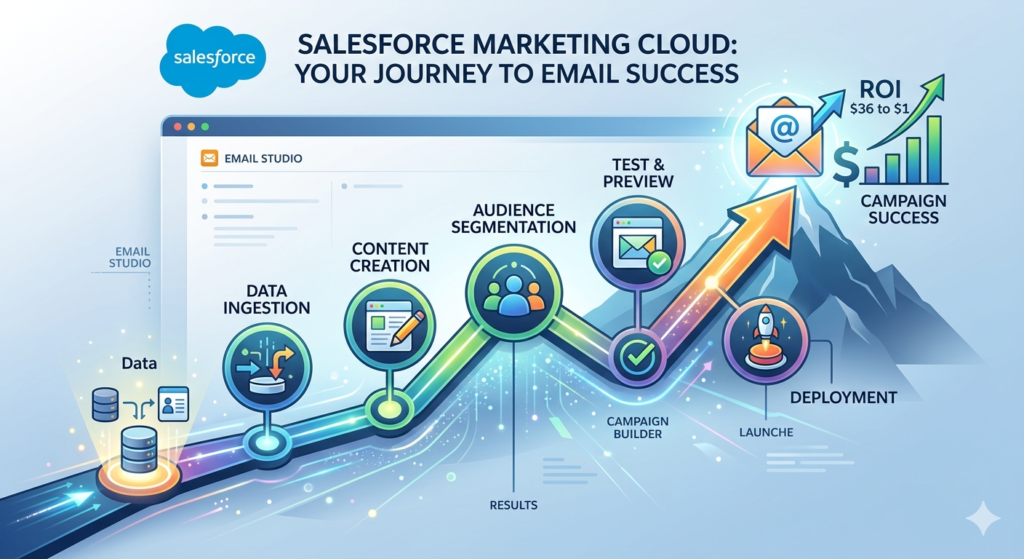
Email marketing remains one of the most powerful digital marketing channels, delivering an average ROI of $36 for every $1 spent. And when it comes to enterprise-grade email marketing platforms, Salesforce Marketing Cloud (SFMC) stands at the top of the mountain.
If you’ve recently started exploring Salesforce Marketing Cloud email capabilities and feel overwhelmed by its vast feature set, you’re not alone. This comprehensive SFMC Email Studio tutorial is designed specifically for beginners who want to understand the platform from scratch and build their very first SFMC email campaign with confidence.
In this guide, we’ll walk you through everything — from understanding what Email Studio is, to designing beautiful emails using the marketing cloud email builder, to hitting that “Send” button for the first time. By the end of this tutorial, you’ll have the knowledge and confidence to create, test, and deploy professional email campaigns that drive real results.
Let’s dive in.
What is Email Studio in SFMC?
Email Studio is the core email marketing application within Salesforce Marketing Cloud. Think of it as your command center for everything related to email — creating content, managing subscribers, sending campaigns, tracking performance, and automating communication workflows.
Why Does Email Studio Matter?
In today’s crowded digital landscape, sending generic, one-size-fits-all emails simply doesn’t work. Customers expect personalized, relevant, and timely communication. That’s exactly where Salesforce Marketing Cloud email capabilities shine.
Email Studio allows businesses to:
- Create visually stunning emails using drag-and-drop tools without needing coding expertise
- Segment audiences based on demographics, behavior, purchase history, and engagement patterns
- Personalize content dynamically so each subscriber receives a tailored experience
- Automate email workflows to nurture leads, onboard new customers, and re-engage inactive subscribers
- Track and analyze performance with detailed metrics like open rates, click-through rates, bounces, and conversions
- A/B test campaigns to optimize subject lines, content, and send times
- Ensure deliverability with built-in tools for compliance, authentication, and reputation management
Whether you’re a small business sending weekly newsletters or a global enterprise running complex, multi-channel campaigns, Email Studio scales to meet your needs. It integrates seamlessly with other SFMC tools like Journey Builder, Automation Studio, and Advertising Studio, making it a central piece of any comprehensive marketing strategy.
Real-World Use Cases
Here are some common ways businesses leverage Email Studio:
- E-commerce: Abandoned cart reminders, product recommendations, order confirmations, and promotional campaigns
- Financial Services: Account alerts, statement notifications, and personalized offers
- Healthcare: Appointment reminders, wellness tips, and patient engagement campaigns
- Education: Enrollment updates, course announcements, and alumni newsletters
- B2B Companies: Lead nurturing sequences, event invitations, and thought leadership content
The versatility of Email Studio makes it an indispensable tool for marketers across every industry.
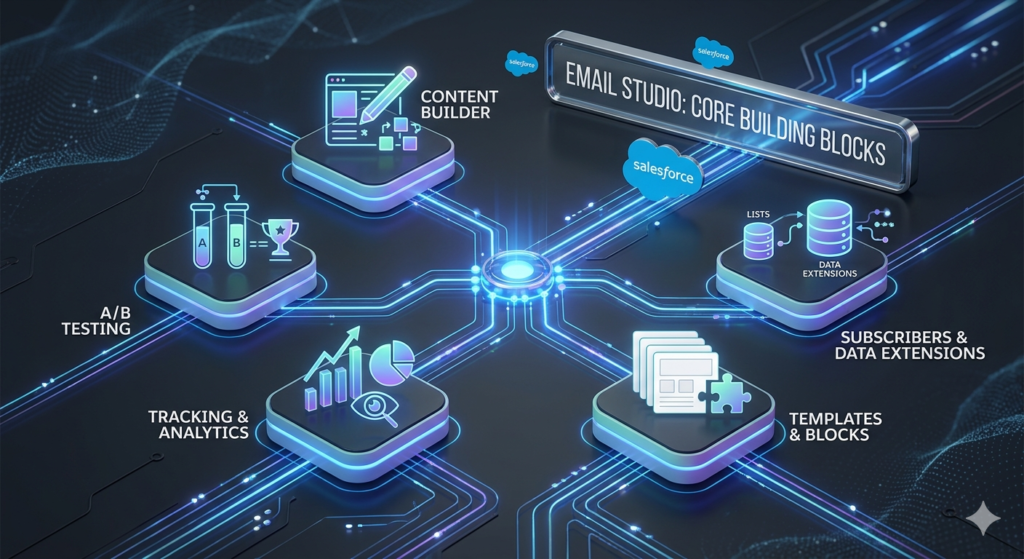
Key Components of Email Studio
Before we jump into building your first campaign, it’s important to understand the key components that make Email Studio tick. Think of these as the building blocks you’ll be working with throughout this SFMC Email Studio tutorial.
1. Content Builder / Email Builder
The marketing cloud email builder — officially called Content Builder — is where the creative magic happens. It’s a centralized content management tool that allows you to create, organize, and manage all your email content in one place.
Key features of Content Builder include:
- Drag-and-drop editor: Build professional emails without writing a single line of code. Simply drag content blocks (text, images, buttons, dividers, etc.) into your email template and customize them to your liking.
- HTML editor: For advanced users who want full control, you can write or paste custom HTML/CSS code directly.
- Content blocks: Reusable components like headers, footers, product cards, and social media links that you can save and use across multiple emails.
- Template management: Store and organize pre-built templates for different campaign types — promotional, transactional, newsletters, and more.
- Asset management: Upload and organize images, documents, and other media files within a structured folder system.
- Dynamic content: Create content that changes based on subscriber attributes, ensuring each recipient sees the most relevant version of your email.
- AMPscript and personalization strings: Insert dynamic data like first names, product recommendations, or account details directly into your emails.
Content Builder replaces the older “Classic Email” editor and offers a significantly more modern, intuitive experience. If you’re just starting out, this is where you’ll spend most of your time.
2. Subscriber Lists and Data Extensions
Your email is only as effective as the audience it reaches. Email Studio provides two primary ways to manage your subscribers:
Subscriber Lists (Lists):
- Simple, straightforward way to organize contacts
- Best suited for small-scale campaigns or organizations with basic segmentation needs
- Subscribers are stored with basic attributes like email address, name, and subscription status
- Easy to set up and manage for beginners
Data Extensions:
- More powerful and flexible data storage tables
- Support custom fields, multiple data types, and complex relationships between data sets
- Ideal for large-scale campaigns, advanced segmentation, and personalization
- Can be populated via imports, API calls, SQL queries, or integrations with other Salesforce products
- Recommended for most production use cases
Pro Tip for Beginners: While Lists are easier to get started with, we strongly recommend learning Data Extensions early on. They’re the industry standard in SFMC, and almost every advanced feature — from Journey Builder to complex personalization — relies on them.
3. Templates and Content Blocks
Templates and content blocks are your efficiency boosters. Instead of building every email from scratch, you can:
- Use pre-built templates provided by Salesforce or created by your team
- Create custom templates that reflect your brand’s visual identity (colors, fonts, logo placement, layout)
- Build reusable content blocks for elements that appear in every email, such as headers, footers, legal disclaimers, and social media links
- Share templates across your team to maintain brand consistency
The marketing cloud email builder makes template management intuitive. You can organize templates into folders, tag them for easy searchability, and set permissions to control who can edit or use them.
4. Tracking and Analytics
Email Studio includes robust tracking capabilities that let you measure the performance of every campaign:
- Open rate: Percentage of recipients who opened your email
- Click-through rate (CTR): Percentage of recipients who clicked a link in your email
- Bounce rate: Percentage of emails that couldn’t be delivered
- Unsubscribe rate: Percentage of recipients who opted out
- Conversion tracking: Track actions taken after clicking through (with proper setup)
- Heat maps: Visual representation of where subscribers clicked within your email
- Device and email client reports: Understand what devices and email clients your audience uses
These analytics are essential for continuously improving your campaigns and understanding what resonates with your audience.
5. A/B Testing
Email Studio allows you to test different versions of your emails to determine what performs best. You can test:
- Subject lines
- Preheader text
- Email content and layout
- Send times
- From names
The platform automatically sends the winning version to the remainder of your audience based on the criteria you define.
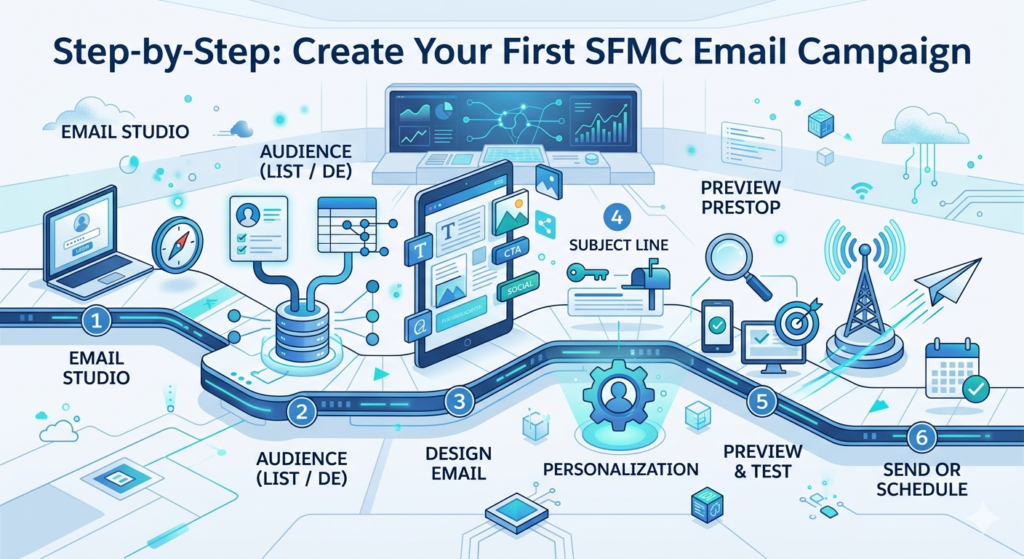
Step-by-Step: Create Your First SFMC Email Campaign
Now for the exciting part — let’s build your first SFMC email campaign from start to finish. Follow each step carefully, and you’ll have a professional email ready to send in no time.
Step 1: Access Email Studio
First, you need to navigate to Email Studio within your Salesforce Marketing Cloud account.
- Log in to Salesforce Marketing Cloud using your credentials at
mc.exacttarget.comor your custom login URL. If your organization uses single sign-on (SSO), log in through your company’s identity provider. - Navigate to Email Studio. Once you’re on the SFMC dashboard (also called the Marketing Cloud homepage), look at the top navigation bar. Hover over or click on “Email Studio” in the main menu. You should see a dropdown with several options:
- Overview: Dashboard showing recent campaign performance
- Content: Where you create and manage email content
- Subscribers: Where you manage your audience
- A/B Testing: For running split tests
- Interactions: For setting up sends and automations
- Tracking: For monitoring campaign results
- Admin: For account settings and configuration
- Familiarize yourself with the interface. Spend a few minutes clicking through the different sections. Notice how Content, Subscribers, and Interactions are the three main areas you’ll use to build and send campaigns.
Troubleshooting Tip: If you don’t see Email Studio in your navigation, your account may not have the necessary permissions or licenses. Contact your Salesforce administrator to ensure Email Studio is enabled for your user role.
Step 2: Create or Select Your Audience (List or Data Extension)
Before creating your email, you need to define who will receive it. Let’s set up your audience.
Option A: Creating a Subscriber List (Simpler Approach)
- Go to Email Studio → Subscribers → Lists
- Click “Create” to start a new list
- Give your list a descriptive name (e.g., “Newsletter Subscribers — January 2025”)
- Add a description to help you and your team identify the list’s purpose
- Choose the list type:
- Public: Subscribers can see and manage their subscription to this list
- Private: Only visible to marketers; subscribers cannot self-manage
- Click “Save”
- Add subscribers to your list by:
- Manually entering email addresses (for small lists)
- Importing a CSV file with subscriber data
- Using the API to push data from external systems
Option B: Creating a Data Extension (Recommended Approach)
- Go to Email Studio → Subscribers → Data Extensions
- Click “Create”
- Choose “Standard Data Extension”
- Configure the following:
- Name: Give it a clear, descriptive name (e.g., “DE_WelcomeCampaign_Jan2025”)
- External Key: Auto-generated, but you can customize it
- Description: Explain the purpose of this data extension
- Is Sendable: Check this box — it indicates this data extension can be used for email sends
- Is Testable: Check this box if you want to use it for test sends
- Define your fields (columns). At minimum, include:
EmailAddress(Email Address data type) — Required for sendingFirstName(Text, 50 characters)LastName(Text, 50 characters)SubscriberKey(Text, 254 characters) — A unique identifier for each subscriber
- Set the relationship: Map
EmailAddressto the subscriber’s email address andSubscriberKeyto the Subscriber Key - Click “Save”
- Import data into your data extension:
- Click on the data extension name
- Go to Records → Import
- Upload your CSV file
- Map the columns in your file to the fields in your data extension
- Click “Import” and wait for the process to complete
Important Note on Data Quality:
- Ensure all email addresses are valid and properly formatted
- Remove duplicates before importing
- Never purchase email lists — this violates Salesforce’s acceptable use policy and anti-spam laws like CAN-SPAM and GDPR
- Always ensure you have proper consent from your subscribers
Step 3: Design Your Email Using the Marketing Cloud Email Builder
Now comes the creative part — designing your email.
- Go to Email Studio → Content (or navigate to Content Builder from the main navigation)
- Click “Create” and select “Email”
- Choose your creation method:
- Template: Start with a pre-designed layout (recommended for beginners)
- Paste HTML: If you have existing HTML code
- Text Only: For plain-text emails
- Existing Email: Duplicate and modify a previous email
- Select a template. Content Builder offers several categories:
- Basic: Simple layouts with one or two columns
- Themed: Pre-designed templates with colors and styling
- Empty: A blank canvas for full creative control
- Saved Templates: Your organization’s custom templates
- Name your email. Give it a descriptive name like “Welcome Email — New Subscribers” and add it to an appropriate folder for organization.
- Start designing using the drag-and-drop editor:The marketing cloud email builder interface consists of:
- Content panel (left side): Drag content blocks from here into your email
- Email canvas (center): Your email preview where you arrange and edit blocks
- Properties panel (right side): Customize the selected block’s settings
- Text Block: Add and format text with a rich text editor (headings, paragraphs, bullet points, links)
- Image Block: Insert images from your Content Builder library or upload new ones
- Button Block: Add call-to-action buttons with customizable text, colors, shapes, and links
- Layout Block: Create multi-column layouts within your email
- Divider Block: Add horizontal lines to separate content sections
- Social Share Block: Add social media sharing icons
- Dynamic Content Block: Display different content based on subscriber attributes
- Free Form Block: Combine text and images in a single, flexible block
- HTML Block: Insert custom HTML code for advanced elements
- Build your email content. Here’s a suggested structure for your first email:
- Header: Your company logo and navigation links
- Hero Section: A compelling image or banner with your main message
- Body Content: 2-3 paragraphs of valuable content
- Call-to-Action: A prominent button directing readers to take action
- Footer: Contact information, unsubscribe link, and physical mailing address (required by law)
Step 4: Add Subject Line and Personalization
A great subject line can make or break your email campaign. Here’s how to set it up:
- In the email editor, click on the “Settings” tab (or look for the subject line field at the top of the editor)
- Enter your subject line. Keep it:
- Under 50 characters for optimal display on mobile devices
- Clear, specific, and action-oriented
- Free of spam trigger words like “FREE!!!” or “Act Now!!!”
- “Welcome to [Brand Name] — Here’s What’s Next”
- “Your Weekly Marketing Tips Are Here 📬”
- “%%FirstName%%, your exclusive offer expires tomorrow”
- Add a preheader (preview text). This is the snippet of text that appears after the subject line in the inbox. It should complement your subject line and entice the reader to open the email. Keep it under 100 characters.
- Add personalization. Personalization makes your emails feel more human and relevant. In SFMC, you can personalize using:Personalization Strings:
- Click where you want to insert personalization in your email
- Click the “Personalization” button in the toolbar
- Select the attribute you want to insert (e.g.,
%%FirstName%%) - Set a default value for cases where the data is missing (e.g., “there” so “Hi %%FirstName%%” becomes “Hi there” for subscribers without a first name)
For more complex personalization, you can use AMPscript — SFMC’s proprietary scripting language:text%%[ SET @firstName = AttributeValue("FirstName") IF EMPTY(@firstName) THEN SET @firstName = "there" ENDIF ]%% Hello %%=v(@firstName)=%%,Dynamic Content:
Create rules that display different content blocks based on subscriber data. For example:- Show different product recommendations based on purchase history
- Display location-specific offers based on the subscriber’s city
- Show different images based on gender or age group
- Configure the “From” name and email address:
- From Name: Use a recognizable name (e.g., “Sarah from [Company]” or “[Company Name]”)
- From Email: Use a professional, branded email address (e.g., newsletter@yourcompany.com)
- Reply Email: Set this to a monitored inbox so you can respond to replies
Step 5: Preview and Test Your Email
Never, ever send an email without testing it first. This is one of the most critical steps in any SFMC email campaign.
- Use the Preview Function:
- Click “Preview” in the email editor
- Toggle between desktop and mobile views to see how your email renders on different screen sizes
- If you used personalization, select a specific subscriber to preview how the personalized content will look
- Send a Test Email:
- Click “Test Send” (or “Send Test” depending on your SFMC version)
- Enter the email addresses of your test recipients (typically yourself and team members)
- Choose a test data extension or subscriber to populate personalization fields
- Click “Send Test”
- Check the test email thoroughly:
- ✅ Does the subject line display correctly?
- ✅ Is the preheader text showing as expected?
- ✅ Are all personalization fields populated correctly?
- ✅ Do all links work and point to the correct URLs?
- ✅ Are images loading properly?
- ✅ Does the email look good on mobile?
- ✅ Is the unsubscribe link present and functional?
- ✅ Is the physical mailing address included in the footer?
- ✅ Are there any typos or grammatical errors?
- ✅ Does the call-to-action button work?
- Test across email clients (if possible):
Use tools like Litmus or Email on Acid (both integrate with SFMC) to preview your email across dozens of email clients including Gmail, Outlook, Apple Mail, and Yahoo Mail. Different email clients render HTML differently, and what looks perfect in Gmail might break in Outlook. - Validate with Content Detective:
SFMC includes a built-in tool called Content Detective that scans your email for common spam triggers. Run this check to improve your deliverability chances. It flags words, phrases, and formatting patterns that might cause spam filters to block your email.
Step 6: Send or Schedule Your SFMC Email Campaign
You’ve built your email, personalized it, tested it thoroughly, and you’re confident it’s ready. Now it’s time to send!
- Navigate to Email Studio → Interactions → Messages → Email
(Or in some SFMC setups, you can initiate a send directly from Content Builder) - Click “Create” and select “Guided Send”
(Guided Send walks you through the sending process step by step — perfect for beginners) - Configure your send:Select your email:
- Choose the email you created in Content Builder
- Choose the list or data extension you created in Step 2
- You can also apply exclusion lists to prevent certain subscribers from receiving the email (e.g., people who recently unsubscribed or made a purchase)
- Send immediately: The email goes out right away
- Schedule for later: Pick a specific date and time
- Consider your audience’s time zone
- Tuesday through Thursday typically see the highest engagement rates
- Mid-morning (10 AM) and early afternoon (1-2 PM) are generally strong send times
- Send throttling: Limit the number of emails sent per hour (useful for large sends to protect your deliverability reputation)
- Review the send summary:
SFMC displays a summary of your send configuration, including:- Email name
- Subject line
- Audience size
- Estimated send time
- Exclusions applied
- Click “Send” or “Schedule”🎉 Congratulations! You’ve just created and sent your first SFMC email campaign!
- Monitor your send:
- Go to Email Studio → Tracking to monitor your campaign’s performance in real-time
- You’ll start seeing data within minutes of your send
Designing Emails with the Marketing Cloud Email Builder
Let’s take a deeper dive into the design capabilities of the marketing cloud email builder, because creating visually appealing emails is crucial for engagement.
Drag-and-Drop Features
The drag-and-drop editor is the heart of Content Builder’s email creation experience. Here’s how to make the most of it:
- Rearranging blocks: Simply click and drag any content block to move it to a different position in your email. A blue line indicates where the block will be placed.
- Copying blocks: Hover over a block and click the duplicate icon to create an exact copy. This is great for repeating patterns like product cards.
- Deleting blocks: Hover over a block and click the trash icon to remove it.
- Resizing columns: In multi-column layouts, drag the column borders to adjust width ratios.
- Block-level styling: Click any block to access its properties panel, where you can customize padding, margins, background colors, borders, and more.
- Global styling: Access the email’s global design settings to set default fonts, colors, and spacing that apply to the entire email.
Using Templates Effectively
Templates save time and ensure brand consistency. Here’s how to leverage them:
- Start with Salesforce’s built-in templates to learn the platform
- Customize templates by modifying colors, fonts, and layouts to match your brand
- Save customized templates for future use by clicking “Save as Template”
- Create a template library organized by campaign type:
- Welcome emails
- Promotional campaigns
- Newsletters
- Transactional emails
- Event invitations
- Lock certain sections of templates to prevent team members from accidentally modifying critical elements like legal disclaimers or unsubscribe links
Adding Images
Images make your emails more engaging, but they need to be used thoughtfully:
- Upload images to Content Builder’s asset library for easy reuse
- Recommended image formats: PNG (for graphics with transparency), JPG (for photographs), GIF (for simple animations)
- Optimize file size: Keep images under 200KB each to ensure fast loading. Use tools like TinyPNG to compress images without losing quality.
- Set image dimensions: For single-column emails, keep images at 600px wide. For two-column layouts, use 300px wide images.
- Always add alt text: Describe the image in the alt text field. This is displayed when images are blocked (which many email clients do by default) and is essential for accessibility.
- Link images: Make images clickable by adding destination URLs
- Use responsive images: Content Builder automatically makes images responsive, but always verify in mobile preview
Adding Buttons
Call-to-action buttons are arguably the most important element in your email. Here’s how to create effective ones:
- Button text: Use action-oriented language like “Shop Now,” “Learn More,” “Get Started,” or “Claim Your Offer”
- Button color: Use a contrasting color that stands out from the rest of your email. Your primary brand color is usually a good choice.
- Button size: Make it large enough to tap easily on mobile (minimum 44×44 pixels)
- Button shape: Rounded corners tend to perform slightly better than sharp corners
- Button placement: Place your primary CTA above the fold (visible without scrolling) and repeat it at the bottom for longer emails
- Padding: Add generous padding inside the button for better visibility and easier tapping
Adding Personalization in the Builder
The marketing cloud email builder makes personalization straightforward:
- Inline personalization: Click in a text block, then use the personalization menu to insert subscriber attributes like
%%FirstName%%or%%CompanyName%% - Personalized images: Use dynamic content rules to swap images based on subscriber data
- Personalized links: Append subscriber data to URLs for tracking or personalized landing pages
- Conditional content: Use dynamic content rules or AMPscript to show/hide entire sections based on subscriber attributes
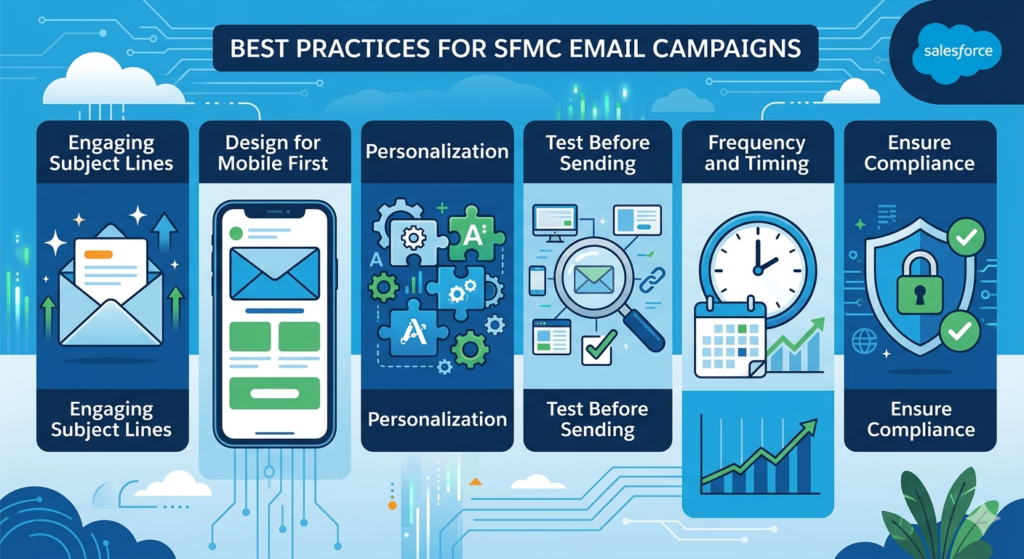
Best Practices for SFMC Email Campaigns
Creating a successful SFMC email campaign goes beyond just knowing the tools. Here are proven best practices that will elevate your email marketing game:
1. Keep Subject Lines Engaging
Your subject line is your email’s first impression. It determines whether your email gets opened or ignored.
- Be specific: “3 Tips to Boost Your Email Open Rate” outperforms “Check This Out”
- Create urgency (without being spammy): “Last Chance: Sale Ends Tonight” vs. “BUY NOW!!!”
- Use numbers: “5 Ways to Improve Your Marketing” is more clickable than vague alternatives
- Ask questions: “Ready to Double Your Email Engagement?” sparks curiosity
- Keep it short: Aim for 6-10 words or under 50 characters
- Use emojis sparingly: One relevant emoji can boost open rates, but overuse looks unprofessional 📧
- A/B test regularly: Use SFMC’s built-in A/B testing to continuously optimize your subject lines
- Personalize when relevant: Including the subscriber’s name or location can increase open rates by 20-30%
2. Design for Mobile First
Over 60% of emails are now opened on mobile devices. If your email doesn’t look good on a smartphone, you’re losing the majority of your audience.
- Use a single-column layout: It adapts best to narrow mobile screens
- Keep font sizes readable: Minimum 14px for body text, 22px+ for headings
- Make buttons finger-friendly: At least 44px tall with plenty of surrounding space
- Limit image width: Use responsive images that scale down automatically
- Keep email width at 600px: This is the standard width that works across most email clients
- Test on actual devices: Don’t rely solely on the preview tool — send test emails to real phones and tablets
- Minimize text: Mobile readers scan rather than read, so keep your copy concise
3. Personalization Tips
Personalization goes far beyond using someone’s first name. Here’s how to level up:
- Behavioral personalization: Reference past purchases, browsing history, or content engagement
- Location-based personalization: Show store locations, local events, or weather-appropriate products
- Lifecycle personalization: Adjust messaging based on where the subscriber is in their customer journey (new subscriber, active customer, at-risk churner)
- Preference-based personalization: Respect subscriber preferences for content categories, frequency, and format
- Dynamic product recommendations: Use SFMC’s Einstein Recommendations to automatically insert personalized product suggestions
- Personalized send times: Use Send Time Optimization (powered by Einstein AI) to deliver emails when each subscriber is most likely to engage
4. Test Before Sending — Every Single Time
Make testing a non-negotiable part of your workflow:
- Send test emails to yourself and at least two team members
- Check every link — broken links are one of the most common and embarrassing email mistakes
- Verify personalization with multiple test subscribers to ensure dynamic content renders correctly
- Run Content Detective to identify potential spam triggers
- Preview across devices using SFMC’s built-in preview or third-party tools like Litmus
- Check dark mode rendering: More users are adopting dark mode, and it can dramatically change how your email looks
- Proofread everything: Typos erode trust. Read your email out loud or have someone else review it.
5. Optimize Send Frequency and Timing
- Don’t overwhelm subscribers: Sending too frequently leads to unsubscribes and spam complaints
- Establish a consistent cadence: Whether it’s weekly, bi-weekly, or monthly, set expectations and stick to them
- Use preference centers: Let subscribers choose how often they want to hear from you
- Monitor engagement metrics: If open rates decline over time, you may be sending too often
6. Ensure Compliance
- Include a physical mailing address in every email (required by CAN-SPAM Act)
- Provide a clear unsubscribe link that works immediately
- Honor unsubscribe requests within 10 business days (CAN-SPAM requirement)
- Obtain proper consent before adding anyone to your email list (especially important under GDPR)
- Include your company name so recipients know who the email is from
- Don’t use deceptive subject lines that misrepresent the email’s content
Common Mistakes to Avoid
Even experienced email marketers make mistakes. Here are the most common pitfalls to watch out for when running your SFMC email campaign:
1. Sending Without Testing
This is the number one mistake beginners make, and it can be costly. Imagine sending an email to 50,000 subscribers with a broken link, missing images, or a subject line that reads “%%FirstName%%, Test Subject Line DO NOT SEND.”
How to avoid it:
- Create a testing checklist and use it for every send
- Establish a peer review process where at least one other person reviews the email before it goes out
- Use SFMC’s Subscriber Preview to test personalization with real subscriber data
- Send test emails to multiple email clients (Gmail, Outlook, Apple Mail)
2. Poor Audience Segmentation
Sending the same email to your entire database is a recipe for low engagement and high unsubscribe rates. A 25-year-old college student and a 55-year-old executive have very different needs and interests.
How to avoid it:
- Segment your audience based on demographics, behavior, engagement level, and preferences
- Use data extensions and SQL queries to create targeted segments
- Start simple — even basic segmentation (active vs. inactive subscribers) can dramatically improve results
- Use SFMC’s data filters or query activities to create dynamic segments that update automatically
3. Ignoring Analytics and Not Iterating
Sending an email and never looking at the results is like throwing darts blindfolded. SFMC provides rich analytics — use them.
How to avoid it:
- Review campaign performance within 24-48 hours of every send
- Track key metrics: open rate, click-through rate, bounce rate, unsubscribe rate, and conversions
- Compare performance against your historical benchmarks and industry averages
- Use insights to improve future campaigns:
- Low open rate? Improve your subject lines or test different send times
- Low click-through rate? Improve your content, CTA, or email design
- High unsubscribe rate? Revisit your segmentation and send frequency
- High bounce rate? Clean your email list and validate email addresses
4. Neglecting Email List Hygiene
Over time, email lists naturally decay. People change email addresses, lose interest, or mark your emails as spam. Sending to invalid or disengaged addresses hurts your sender reputation and deliverability.
How to avoid it:
- Regularly remove hard bounces (invalid email addresses)
- Implement a re-engagement campaign for subscribers who haven’t opened an email in 3-6 months
- If re-engagement fails, remove inactive subscribers from your active lists
- Use double opt-in to ensure new subscribers provide valid email addresses
- Never buy or rent email lists
5. Overcomplicating Your First Campaigns
It’s tempting to use every feature SFMC offers in your first email — dynamic content, AMPscript, complex segmentation, A/B testing, Einstein AI. Don’t.
How to avoid it:
- Start simple. Your first few campaigns should focus on mastering the basics
- Gradually introduce advanced features as you gain confidence
- Set realistic goals for each campaign
- Document what you learn along the way
6. Forgetting the Call-to-Action
Every email should have a clear purpose and a corresponding CTA. If subscribers read your email and don’t know what to do next, you’ve wasted an opportunity.
How to avoid it:
- Define the goal of every email before you start designing
- Include one primary CTA and optionally one or two secondary CTAs
- Make your CTA button visually prominent and action-oriented
- Place your primary CTA above the fold
7. Not Using Preheader Text
The preheader is valuable real estate that many marketers ignore. By default, email clients pull the first text from your email body, which might be “View in browser” or other irrelevant content.
How to avoid it:
- Always write custom preheader text that complements your subject line
- Keep it between 40-100 characters
- Use it to add context or create additional curiosity
Bonus: What’s Next After Your First Campaign?
Once you’ve mastered the basics covered in this SFMC Email Studio tutorial, here’s a roadmap for your continued growth:
Level 1: Foundation (Weeks 1-4)
- ✅ Build and send basic email campaigns (you’re doing this now!)
- Learn to import and manage data extensions
- Create reusable templates and content blocks
- Understand basic tracking and analytics
Level 2: Intermediate (Months 2-3)
- Learn AMPscript for advanced personalization
- Implement A/B testing for subject lines and content
- Build audience segments using data filters
- Explore guided sends vs. user-initiated sends
Level 3: Advanced (Months 4-6)
- Master Journey Builder for automated email sequences
- Use SQL queries in Automation Studio for complex segmentation
- Implement dynamic content for highly personalized emails
- Leverage Einstein AI features (Send Time Optimization, Content Selection, Engagement Scoring)
Level 4: Expert (Months 6+)
- Build complex multi-channel journeys (email + SMS + push + advertising)
- Implement advanced data architectures with relational data models
- Create custom integrations using SFMC APIs
- Optimize deliverability at scale
Conclusion
Congratulations on making it through this comprehensive SFMC Email Studio tutorial! You now have a solid understanding of what Email Studio is, how its key components work together, and — most importantly — how to build and send your first SFMC email campaign from scratch.
Let’s recap what you’ve learned:
- Email Studio is the powerful email marketing engine within Salesforce Marketing Cloud
- Content Builder (the marketing cloud email builder) makes it easy to design professional emails without coding
- Subscriber Lists and Data Extensions help you organize and target your audience
- The six-step process — access Email Studio, create your audience, design your email, personalize it, test it, and send it — provides a reliable framework for every campaign
- Best practices like mobile-first design, engaging subject lines, thorough testing, and continuous optimization separate good email marketers from great ones
- Common mistakes like skipping tests, poor segmentation, and ignoring analytics can derail even well-designed campaigns
The key to mastering Salesforce Marketing Cloud email marketing is practice. Don’t wait for the perfect campaign idea — start building today. Create a test email, send it to yourself, analyze how it looks, and iterate. Every email you build will make you more confident and more skilled.
Remember, every email marketing expert started exactly where you are right now — staring at a blank canvas in Content Builder, wondering where to click first. The difference between those who succeed and those who don’t is simple: they started, they practiced, and they never stopped learning.
Now it’s your turn. Open Email Studio, roll up your sleeves, and build your first SFMC email campaign. Your future subscribers are waiting.
About RizeX Labs
At RizeX Labs, we specialize in delivering cutting-edge Salesforce solutions, including Marketing Cloud implementations with a strong focus on Email Studio. Our expertise combines deep technical knowledge, industry best practices, and real-world project experience to help businesses create impactful email campaigns, improve customer engagement, and drive measurable results.
We empower organizations to transform their email marketing approach—from manual, disconnected processes to fully automated, data-driven campaigns that enhance personalization, efficiency, and ROI.
Internal Links:
- Link to your Salesforce Marketing Cloud course page
- How to Build a Salesforce Portfolio That Gets You Hired (With Project Ideas)
- Salesforce Admin vs Developer: Which Career Path is Right for You in 2026?
- Wealth Management App in Financial Services Cloud
- SFMC course page
External Links:
- Salesforce official website
- Marketing Cloud overview
- Email Studio documentation
- Trailhead (SFMC learning)
- Litmus (email testing platform)
- Email marketing best practices (HubSpot)
Quick Summary
SFMC Email Studio is a powerful tool that enables marketers and developers to create, manage, and send personalized email campaigns at scale. By using Email Studio, you can design responsive emails, segment your audience, and track campaign performance in real time.
In this tutorial, you will learn how to build and send your first email campaign step by step—from creating an email template to selecting recipients and scheduling delivery. With Email Studio, businesses can improve customer communication, automate marketing processes, and achieve better engagement through targeted messaging.
Quick Summary
This in-depth SFMC Email Studio tutorial serves as a comprehensive beginner's guide to building and sending professional email campaigns in Salesforce Marketing Cloud. The blog begins by introducing Email Studio as the core email marketing application within SFMC, explaining its features, real-world use cases across industries, and its role in automating business communication. The tutorial breaks down Email Studio's key components — Content Builder (the marketing cloud email builder), subscriber lists, data extensions, templates, content blocks, tracking analytics, and A/B testing capabilities. The core of the guide walks readers through a detailed six-step process: accessing Email Studio, creating audiences using lists or data extensions, designing emails with the drag-and-drop builder, adding subject lines and personalization, previewing and testing emails across devices, and finally sending or scheduling the campaign. Additional sections cover advanced design techniques including working with images, buttons, templates, and dynamic personalization. The blog provides actionable best practices covering mobile-first design, engaging subject lines, personalization strategies, compliance requirements, and send frequency optimization. It also identifies seven common mistakes beginners make — from skipping tests to ignoring analytics — and offers a learning roadmap from beginner to expert level. The tutorial empowers marketers to confidently launch their first SFMC email campaign.

