In today’s rapidly evolving digital landscape, Salesforce continues to revolutionize customer relationship management with innovative tools and frameworks. Among these groundbreaking solutions, OmniStudio stands out as a comprehensive suite of low-code tools designed to accelerate digital transformation and create seamless customer experiences.
Originally developed by Vlocity (acquired by Salesforce in 2020), OmniStudio has become an integral part of the Salesforce ecosystem, particularly within Industry Clouds. This powerful framework enables developers and administrators to build sophisticated, industry-specific applications with minimal coding, significantly reducing development time and costs.
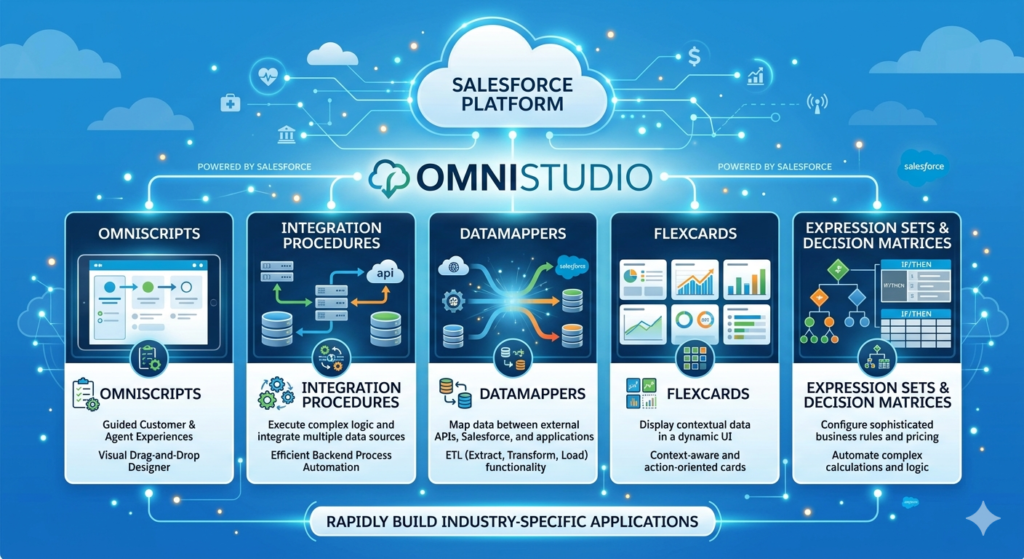
OmniStudio comprises several interconnected components including OmniScripts (guided workflows), DataRaptors (data processing tools), Integration Procedures (server-side processing), FlexCards (contextual data displays), and OmniStudio Actions (reusable business logic). Together, these tools empower organizations to create dynamic, responsive applications that enhance customer engagement and streamline business processes.
Whether you’re a Salesforce developer preparing for your next interview, a business analyst looking to expand your skill set, or an administrator seeking to understand OmniStudio capabilities, this comprehensive guide will equip you with the knowledge and confidence to excel. We’ve compiled 35 essential interview questions with detailed answers, real-world scenarios, comparison tables, and performance optimization tips to ensure you’re fully prepared.
Let’s dive into the world of OmniStudio and unlock your potential to become an OmniStudio expert!
Section 1: Fundamental OmniStudio Concepts
Q1: What is OmniStudio, and what are its core components?
Answer:
OmniStudio is a suite of declarative, low-code tools within Salesforce designed to build industry-specific customer experiences quickly and efficiently. It was originally part of Vlocity and is now integrated into Salesforce Industry Clouds.
Core Components:
- OmniScripts: Guided, step-by-step processes that collect and display information through interactive user interfaces
- DataRaptors: Declarative data processing tools for extracting, transforming, and loading data
- Integration Procedures: Server-side processing tools that orchestrate complex business logic
- FlexCards: Responsive, contextual user interface components that display data dynamically
- OmniStudio Actions: Reusable components that encapsulate business logic and can be called from various OmniStudio tools
These components work together seamlessly to create powerful, industry-specific applications without extensive custom coding.
Q2: What is the difference between OmniScripts and Salesforce Flow?
Answer:
While both OmniScripts and Salesforce Flow are automation tools, they serve different purposes and have distinct characteristics:
| Feature | OmniScripts | Salesforce Flow |
|---|---|---|
| Primary Use | Complex, industry-specific guided processes | General automation and business processes |
| UI Complexity | Rich, multi-step user interfaces with advanced styling | Basic screen flows with standard components |
| Data Processing | Integrates with DataRaptors for declarative data handling | Uses DML operations and Apex actions |
| Industry Focus | Designed for industry clouds (Healthcare, Financial Services, etc.) | Universal across all Salesforce implementations |
| Reusability | High reusability through OmniScript elements | Reusable through subflows |
| Performance | Optimized for complex, multi-page experiences | Better for simple automation tasks |
| Learning Curve | Steeper, requires understanding of OmniStudio ecosystem | More intuitive for Salesforce administrators |
When to Use:
- OmniScripts: Complex customer onboarding, insurance claims processing, loan applications
- Salesforce Flow: Record updates, approval processes, email alerts, simple guided experiences
Q3: Explain the OmniScript lifecycle and execution flow.
Answer:
The OmniScript lifecycle consists of several distinct phases:
1. Design Phase:
- Elements are configured in the OmniScript Designer
- Layout and styling are defined
- Navigation rules are established
2. Activation Phase:
- OmniScript is activated, making it available for use
- Lightning Web Component (LWC) is generated
- Version control is established
3. Runtime Execution:
- User initiates the OmniScript
- Initial data is loaded via DataRaptor Extract or Integration Procedure
- User navigates through steps, triggering validations
- Data is stored temporarily in the OmniScript state
- Upon completion, data is saved using DataRaptor Transform/Load or Integration Procedure
4. Post-Processing:
- Success or error messages are displayed
- Optional navigation to records or other components
- Audit trails are created (if configured)
Key Execution Points:
- Before Script Load: Custom JavaScript executes before OmniScript loads
- Step Transitions: Validations run before moving to next step
- On Save: DataRaptor or Integration Procedure processes final data
- After Script Load: Custom JavaScript executes after OmniScript completes
Q4: What are DataRaptors and what types are available?
Answer:
DataRaptors are declarative, reusable data processing tools within OmniStudio that perform Extract, Transform, and Load (ETL) operations without writing code.
Types of DataRaptors:
1. DataRaptor Extract:
- Purpose: Retrieve data from Salesforce objects
- Use Cases: Pre-populate OmniScript fields, fetch related records, display data in FlexCards
- Features: Supports relationships, formulas, conditional filtering
2. DataRaptor Transform:
- Purpose: Transform data from one format to another
- Use Cases: Convert JSON structures, map data between systems, prepare data for external APIs
- Features: Formula fields, concatenation, conditional logic
3. DataRaptor Load:
- Purpose: Insert, update, or upsert data into Salesforce objects
- Use Cases: Save OmniScript data, create multiple related records, bulk data operations
- Features: Relationship handling, default values, conditional logic
4. DataRaptor Turbo Extract:
- Purpose: High-performance data extraction for large datasets
- Use Cases: Processing thousands of records, reporting, bulk operations
- Features: Optimized queries, faster execution, reduced server load
Key Benefits:
- No code deployment required
- Version control built-in
- Reusable across multiple OmniScripts and Integration Procedures
- Easy maintenance and debugging
Q5: What is an Integration Procedure and how does it differ from DataRaptors?
Answer:
An Integration Procedure is a server-side processing tool in OmniStudio that orchestrates complex business logic by combining multiple actions in a declarative manner.
Key Characteristics:
- Server-Side Execution: Runs entirely on the server, reducing client-side processing
- Action Orchestration: Combines DataRaptors, Apex classes, HTTP callouts, and transformations
- Error Handling: Built-in error management and rollback capabilities
- Performance: More efficient for complex operations than client-side processing
Integration Procedure vs DataRaptor:
| Aspect | Integration Procedure | DataRaptor |
|---|---|---|
| Scope | Orchestrates multiple operations | Single ETL operation |
| Complexity | Handles complex business logic | Focuses on data transformation |
| Components | Can include DataRaptors, Apex, HTTP calls | Standalone data processing |
| Execution | Always server-side | Can be client or server-side |
| Conditional Logic | Advanced branching and decision trees | Basic conditional mapping |
| Use Case | Complex integrations, multi-step processes | Simple data operations |
Common Use Cases:
- Multi-system integrations
- Complex calculation logic
- Sequential API calls
- Data validation and enrichment
- Business rule execution
Section 2: OmniScripts Deep Dive
Q6: What are the different types of OmniScript elements?
Answer:
OmniScript elements are building blocks used to create user interfaces and capture data. They fall into several categories:
Input Elements:
- Text, Email, Phone, Number: Standard input fields
- Date, DateTime, Time: Temporal data collection
- Checkbox, Radio Button: Boolean and single-choice selections
- Select, Multi-Select: Dropdown and multiple-choice options
- Text Area: Large text input
- Formula: Calculated fields based on other inputs
Display Elements:
- Text Block: Static text and instructions
- Image: Display images
- File Upload: Document attachment capability
- Signature: Digital signature capture
Structural Elements:
- Step: Page-level container
- Block: Section within a step
- Set Values: Assign values to variables
Advanced Elements:
- Type Ahead Block: Search with autocomplete
- Table: Display and edit multiple records
- Calculation Matrix: Complex calculation displays
- Disclosure: Expandable/collapsible sections
Action Elements:
- Navigation: Control flow between steps
- Remote Action: Call Apex methods
- DataRaptor Extract Post Action: Retrieve data during execution
- Integration Procedure Action: Call Integration Procedures
Q7: How do you handle validations in OmniScripts?
Answer:
OmniStudio provides multiple validation mechanisms to ensure data quality:
1. Built-in Validations:
text- Required field validation (Required checkbox)
- Pattern matching (Regular Expressions)
- Range validations (Min/Max values for numbers)
- Email format validation
- Phone number format validation
2. Custom Validations:
- Validation Rules: JavaScript-based custom validation
- Response JSON Path: Validate against Integration Procedure responses
- Conditional Logic: Show/hide/require fields based on other inputs
3. Step-Level Validation:
- Prevents navigation to next step until all validations pass
- Can display custom error messages
- Highlights invalid fields
4. Cross-Field Validation:
JavaScript// Example: Validate end date is after start date
if (endDate < startDate) {
    return {
        valid: false,
        message: "End date must be after start date"
    };
}
Best Practices:
- Validate early and often to improve user experience
- Provide clear, actionable error messages
- Use client-side validation when possible for performance
- Implement server-side validation for security-critical fields
- Test all validation scenarios thoroughly
Q8: Explain OmniScript versioning and activation process.
Answer:
OmniStudio implements robust version control for OmniScripts to manage changes safely:
Versioning System:
- Major Version: Significant changes (e.g., 1.0, 2.0, 3.0)
- Minor Version: Incremental updates (e.g., 1.1, 1.2, 1.3)
- Multiple versions can coexist simultaneously
- Only one version can be active at a time
Activation Process:
- Create/Modify OmniScript: Make changes in Designer
- Save: Changes are saved but not live
- Activate:
- Generates Lightning Web Component (LWC)
- Compiles OmniScript into executable format
- Makes the version available for use
- Deactivates previous active version
Important Considerations:
- Active Version: The version users will execute
- Inactive Versions: Available for reference or rollback
- Clone Version: Create new version from existing one
- Compare Versions: View differences between versions
Migration Strategy:
textDevelopment Sandbox → QA Sandbox → UAT → Production
- Use OmniStudio deployment tools
- Test thoroughly in each environment
- Document changes between versions
- Maintain rollback capability
Best Practices:
- Increment minor versions for small changes
- Use major versions for significant redesigns
- Document changes in version notes
- Test in sandbox before activating in production
- Keep at least two previous versions for rollback
Q9: What are OmniScript Prefill and how do you implement it?
Answer:
OmniScript Prefill is the process of populating OmniScript fields with existing data before the user interacts with the form, enhancing user experience and reducing manual data entry.
Implementation Methods:
1. DataRaptor Extract (Recommended):
textConfiguration in OmniScript Properties:
- Set DataRaptor Extract action
- Pass Context ID (usually Record ID)
- Map extracted data to OmniScript elements
2. Integration Procedure:
text- Create Integration Procedure with data retrieval logic
- Set as Prefill action in OmniScript properties
- Handle complex data requirements
3. Set Values Element:
text- Use Set Values element in first step
- Assign values from URL parameters or context
- Good for simple scenarios
Real-World Scenario:
Insurance Claim Processing:
textWhen a claims adjuster opens an OmniScript for an existing claim:
1. DataRaptor Extract retrieves:
   - Policyholder information
   - Existing claim details
   - Related documents
   - Previous claim history
2. Fields are pre-populated automatically
3. User only enters new information
4. Reduces time from 10 minutes to 3 minutes per claim
Performance Tips:
- Fetch only required fields to minimize data transfer
- Use Turbo Extract for large datasets
- Implement caching for frequently accessed data
- Consider lazy loading for complex relationships
Q10: How do you implement conditional logic and step navigation in OmniScripts?
Answer:
Conditional logic and navigation control the user experience by showing relevant content and guiding users through appropriate paths.
Conditional Display:
1. Show/Hide Elements:
textCondition Type: Always/Conditional
Conditional Logic: %FieldName% == "Value"
Supports: AND, OR, NOT operations
2. Conditional Views:
JSON{
  "condition": "%CustomerType% == 'Premium'",
  "showPremiumOptions": true,
  "showStandardOptions": false
}
Step Navigation Techniques:
1. Linear Navigation:
- Sequential step progression
- Next/Previous buttons
- Standard for simple processes
2. Conditional Navigation:
JavaScript// Navigate based on user selection
if (%CustomerType% == "Business") {
    navigate to "BusinessInformation"
} else {
    navigate to "PersonalInformation"
}
3. Dynamic Step Skipping:
textUsing Navigation Override:
- Set condition for step display
- Skip irrelevant steps automatically
- Improve user experience
4. Custom Navigation:
JavaScript// Custom navigation button
{
    "type": "Navigation",
    "action": "goToStep",
    "stepName": "Review",
    "condition": "%AllFieldsComplete% == true"
}
Advanced Scenario:
Loan Application Process:
textStep 1: Applicant Type (Individual/Joint)
  ↓
If Individual → Step 2A: Personal Details
If Joint → Step 2B: Primary + Co-Applicant Details
  ↓
Step 3: Income Verification (conditional fields based on employment type)
  ↓
Step 4: Credit Check
  ↓
If Approved → Step 5A: Loan Terms
If Pending → Step 5B: Additional Documentation
If Denied → Step 5C: Denial Explanation
Section 3: FlexCards and User Interface
Q11: What are FlexCards and what are their primary use cases?
Answer:
FlexCards are highly customizable, responsive UI components in OmniStudio that display contextual information in card-based layouts. They provide rich, interactive data visualization without requiring custom development.
Key Features:
- Responsive Design: Adapts to different screen sizes automatically
- Data-Driven: Populated via DataRaptors or Integration Procedures
- Interactive: Supports actions, navigation, and state changes
- Configurable: Declarative styling and layout options
- Reusable: Can be embedded in multiple contexts
Primary Use Cases:
1. Customer 360 Views:
textDisplay comprehensive customer information:
- Contact details
- Account summary
- Recent interactions
- Open cases
- Product ownership
2. Dashboards:
textExecutive summaries with KPIs:
- Sales metrics
- Service statistics
- Performance indicators
- Trend visualizations
3. Product Catalogs:
textE-commerce and product selection:
- Product images and descriptions
- Pricing information
- Availability status
- Add to cart actions
4. Record Summaries:
textQuick views on related records:
- Policy information in insurance
- Account balances in banking
- Patient summaries in healthcare
FlexCard States:
FlexCards support multiple states for different views:
- Default State: Initial card display
- Expanded State: Detailed view with additional information
- Custom States: Configured based on data conditions
Q12: How do you implement actions in FlexCards?
Answer:
FlexCard actions enable interactivity and user engagement through various action types:
Action Types:
1. OmniScript Action:
textPurpose: Launch an OmniScript
Configuration:
- Select target OmniScript
- Pass context data
- Define modal or full-page display
2. Navigation Action:
textPurpose: Redirect to Salesforce records or URLs
Options:
- Record Page
- List View
- Custom URL
- External links
3. DataRaptor Action:
textPurpose: Execute data operations
Use Cases:
- Update record status
- Create new records
- Trigger workflows
4. Integration Procedure Action:
textPurpose: Execute complex business logic
Examples:
- Approval processes
- Calculations
- External API calls
5. FlexCard State Change:
textPurpose: Switch between card states
Scenarios:
- Expand/collapse views
- Show/hide details
- Toggle configurations
Implementation Example:
Insurance Policy FlexCard:
JSON{
  "actions": [
    {
      "type": "OmniScript",
      "name": "File Claim",
      "omniScript": "ClaimSubmission",
      "passContextId": true,
      "displayType": "modal"
    },
    {
      "type": "Navigation",
      "name": "View Details",
      "target": "recordPage",
      "recordId": "{policyId}"
    },
    {
      "type": "IntegrationProcedure",
      "name": "Request Quote",
      "procedure": "GenerateQuote",
      "params": {
        "policyType": "{policyType}",
        "customerId": "{customerId}"
      }
    }
  ]
}
Best Practices:
- Limit actions to 3-5 primary options to avoid overwhelming users
- Use descriptive action names
- Implement confirmation for destructive actions
- Provide feedback after action execution
- Handle errors gracefully with user-friendly messages
Section 4: Integration Procedures Advanced Topics
Q13: What are the different action types available in Integration Procedures?
Answer:
Integration Procedures support various action types to build comprehensive server-side logic:
1. DataRaptor Actions:
- DataRaptor Extract: Retrieve data from Salesforce
- DataRaptor Transform: Convert data formats
- DataRaptor Load: Insert/update Salesforce records
- DataRaptor Turbo Extract: High-performance extraction
2. HTTP Action:
textPurpose: Call external REST APIs
Configuration:
- HTTP Method (GET, POST, PUT, DELETE)
- Endpoint URL
- Headers and authentication
- Request/response mapping
3. Apex Action:
textPurpose: Execute custom Apex methods
When to Use:
- Complex business logic not achievable declaratively
- Platform event handling
- Custom integrations
4. Set Values:
textPurpose: Assign values to variables
Use Cases:
- Initialize variables
- Data transformation
- Conditional assignments
5. Response Action:
textPurpose: Structure the final output
Features:
- JSON path mapping
- Custom response structure
- Error handling
6. Calculation Action:
textPurpose: Perform mathematical operations
Examples:
- Pricing calculations
- Tax computations
- Statistical analysis
7. Conditional Block:
textPurpose: Branching logic
Structure:
IF condition THEN actions
ELSE IF condition THEN actions
ELSE actions
8. Loop Block:
textPurpose: Iterate over collections
Use Cases:
- Process multiple records
- Aggregate data
- Bulk operations
Execution Flow Example:
Quote Generation Integration Procedure:
text1. DataRaptor Extract: Get customer information
2. HTTP Action: Call pricing API
3. Calculation Action: Apply discount rules
4. Apex Action: Execute complex tax logic
5. Set Values: Structure quote data
6. DataRaptor Load: Save quote record
7. Response Action: Return quote details
Q14: How do you implement error handling in Integration Procedures?
Answer:
Robust error handling is critical for reliable Integration Procedures:
Error Handling Mechanisms:
1. Action-Level Error Handling:
textConfiguration:
- Execute on Error checkbox
- Error path designation
- Conditional execution based on errors
2. Try-Catch Pattern:
textStructure:
Try Block:
  - Main business logic
  - Potentially failing actions
Catch Block:
  - Error logging
  - Fallback actions
  - User notification
3. Conditional Branching:
JavaScriptIF %ErrorOccurred% == true THEN
  - Log error details
  - Send notification
  - Return user-friendly message
ELSE
  - Continue normal flow
END IF
4. Custom Error Responses:
JSON{
  "success": false,
  "errorMessage": "Unable to process request",
  "errorCode": "INTEGRATION_ERROR_001",
  "details": {
    "action": "HTTP Callout",
    "reason": "Timeout",
    "timestamp": "2024-01-15T10:30:00Z"
  }
}
Best Practices:
Logging and Monitoring:
text- Enable Debug Mode during development
- Use Platform Events for error tracking
- Implement structured logging
- Monitor execution statistics
User-Friendly Messages:
textTechnical Error: "HTTP 500 - Internal Server Error"
User Message: "We're experiencing technical difficulties.
               Please try again in a few minutes."
Retry Logic:
textImplementation:
1. Detect transient failures
2. Implement exponential backoff
3. Set maximum retry attempts
4. Log retry attempts
Real-World Scenario:
Payment Processing Integration:
text1. Call payment gateway API
2. IF timeout error:
   - Retry after 2 seconds
   - If still failing, return pending status
   - Send notification to admin
3. IF declined:
   - Return clear decline reason
   - No retry needed
4. IF success:
   - Update payment record
   - Send confirmation email
5. Always log transaction details for audit
Q15: What are Integration Procedure best practices for performance optimization?
Answer:
Optimizing Integration Procedure performance is crucial for user experience and system efficiency:
Performance Optimization Strategies:
1. Data Volume Management:
text✓ Fetch only required fields
✓ Limit query results with filters
✓ Use pagination for large datasets
✓ Implement DataRaptor Turbo Extract for bulk operations
✗ Avoid SELECT * queries
✗ Don't retrieve unnecessary related objects
2. Action Sequencing:
text✓ Order actions logically
✓ Perform fast operations first
✓ Parallel processing where possible
✓ Exit early on failures
✗ Avoid unnecessary sequential dependencies
3. Caching Strategies:
text✓ Cache frequently accessed data
✓ Use platform cache for static data
✓ Implement time-based cache expiration
✓ Store expensive calculations
4. HTTP Callout Optimization:
text✓ Set appropriate timeouts
✓ Implement connection pooling
✓ Use compression for large payloads
✓ Batch API calls when possible
✗ Avoid synchronous calls for non-critical operations
5. Minimize Round Trips:
textBefore Optimization:
- DataRaptor Extract: Get Account (1 call)
- DataRaptor Extract: Get Contact (1 call)
- DataRaptor Extract: Get Opportunities (1 call)
Total: 3 server calls

After Optimization:
- Single DataRaptor Extract with related objects
Total: 1 server call
Performance Metrics Table:
| Optimization | Before | After | Improvement |
|---|---|---|---|
| Reduced API Calls | 5 calls | 2 calls | 60% reduction |
| Data Fetch Time | 3.2s | 0.8s | 75% faster |
| Response Size | 250KB | 50KB | 80% smaller |
| Overall Execution | 5.5s | 1.2s | 78% faster |
6. Code-Level Optimizations:
text✓ Use Set Values instead of complex DataRaptors for simple assignments
✓ Leverage formulas for calculations instead of Apex when possible
✓ Avoid nested loops
✓ Use bulk-friendly patterns
Monitoring and Testing:
textTools:
- OmniStudio Debug Mode
- Salesforce Debug Logs
- Performance analysis in Setup
- Custom logging for metrics

KPIs to Track:
- Average execution time
- Peak execution time
- Error rate
- Resource consumption
Section 5: Real-World Scenarios and Advanced Topics
Q16: Describe a real-world scenario where you used OmniStudio to solve a complex business problem.
Answer:
Scenario: Healthcare Patient Onboarding System
Business Challenge:
A healthcare provider needed to streamline patient onboarding, which involved:
- Collecting patient demographics and medical history
- Insurance verification
- HIPAA compliance documentation
- Appointment scheduling
- Provider assignment
The existing process took 45 minutes per patient with multiple paper forms and system entries.
OmniStudio Solution:
1. OmniScript – Patient Onboarding:
textStep 1: Personal Information
- Name, DOB, Contact details
- Emergency contacts
- Prefilled from existing records via DataRaptor Extract

Step 2: Medical History
- Current medications
- Allergies
- Previous conditions
- Conditional questions based on responses

Step 3: Insurance Verification
- Integration Procedure calls insurance API
- Real-time verification
- Coverage display in FlexCard

Step 4: HIPAA Consent
- Digital signature capture
- Document generation via DocuSign integration
- Automatic record storage

Step 5: Appointment Scheduling
- Provider availability via Integration Procedure
- Calendar integration
- Confirmation email via platform event
2. FlexCards – Patient Dashboard:
text- Active prescriptions
- Upcoming appointments
- Insurance coverage summary
- Recent visits
- Quick actions (schedule, message provider)
3. Integration Procedures:
texta) Insurance Verification:
   - HTTP callout to insurance provider API
   - Parse eligibility response
   - Calculate copay amounts
   - Store verification results

b) Provider Matching:
   - Query available providers
   - Apply specialty matching logic
   - Calculate distance from patient
   - Return ranked provider list

c) Appointment Creation:
   - Create appointment record
   - Send calendar invites
   - Trigger reminder workflow
   - Update provider schedule
4. DataRaptors:
textExtract: Retrieve existing patient data
Transform: Format data for external systems
Load: Save comprehensive patient record with related data
Results:
| Metric | Before | After | Improvement |
|---|---|---|---|
| Onboarding Time | 45 min | 12 min | 73% reduction |
| Data Accuracy | 87% | 98% | 11% increase |
| Patient Satisfaction | 3.2/5 | 4.7/5 | 47% increase |
| Staff Efficiency | 8 patients/day | 22 patients/day | 175% increase |
| Paper Usage | 12 pages/patient | 0 pages | 100% reduction |
Key Success Factors:
- User-friendly interface reduced training time
- Real-time integrations eliminated wait times
- Automated workflows reduced errors
- Mobile-responsive design enabled remote onboarding
- HIPAA-compliant design met regulatory requirements
Q17: How do you handle authentication and security in OmniStudio components?
Answer:
Security is paramount in OmniStudio implementations, especially when handling sensitive data:
Security Layers:
1. Profile and Permission Sets:
textAccess Control:
- OmniStudio permissions
- Object-level security (CRUD)
- Field-level security (FLS)
- Custom permissions for specific features
2. Sharing Rules:
textRecord-Level Security:
- Organization-Wide Defaults (OWD)
- Sharing rules for data access
- Manual sharing when needed
- Territory-based sharing
3. Named Credentials:
textFor External Integrations:
- Store authentication credentials securely
- Support OAuth, Basic Auth, JWT
- Avoid hardcoded credentials
- Centralized credential management

Example Configuration:
Named Credential: PaymentGateway_API
Authentication: OAuth 2.0
Scope: payment.process, payment.query
4. Remote Site Settings:
textWhitelist external endpoints:
- Required for HTTP callouts
- Define allowed domains
- Prevent unauthorized connections
5. Data Encryption:
textPlatform Shield:
- Encrypt sensitive fields at rest
- Field audit trail
- Event monitoring
- Transaction security policies
6. CORS and CSP:
textCross-Origin Resource Sharing:
- Configure allowed origins
- Set appropriate headers
- Restrict external access

Content Security Policy:
- Define trusted content sources
- Prevent XSS attacks
- Inline script restrictions
Authentication Patterns:
A. User Authentication:
textExperience Cloud Sites:
- Login authentication
- Session management
- Multi-factor authentication (MFA)
- Single Sign-On (SSO)
B. API Authentication:
JavaScript// Integration Procedure HTTP Action
{
  "authentication": "Named Credential",
  "namedCredential": "ExternalSystem_Auth",
  "headers": {
    "Content-Type": "application/json",
    "X-API-Version": "v2"
  }
}
C. Token-Based Authentication:
textOAuth 2.0 Flow:
1. Request authorization
2. Receive access token
3. Include token in subsequent requests
4. Refresh token when expired
5. Revoke on logout
Security Best Practices:
1. Principle of Least Privilege:
text✓ Grant minimum necessary permissions
✓ Use custom permissions for granular control
✓ Regular permission audits
✓ Remove unused access
2. Input Validation:
text✓ Validate all user inputs
✓ Sanitize data before processing
✓ Use allowlists, not denylists
✓ Implement server-side validation
3. Secure Data Transmission:
text✓ Always use HTTPS
✓ Encrypt sensitive data
✓ Avoid exposing PII in URLs
✓ Implement request signing
4. Audit and Monitoring:
text✓ Enable field history tracking
✓ Monitor login history
✓ Review API usage
✓ Alert on suspicious activities
Real-World Implementation:
Banking Application Security:
textRequirements:
- GDPR compliance
- PCI DSS for payment data
- Multi-factor authentication
- Encrypted data storage

Implementation:
1. Customer login with SSO
2. MFA verification for transactions
3. Platform Shield encryption on account numbers
4. Named Credentials for payment gateway
5. Transaction security policies for anomaly detection
6. Audit trails for all data access
7. Automatic session timeout after 10 minutes
8. IP whitelisting for administrative access
Q18: What is the difference between client-side and server-side actions in OmniStudio?
Answer:
Understanding when to use client-side versus server-side processing is crucial for optimal performance and security:
Comparison Table:
| Aspect | Client-Side Actions | Server-Side Actions |
|---|---|---|
| Execution Location | User’s browser | Salesforce server |
| Examples | OmniScript interactions, FlexCard displays | Integration Procedures, DataRaptors |
| Performance | Faster for simple operations | Better for complex logic |
| Security | Less secure, visible to users | More secure, hidden logic |
| Network Dependency | Requires active connection | Handles intermittent connections |
| Governor Limits | JavaScript limits | Apex governor limits |
| Data Processing | Limited to displayed data | Access to all org data |
| User Experience | Immediate feedback | May have latency |
| Best For | UI interactions, validations | Data processing, integrations |
Client-Side Actions:
When to Use:
text✓ Form validations
✓ Show/hide logic
✓ UI state changes
✓ Simple calculations
✓ User interactions
✓ Navigation control
Advantages:
text+ Immediate response
+ Reduced server load
+ Better user experience for simple tasks
+ No server round trips
Limitations:
text- Security concerns (code visible to users)
- Limited to client-side data
- Can't access Salesforce database directly
- Browser compatibility issues
- JavaScript governor limits
Server-Side Actions:
When to Use:
text✓ Database operations (CRUD)
✓ Complex business logic
✓ External API integrations
✓ Secure computations
✓ Large data processing
✓ Transaction management
Advantages:
text+ Secure processing
+ Access to all Salesforce data
+ Complex logic execution
+ Transaction rollback capability
+ Centralized business rules
Limitations:
text- Network latency
- Server governor limits
- Increased server load
- Potential timeout issues
Optimal Architecture Pattern:
textClient-Side:
↓ User enters data
↓ Client-side validation (immediate feedback)
↓ Simple calculations
↓ UI state management
↓
Server-Side (Integration Procedure):
↓ Secure authentication
↓ Data validation
↓ Business rule execution
↓ Database operations
↓ External integrations
↓ Audit logging
↓
Client-Side:
↓ Display results
↓ Navigate to next step
Real-World Example:
Loan Application Process:
JavaScript// Client-Side Actions:
1. Validate email format
2. Show/hide fields based on loan type
3. Calculate estimated monthly payment
4. Enable/disable submit button
5. Display progress indicator

// Server-Side Actions (Integration Procedure):
1. Validate applicant eligibility
2. Call credit bureau API
3. Execute underwriting rules
4. Calculate actual interest rate
5. Create application record
6. Trigger approval workflow
7. Send confirmation email
8. Log audit trail

Result:
- Users get immediate feedback (client-side)
- Secure processing and data integrity (server-side)
- Optimal performance and user experience
Hybrid Approach Best Practices:
text1. Validate on client first, then server
2. Use client-side for UX, server-side for security
3. Minimize server calls, but don't compromise security
4. Implement loading indicators for server operations
5. Cache frequently used data client-side
6. Handle errors gracefully on both sides
Q19: How do you debug and troubleshoot OmniStudio components?
Answer:
Effective debugging is essential for maintaining OmniStudio applications:
Debugging Tools and Techniques:
1. OmniScript Debug Mode:
textActivation:
- Enable in OmniScript properties
- Shows Debug tab during execution
- Displays JSON state
- Tracks data flow

Information Provided:
- Current step data
- Variable values
- Validation errors
- Action responses
2. Browser Developer Console:
textChrome DevTools:
- Console logs
- Network requests
- JavaScript errors
- Element inspection
- Performance profiling

Key Commands:
console.log(omniJsonData); // View OmniScript state
console.log(this.omniJsonDef); // View definition
3. Salesforce Debug Logs:
textSetup → Debug Logs
- Create trace flag
- Set log levels
- Filter by user/action
- Analyze execution flow

Key Categories:
- CALLOUT: HTTP requests/responses
- DB: Database operations
- VALIDATION: Validation rules
- WORKFLOW: Process automation
4. Integration Procedure Debug:
textTools:
- Test tab in Integration Procedure
- Preview functionality
- Step-by-step execution
- Response inspection

Process:
1. Provide test input JSON
2. Run procedure
3. Examine each step output
4. Identify failure points
5. Adjust and retest
5. DataRaptor Preview:
textFeatures:
- Test with sample data
- View extracted/transformed data
- Validate formulas
- Check conditional logic

Usage:
1. Click Preview button
2. Select sample record or provide JSON
3. Review output
4. Verify field mappings
Common Issues and Solutions:
Issue 1: Data Not Displaying
textSymptoms:
- Empty FlexCards
- Blank OmniScript fields

Troubleshooting:
1. Check DataRaptor Extract mapping
2. Verify JSON path syntax
3. Confirm record access permissions
4. Review field-level security
5. Inspect debug logs for errors

Solution:
- Correct field API names
- Add missing permissions
- Fix merge field syntax
Issue 2: Integration Procedure Failures
textSymptoms:
- Error messages
- Partial data save
- Timeout issues

Troubleshooting:
1. Enable debug mode
2. Test each action individually
3. Check external API status
4. Review HTTP responses
5. Verify authentication

Solution:
- Implement error handling
- Add retry logic
- Increase timeout values
- Fix authentication issues
Issue 3: Performance Problems
textSymptoms:
- Slow loading
- Timeouts
- Poor user experience

Troubleshooting:
1. Check data volume
2. Review number of server calls
3. Analyze query efficiency
4. Monitor network latency

Solution:
- Optimize DataRaptor queries
- Implement caching
- Reduce payload size
- Use pagination
Issue 4: Validation Errors
textSymptoms:
- Cannot proceed to next step
- Unexpected error messages

Troubleshooting:
1. Review validation rules
2. Check required fields
3. Examine conditional logic
4. Test edge cases

Solution:
- Adjust validation conditions
- Improve error messages
- Fix conditional dependencies
Debugging Checklist:
text✓ Enable debug mode
✓ Check debug logs
✓ Verify permissions
✓ Test with multiple users
✓ Review integration responses
✓ Validate field mappings
✓ Check conditional logic
✓ Test all navigation paths
✓ Verify data transformations
✓ Monitor performance metrics
Advanced Debugging:
Custom Logging:
JavaScript// In Custom Lightning Web Component
console.log('OmniScript State:', JSON.stringify(this.omniJsonData));

// In Apex
System.debug(LoggingLevel.ERROR, 'Integration Response: ' + response);
Postman Testing:
textFor Integration Procedures:
1. Export procedure definition
2. Set up Postman collection
3. Test with various inputs
4. Validate responses
5. Document test cases
Q20: How do you migrate OmniStudio components between environments?
Answer:
Migrating OmniStudio components requires careful planning and execution:
Migration Methods:
1. OmniStudio Deployment Tool:
textBuilt-in Tool:
- Export from source org
- Import to target org
- Handles dependencies
- Version control

Steps:
1. Navigate to OmniStudio → Deployment
2. Select components to export
3. Download deployment package
4. Upload to target environment
5. Activate components
2. Change Sets:
textSalesforce Native:
- Include OmniScript/FlexCard metadata
- Add dependent components
- Deploy via change sets

Limitations:
- Manual dependency management
- Potential version conflicts
- Limited rollback options
3. Salesforce CLI / DevOps:
Bash# Export metadata
sfdx force:source:retrieve -m OmniScript,OmniDataTransform

# Deploy to target
sfdx force:source:deploy -m OmniScript,OmniDataTransform -u targetOrg

# Validate before deployment
sfdx force:source:deploy -m OmniScript --checkonly
4. Packages:
textManaged/Unmanaged Packages:
- Bundle related components
- Version control
- Easier distribution
- Namespace considerations
Migration Strategy:
Phase 1: Preparation
text1. Document all components
2. Map dependencies
3. Create deployment checklist
4. Backup target environment
5. Schedule deployment window
Phase 2: Dependency Mapping
textComponent Dependencies:
OmniScript → DataRaptors, Integration Procedures, FlexCards
DataRaptors → Salesforce Objects, Fields
Integration Procedures → Apex Classes, Named Credentials, DataRaptors
FlexCards → DataRaptors, Integration Procedures

Checklist:
✓ Custom objects and fields
✓ Apex classes
✓ Named credentials
✓ Remote site settings
✓ Static resources
✓ Custom labels
✓ Permission sets
Phase 3: Export Process
text1. Export in correct order:
   a. Supporting metadata (objects, fields)
   b. Apex classes
   c. DataRaptors
   d. Integration Procedures
   e. FlexCards
   f. OmniScripts

2. Document versions being deployed
3. Create deployment notes
4. Package configurations
Phase 4: Import Process
text1. Deploy supporting metadata first
2. Import components in dependency order
3. Validate each component
4. Activate components
5. Run smoke tests
6. Document any issues
Phase 5: Post-Deployment
text1. Activate OmniScripts
2. Test functionality
3. Verify integrations
4. Check permissions
5. Monitor for errors
6. User acceptance testing
Best Practices:
Version Control:
text✓ Use Git for source control
✓ Tag releases
✓ Document changes
✓ Maintain changelog
✓ Branch strategy (dev, QA, prod)
Testing Strategy:
textDevelopment Sandbox:
- Unit testing
- Component validation
- Initial debugging

QA Sandbox:
- Integration testing
- End-to-end scenarios
- Performance testing

UAT:
- User acceptance testing
- Real-world scenarios
- Final validation

Production:
- Phased rollout if possible
- Monitoring
- Rollback plan ready
Common Pitfalls and Solutions:
| Pitfall | Solution |
|---|---|
| Missing dependencies | Use deployment analyzer tool |
| Permission issues | Export and deploy permission sets |
| Hard-coded IDs | Use dynamic references or custom metadata |
| Named credential missing | Document and create manually |
| Activation failures | Check all dependencies are deployed |
| Version conflicts | Deactivate old versions first |
Rollback Plan:
textPreparation:
1. Backup current components
2. Document component versions
3. Export active configurations

Execution:
1. Deactivate new versions
2. Reactivate previous versions
3. Restore configurations
4. Test functionality
5. Notify users
CI/CD Integration:
YAML# Sample deployment pipeline
stages:
  - validate
  - test
  - deploy

validate:
  script:
    - sfdx force:source:deploy --checkonly --testlevel RunLocalTests

test:
  script:
    - run_integration_tests.sh

deploy:
  script:
    - sfdx force:source:deploy -m OmniScript,OmniDataTransform
  only:
    - main
Section 6: Performance Optimization and Best Practices
Q21: What are the best practices for designing high-performance OmniScripts?
Answer:
Performance Optimization Best Practices:
1. Minimize Server Calls:
textBefore Optimization:
- Step 1: DataRaptor Extract for Account
- Step 2: DataRaptor Extract for Contact
- Step 3: DataRaptor Extract for Opportunities
Total: 3 server calls

After Optimization:
- Single Integration Procedure or DataRaptor with related data
Total: 1 server call
Performance Gain: 60-70% faster
2. Data Loading Strategies:
text✓ Load only required fields
✓ Use lazy loading for large datasets
✓ Implement pagination for lists
✓ Cache static data client-side
✓ Prefetch predictable data

Example:
// Instead of loading all 50 fields
SELECT Id, Name, Email, Phone, Address...

// Load only essential fields
SELECT Id, Name, Email, Phone
3. Conditional Element Loading:
text✓ Show/hide instead of creating/destroying elements
✓ Use conditional steps to skip unnecessary pages
✓ Defer loading of optional sections
✓ Implement progressive disclosure

Impact:
- Reduced initial load time
- Lower memory consumption
- Better user experience
4. Element Optimization:
textAvoid:
✗ Multiple Type-Ahead blocks on one step (heavy data load)
✗ Large tables without pagination
✗ Excessive formula calculations
✗ Redundant elements

Prefer:
✓ Radio buttons over Type-Ahead for small lists
✓ Picklists over Type-Ahead when possible
✓ Server-side calculations for complex logic
✓ Reusable blocks for repeated patterns
5. JavaScript Optimization:
JavaScript// Inefficient
for (let i = 0; i < array.length; i++) {
    heavyOperation(array[i]);
}

// Optimized
const length = array.length;
for (let i = 0; i < length; i++) {
    heavyOperation(array[i]);
}

// Better - avoid unnecessary operations
if (needsProcessing) {
    processArray(array);
}
6. Response Payload Optimization:
textReduce JSON Size:
- Remove unnecessary data
- Compress large responses
- Use abbreviations for keys where appropriate
- Implement field filtering

Before: 250KB response
After: 65KB response
Load time: 3.2s → 0.9s
Performance Metrics to Monitor:
| Metric | Target | Action if Exceeded |
|---|---|---|
| Initial Load Time | < 2 seconds | Reduce prefetch data |
| Step Transition | < 1 second | Optimize validations |
| Server Call Response | < 3 seconds | Optimize queries/callouts |
| Total Completion Time | < 5 minutes | Simplify process |
| Memory Usage | < 50MB | Reduce data caching |
7. Asset Optimization:
textImages and Files:
✓ Compress images (use WebP format)
✓ Lazy load non-critical images
✓ Use SVG for icons
✓ Implement CDN for static resources
✗ Avoid base64 encoding large images in JSON
8. Layout Optimization:
text✓ Use Lightning Design System (SLDS) components
✓ Minimize custom CSS
✓ Avoid excessive nesting
✓ Use CSS classes instead of inline styles
✓ Optimize for mobile (responsive design)
Real-World Performance Case Study:
Insurance Quote Generation OmniScript:
textInitial Performance:
- Load time: 8.5 seconds
- 7 server calls
- 320KB data transfer
- User completion time: 12 minutes

Optimizations Applied:
1. Combined 3 DataRaptors into 1 Integration Procedure
2. Implemented client-side calculation for premium estimates
3. Added pagination to coverage options table
4. Lazy loaded document upload section
5. Reduced image sizes by 80%
6. Cached product definitions client-side

Results:
- Load time: 2.1 seconds (75% improvement)
- 2 server calls (71% reduction)
- 85KB data transfer (73% reduction)
- User completion time: 5 minutes (58% improvement)
- Customer satisfaction: +35%
Q22: How do you handle bulk data operations in OmniStudio?
Answer:
Bulk data operations require special consideration in OmniStudio:
Strategies for Bulk Operations:
1. DataRaptor Turbo Extract:
textUse Cases:
- Extracting thousands of records
- Generating reports
- Batch processing

Benefits:
- Optimized query performance
- Reduced server load
- Faster execution
- Handles large datasets efficiently

Configuration:
- Use Turbo Extract type
- Implement appropriate filters
- Limit fields to essential data
- Use indexing on filter fields
2. Batch Processing in Integration Procedures:
textPattern:
1. Query records in batches (200-500 at a time)
2. Process batch through loop
3. Aggregate results
4. Continue to next batch

Example Structure:
- Set Values: Initialize variables
- Loop Block: Iterate batches
  - DataRaptor Extract: Get batch
  - Transform data
  - DataRaptor Load: Save results
- Response: Return summary
3. Asynchronous Processing:
textFor large operations:
✓ Use Platform Events
✓ Trigger batch Apex jobs
✓ Queue long-running processes
✓ Provide status updates to users

User Experience:
1. Submit bulk request
2. Receive confirmation
3. Continue working
4. Notification when complete
4. DataRaptor Bulk Operations:
textBulk Load Configuration:
- Use DataRaptor Load with multiple records
- Implement upsert for existing records
- Handle relationships efficiently
- Enable rollback on error

Example JSON Input:
{
  "records": [
    {"Name": "Account 1", "Industry": "Technology"},
    {"Name": "Account 2", "Industry": "Finance"},
    ...
  ]
}
Performance Comparison:
| Approach | 100 Records | 1000 Records | 10000 Records |
|---|---|---|---|
| Individual Calls | 45s | 7.5min | 75min |
| Batch (200) | 8s | 45s | 7.5min |
| Turbo Extract | 2s | 8s | 45s |
| Async Batch | 15s* | 1min* | 5min* |
*Processing time, user not blocked
5. Pagination for User Interface:
JavaScript// Display large datasets
{
  "pageSize": 25,
  "currentPage": 1,
  "totalRecords": 1250,
  "totalPages": 50,
  "records": [...] // Current page only
}

Benefits:
- Faster initial load
- Reduced memory usage
- Better user experience
- On-demand data loading
6. Governor Limit Considerations:
textSalesforce Limits:
- SOQL queries: 100 per transaction
- DML statements: 150 per transaction
- Heap size: 6MB (sync), 12MB (async)
- CPU time: 10s (sync), 60s (async)

Strategies:
✓ Bulkify operations
✓ Use collections efficiently
✓ Minimize loops
✓ Leverage set-based operations
✗ Avoid SOQL in loops
Real-World Implementation:
Mass Policy Renewal Process:
textRequirement: Process 50,000 policy renewals

Solution Architecture:

1. User Interface (OmniScript):
   - Select renewal criteria
   - Preview affected policies (paginated)
   - Confirm renewal action
   - Submit request

2. Orchestration (Integration Procedure):
   - Validate criteria
   - Count affected policies
   - Create batch job record
   - Trigger platform event

3. Batch Processing (Apex Batch):
   - Process 200 policies per batch
   - Calculate renewal premiums
   - Generate renewal documents
   - Send notifications

4. Progress Tracking (FlexCard):
   - Display processing status
   - Show completion percentage
   - List completed/failed renewals
   - Download results

Results:
- 50,000 policies processed in 2 hours
- User not blocked during processing
- 99.8% success rate
- Real-time status updates
- Comprehensive error handling
Q23: What are OmniStudio design patterns you frequently use?
Answer:
Common Design Patterns:
1. Wizard Pattern (Multi-Step Process):
textStructure:
Step 1: Information Collection
Step 2: Validation & Review
Step 3: Additional Details (conditional)
Step 4: Summary & Confirmation
Step 5: Success/Next Steps

Use Cases:
- Application processes
- Onboarding workflows
- Complex data entry
- Guided troubleshooting

Best Practices:
✓ Show progress indicator
✓ Allow backward navigation
✓ Save progress incrementally
✓ Provide clear instructions
✓ Implement exit survey if abandoned
2. Master-Detail Pattern:
textImplementation:
- FlexCard displays master record
- Action launches OmniScript for details
- OmniScript can create/edit related records
- Return to FlexCard upon completion

Example:
Account FlexCard → Create Opportunity OmniScript
- Pre-populated with account data
- Collect opportunity details
- Create related contacts
- Return to updated account view
3. Search and Select Pattern:
textComponents:
1. Type-Ahead or Search Element
2. Results Display (Table/FlexCard)
3. Selection Mechanism
4. Action on Selection

Flow:
User searches → Results displayed → User selects → OmniScript proceeds
with selected data

Optimization:
- Debounce search input (300-500ms)
- Limit results (10-20 initially)
- Implement pagination
- Cache frequent searches
4. Prefill and Edit Pattern:
textUse Case: Update existing records

Flow:
1. OmniScript loads with DataRaptor Extract (prefill)
2. User modifies necessary fields
3. Unchanged fields retain original values
4. DataRaptor Load updates only changed fields

Benefits:
- Reduces user input effort
- Maintains data consistency
- Faster completion time
- Better user experience
5. Approval Workflow Pattern:
textStructure:
Submission OmniScript:
- Collect request details
- Attach supporting documents
- Submit for approval

Approval FlexCard:
- Display request summary
- Show approval history
- Approve/Reject actions

Review OmniScript:
- Detailed review interface
- Comment capability
- Approval routing logic

Implementation:
- Integration Procedure handles workflow
- Platform Events for notifications
- Email alerts to approvers
- Status tracking via FlexCard
6. Configuration-Driven Pattern:
textApproach:
- Store configuration in Custom Metadata
- OmniScript adapts based on configuration
- No code changes for business rule updates

Example:
Product Configuration:
- Product fields defined in metadata
- Validation rules in metadata
- Pricing rules in metadata
- OmniScript builds UI dynamically

Benefits:
- Rapid configuration changes
- No deployments for rule updates
- Self-service for administrators
- Consistent across products
7. Error Recovery Pattern:
textImplementation:
1. Detect error condition
2. Log error details
3. Provide user-friendly message
4. Offer recovery options:
   - Retry operation
   - Save and exit
   - Contact support
   - Skip and continue

Example:
try {
    callExternalAPI();
} catch (error) {
    logError(error);
    displayRecoveryOptions();
    if (userSelects === 'retry') {
        retryWithBackoff();
    }
}
8. Progressive Disclosure Pattern:
textConcept:
Show only essential information initially, reveal more as needed

Implementation:
Step 1: Basic information (always shown)
Step 2: Detailed information (if user selects "more details")
Step 3: Expert options (if user selects "advanced")

Benefits:
- Simpler interface for basic users
- Full power for advanced users
- Reduced cognitive load
- Faster completion for simple cases
Pattern Selection Guide:
| Business Requirement | Recommended Pattern |
|---|---|
| Complex data entry | Wizard Pattern |
| Related record management | Master-Detail Pattern |
| Finding existing records | Search and Select Pattern |
| Updating existing data | Prefill and Edit Pattern |
| Multi-level authorization | Approval Workflow Pattern |
| Flexible business rules | Configuration-Driven Pattern |
| External integration | Error Recovery Pattern |
| Varying user expertise | Progressive Disclosure Pattern |
Q24: How do you implement multi-language support in OmniStudio?
Answer:
Multi-Language Implementation Strategies:
1. Custom Labels:
textSetup:
- Create custom labels for all text
- Add translations for supported languages
- Reference in OmniStudio components

OmniScript Usage:
Text Element: {!$Label.WelcomeMessage}
Button Label: {!$Label.NextButton}
Error Message: {!$Label.ValidationError}

Benefits:
✓ Centralized translation management
✓ Salesforce native functionality
✓ Easy updates without redeployment
✓ Professional translation workflow
2. Language Detection:
textAutomatic Detection:
- User's Salesforce language preference
- Browser language settings
- Geolocation-based default

Implementation in Integration Procedure:
1. Detect user language
2. Set language variable
3. Use for conditional content
4. Load appropriate labels

Example:
{
  "userLanguage": "es",
  "welcomeMessage": "{!$Label.Welcome_Spanish}",
  "contentDirection": "ltr"
}
3. Dynamic Content Loading:
textPattern:
- Store translated content in Custom Metadata
- Query based on language code
- Populate OmniScript dynamically

Custom Metadata Structure:
Object: Translation__mdt
Fields:
- Key__c (e.g., "welcome_message")
- Language__c (e.g., "en", "es", "fr")
- Value__c (translated text)
- Category__c (grouping)

DataRaptor Extract:
Filter: Language__c = {!userLanguage}
Output: Map of key-value pairs
4. Date and Number Formatting:
textLocale-Specific Formatting:

Dates:
- US: MM/DD/YYYY
- EU: DD/MM/YYYY
- ISO: YYYY-MM-DD

Numbers:
- US: 1,234.56
- EU: 1.234,56

Currency:
- USD: $1,234.56
- EUR: €1.234,56
- GBP: £1,234.56

Implementation:
Use Salesforce locale settings or custom formatting functions
5. Right-to-Left (RTL) Support:
textFor languages like Arabic, Hebrew:

CSS Adjustments:
.rtl {
    direction: rtl;
    text-align: right;
}

OmniScript Configuration:
- Set CSS class based on language
- Mirror layouts for RTL
- Adjust icon positions
- Test thoroughly with RTL content
6. FlexCard Localization:
textApproach:
1. Create language-specific FlexCard states
2. Use conditional rendering based on user language
3. Store translated content in custom objects

Example Structure:
State: Default (English)
State: Spanish
State: French

Automatic state selection based on user preference
Implementation Example:
Multi-Language Customer Onboarding:
JavaScript// Integration Procedure - Language Setup
{
  "Step1_GetUserLanguage": {
    "type": "Set Values",
    "values": {
      "userLang": "$User.LanguageLocaleKey",
      "supportedLangs": ["en_US", "es", "fr", "de", "ja"]
    }
  },

  "Step2_LoadTranslations": {
    "type": "DataRaptor Extract",
    "dataRaptor": "GetTranslations",
    "inputMap": {
      "language": "{userLang}"
    },
    "outputMap": {
      "labels": "translations"
    }
  },

  "Step3_FormatSettings": {
    "type": "Set Values",
    "values": {
      "dateFormat": "{labels.dateFormat}",
      "direction": "{labels.textDirection}",
      "currencySymbol": "{labels.currency}"
    }
  }
}
HTML<!-- OmniScript Element with Custom Label -->
<Text>
  <Label>{!$Label.FirstName}</Label>
  <HelpText>{!$Label.FirstNameHelp}</HelpText>
</Text>

<Number>
  <Label>{!$Label.AnnualIncome}</Label>
  <FormatLocale>{!userLocale}</FormatLocale>
</Number>
Translation Management Best Practices:
text✓ Centralize all text in custom labels
✓ Use consistent naming conventions
✓ Implement translation review process
✓ Test with native speakers
✓ Consider cultural differences
✓ Handle text expansion (German +35%, Spanish +20%)
✓ Support special characters and diacritics
✓ Maintain translation glossary
✓ Version control translations
✗ Don't hardcode any text
✗ Avoid slang or idioms that don't translate
Performance Considerations:
| Approach | Load Time | Maintenance | Scalability |
|---|---|---|---|
| Custom Labels | Fast | Easy | Excellent |
| Custom Metadata | Medium | Moderate | Very Good |
| Custom Objects | Slower | Complex | Good |
| External Service | Slowest | Easy | Excellent |
Q25: What are OmniStudio Calculation Matrices and Procedures, and when would you use them?
Answer:
Calculation Matrices and Procedures are specialized OmniStudio tools for complex calculations and decision-making logic.
Calculation Matrices:
Purpose:
- Multi-dimensional decision tables
- Rule-based calculations
- Complex pricing logic
- Rate lookups
Structure:
textInput Dimensions → Processing Logic → Output Values

Example: Insurance Premium Calculation
Dimensions:
- Age Range
- Coverage Type
- Geographic Region
- Risk Category

Output:
- Base Premium
- Modifier Percentage
- Final Premium
Use Cases:
1. Pricing Calculations:
textProduct Pricing Matrix:
Quantity | Customer Tier | Discount %
---------|---------------|------------
1-10     | Bronze        | 5%
1-10     | Silver        | 10%
1-10     | Gold          | 15%
11-50    | Bronze        | 10%
11-50    | Silver        | 15%
11-50    | Gold          | 20%
50+      | Bronze        | 15%
50+      | Silver        | 20%
50+      | Gold          | 25%
2. Risk Assessment:
textHealthcare Risk Score:
Age | BMI | Smoker | Exercise | Risk Score
----|-----|--------|----------|------------
<30 | <25 | No     | Yes      | Low
<30 | 25-30| No    | Yes      | Low-Med
30-50| <25 | No     | Yes      | Medium
30-50| 25-30| Yes   | No       | High
50+  | 30+ | Yes    | No       | Very High
3. Eligibility Determination:
textLoan Eligibility Matrix:
Credit Score | Income | DTI Ratio | Employment | Eligible
-------------|--------|-----------|------------|----------
750+         | 75k+   | <30%      | 2+ years   | Yes
750+         | 75k+   | 30-40%    | 2+ years   | Conditional
700-749      | 50k+   | <30%      | 2+ years   | Conditional
<700         | Any    | Any       | Any        | No
Calculation Procedures:
Purpose:
- Sequential calculation logic
- Multi-step computations
- Complex formulas
- Business rule execution
Components:
text1. Input Variables
2. Calculation Steps (formulas, lookups, conditions)
3. Intermediate Results
4. Final Output
Implementation Example:
Mortgage Payment Calculator:
JavaScript// Calculation Procedure Structure
{
  "inputs": {
    "loanAmount": 350000,
    "interestRate": 3.5,
    "loanTermYears": 30,
    "propertyTaxRate": 1.2,
    "insuranceAnnual": 1200,
    "hoaMonthly": 150
  },

  "calculations": [
    {
      "step": 1,
      "name": "monthlyInterestRate",
      "formula": "interestRate / 100 / 12"
    },
    {
      "step": 2,
      "name": "numberOfPayments",
      "formula": "loanTermYears * 12"
    },
    {
      "step": 3,
      "name": "principalAndInterest",
      "formula": "loanAmount * (monthlyInterestRate * (1 + monthlyInterestRate)^numberOfPayments) / ((1 + monthlyInterestRate)^numberOfPayments - 1)"
    },
    {
      "step": 4,
      "name": "propertyTaxMonthly",
      "formula": "(loanAmount * propertyTaxRate / 100) / 12"
    },
    {
      "step": 5,
      "name": "insuranceMonthly",
      "formula": "insuranceAnnual / 12"
    },
    {
      "step": 6,
      "name": "totalMonthlyPayment",
      "formula": "principalAndInterest + propertyTaxMonthly + insuranceMonthly + hoaMonthly"
    }
  ],

  "output": {
    "monthlyPayment": 2456.78,
    "principalInterestPortion": 1576.50,
    "taxInsuranceHOA": 880.28,
    "totalPaid": 884440.80,
    "totalInterest": 567640.80
  }
}
Integration with OmniStudio:
In OmniScripts:
text1. Collect user inputs
2. Call Calculation Matrix/Procedure
3. Display results
4. Use outputs for downstream processing

Element Types:
- Calculation Matrix Element
- Calculation Procedure Action
- Integration Procedure calling Calc Matrix
In Integration Procedures:
textUse Case: Complex quote generation

Flow:
1. DataRaptor Extract: Get customer data
2. Calculation Matrix: Determine pricing tier
3. Calculation Procedure: Calculate detailed pricing
4. Apex Action: Apply business rules
5. DataRaptor Load: Save quote
6. Response: Return quote details
Decision Matrix Pattern:
textWhen to Use Calculation Matrix:
✓ Multiple input variables
✓ Lookup-based decisions
✓ Rate tables
✓ Categorical outputs
✓ Frequently changing rules

When to Use Calculation Procedure:
✓ Sequential calculations
✓ Mathematical formulas
✓ Dependent calculations
✓ Complex business logic
✓ Intermediate results needed
Performance and Maintenance:
| Aspect | Calculation Matrix | Calculation Procedure |
|---|---|---|
| Best For | Lookups, tables | Formulas, sequences |
| Complexity | Low-Medium | Medium-High |
| Maintenance | Easy (table update) | Moderate (formula logic) |
| Performance | Very Fast | Fast |
| Scalability | Excellent | Very Good |
| Business User Friendly | Yes | Requires technical knowledge |
Real-World Scenario:
Insurance Premium Calculation System:
textComponents:

1. Calculation Matrix: "PremiumRateTable"
   Inputs: Age, Gender, Coverage Amount, Health Class
   Output: Base Rate per $1000 coverage

2. Calculation Procedure: "PremiumCalculator"
   Steps:
   a) Get base rate from matrix
   b) Calculate coverage units (Amount / 1000)
   c) Apply base premium (baseRate * coverageUnits)
   d) Add rider premiums
   e) Apply discounts (multi-policy, non-smoker)
   f) Calculate taxes and fees
   g) Determine payment frequency adjustment
   h) Calculate final premium

3. OmniScript Integration:
   - User enters: Age, Gender, Coverage Amount, Health Info
   - Calls Calculation Procedure
   - Displays: Monthly/Annual premium breakdown
   - Shows: What-if scenarios
   - Proceeds: To application if user accepts

Result:
- Accurate, consistent pricing
- Instant quote generation
- Easy rate updates (matrix only)
- Complex logic handled systematically
- Audit trail of calculations
Section 7: Additional Essential Questions
Q26: What are the differences between LWC OmniScripts and the legacy Angular-based OmniScripts?
Answer:
Salesforce transitioned OmniScripts from Angular to Lightning Web Components (LWC):
| Feature | Angular OmniScripts | LWC OmniScripts |
|---|---|---|
| Technology | AngularJS | Lightning Web Components |
| Performance | Slower | 30-40% faster |
| Salesforce Standard | Legacy | Current standard |
| Security | Locker Service | Lightning Locker, more secure |
| Browser Compatibility | Limited | Modern browsers |
| Development | Being phased out | Actively developed |
| Mobile | Less optimized | Fully optimized |
| Customization | Limited | Extensive |
| Future Support | Deprecated | Fully supported |
Migration Considerations:
- Salesforce recommends migrating to LWC
- Most features available in both
- Some custom JavaScript may need updates
- Test thoroughly after migration
Q27: How do you implement audit trails and compliance tracking in OmniStudio?
Answer:
Audit Trail Strategies:
1. Field History Tracking:
textEnable on critical objects:
- Track field changes
- User and timestamp captured
- Available for reporting
- Limited to 20 fields per object
2. Platform Events:
JavaScript// Publish audit event from Integration Procedure
{
  "type": "Platform Event",
  "event": "OmniStudio_Audit__e",
  "fields": {
    "User__c": "{!$User.Id}",
    "Action__c": "Quote Generated",
    "Component__c": "QuoteOmniScript_v2",
    "Details__c": "{!quoteDetails}",
    "Timestamp__c": "{!$System.Now}"
  }
}

// Subscribe and process
trigger OmniStudioAuditHandler on OmniStudio_Audit__e (after insert) {
    // Log to custom object
    // Send to external system
    // Real-time monitoring
}
3. Custom Audit Object:
textObject: OmniStudio_Audit_Log__c
Fields:
- User__c (Lookup to User)
- OmniScript_Name__c
- Version__c
- Action__c (Opened, Completed, Abandoned)
- Data_Snapshot__c (Long Text Area, JSON)
- Duration__c
- IP_Address__c
- Timestamp__c

Benefits:
- Complete control over retention
- Custom reporting
- Integration with analytics
- Long-term compliance storage
4. Integration Procedure Logging:
textBest Practice Pattern:

Start:
  - Log: Process Initiated
  - Capture: Input parameters

Processing:
  - Log: Each major step
  - Capture: Intermediate results

Completion:
  - Log: Success/Failure
  - Capture: Final output
  - Duration: Total time

Error:
  - Log: Error details
  - Capture: Stack trace
  - Notify: Administrator
5. Document Generation and Storage:
textFor Compliance:
- Generate PDF snapshots of completed OmniScripts
- Store in Salesforce Files
- Link to related records
- Include digital signatures
- Timestamp and version control

Implementation:
OmniScript → Generate Document Action → Salesforce Files
Retention: Per compliance requirements (HIPAA, SOX, GDPR)
Compliance Requirements:
GDPR:
textRequirements:
- Right to access (data export)
- Right to deletion (purge capability)
- Data minimization (collect only necessary)
- Consent tracking

Implementation:
- Track consent in OmniScript
- Enable data export Integration Procedure
- Implement delete functionality
- Minimize data retention
HIPAA (Healthcare):
textRequirements:
- Audit trails of PHI access
- User authentication
- Encryption at rest and in transit
- Access controls

Implementation:
- Platform Shield encryption
- SSO with MFA
- Comprehensive audit logging
- Role-based access
SOX (Financial):
textRequirements:
- Financial transaction audit trails
- Change management tracking
- User access logs
- Data integrity

Implementation:
- Immutable audit logs
- Version control
- Approval workflows
- Segregation of duties
Q28: What is the role of Expression Sets and Decision Matrices in OmniStudio?
Answer:
Expression Sets:
Purpose:
- Define reusable business logic
- Complex conditional expressions
- Centralized rule management
Structure:
textIF condition THEN output
ELSE IF condition THEN output
ELSE default output

Example:
IF (Age >= 65 AND Income < 30000) THEN "Eligible for Senior Discount"
ELSE IF (Age >= 65 AND Income >= 30000) THEN "Eligible for Standard Rate"
ELSE IF (MilitaryVeteran == TRUE) THEN "Eligible for Veteran Discount"
ELSE "Standard Rate"
Use Cases:
- Eligibility determination
- Dynamic pricing
- Conditional content display
- Routing logic
Decision Matrices:
Simpler than Calculation Matrices, focused on decisions rather than calculations.
Example: Customer Tier Assignment
| Annual Spend | Years as Customer | Support Level | Tier |
|---|---|---|---|
| $100k+ | Any | Any | Platinum |
| $50k-99k | 5+ | Premium | Gold |
| $50k-99k | <5 | Standard | Silver |
| $10k-49k | Any | Standard | Bronze |
Implementation in Integration Procedures:
JavaScript{
  "type": "Expression Set",
  "name": "DetermineTier",
  "inputs": {
    "annualSpend": 75000,
    "yearsAsCustomer": 7,
    "supportLevel": "Premium"
  },
  "output": {
    "tier": "Gold",
    "discountPercentage": 15,
    "dedicatedRep": true
  }
}
Q29: How do you handle versioning and backward compatibility in OmniStudio solutions?
Answer:
Versioning Strategy:
1. Semantic Versioning:
textFormat: MAJOR.MINOR
- Major: Breaking changes, new process flow
- Minor: Additions, non-breaking changes

Examples:
1.0 → Initial release
1.1 → Added optional field
1.2 → Enhanced validation
2.0 → Redesigned user interface
2. Backward Compatibility:
textMaintain compatibility by:
✓ Not removing existing fields
✓ Making new fields optional
✓ Keeping same data structures
✓ Supporting old API contracts
✓ Providing migration path

Breaking changes require new major version
3. Deprecation Strategy:
textPhase 1: Announce deprecation
  - Document in release notes
  - Notify users via email
  - Set sunset date

Phase 2: Parallel operation
  - Run old and new versions
  - Migrate users gradually
  - Monitor adoption

Phase 3: Deactivation
  - Deactivate old version
  - Redirect to new version
  - Maintain for emergency rollback

Phase 4: Archive
  - Keep for reference
  - Remove from production after retention period
4. Data Migration:
textWhen data structures change:

1. Create migration script
2. Test in sandbox
3. Backup existing data
4. Execute migration
5. Validate results
6. Monitor for issues

Example:
Old structure: Single "Address" field
New structure: Street, City, State, Zip separate

Migration: Parse and split existing data
5. API Versioning:
textFor Integration Procedures exposed as APIs:

Approach:
- Version in procedure name: GetCustomer_v1, GetCustomer_v2
- Maintain both until migration complete
- Document differences
- Set deprecation timeline

Response format:
{
  "version": "2.0",
  "data": {...},
  "deprecated": false
}
Q30: What are OmniStudio Actions and how do they differ from other components?
Answer:
OmniStudio Actions are reusable, configurable components that encapsulate specific functionality.
Key Characteristics:
- Pre-built or custom business logic
- Reusable across OmniScripts, FlexCards, Integration Procedures
- Configurable parameters
- Version controlled
Types of Actions:
1. Standard Actions:
text- Navigate to Record
- Create Record
- Update Record
- Delete Record
- Send Email
- Generate Document
2. Custom Actions:
textBuilt using:
- Integration Procedures
- DataRaptors
- Apex classes
- External services

Example: "Calculate Credit Score"
Inputs: SSN, Address
Processing: Call credit bureau API
Output: Credit score, report URL
Comparison with Other Components:
| Feature | OmniStudio Action | Integration Procedure | DataRaptor |
|---|---|---|---|
| Reusability | Highest | High | High |
| Scope | Specific task | Multi-step process | Data operation |
| Complexity | Low-Medium | High | Low-Medium |
| Configuration | Parameters | Steps/Logic | Field mapping |
| Use In | Multiple components | Server-side only | Data operations |
Use Cases:
1. “Submit for Approval” Action:
textConfiguration:
- Input: Record ID, Approver ID
- Logic: Create approval record, Send notification
- Output: Approval ID, Status

Used In:
- OmniScript "Submit" button
- FlexCard "Approve" action
- Automated workflow trigger
2. “Calculate Tax” Action:
textConfiguration:
- Input: Amount, Location
- Logic: Call tax API, Apply rules
- Output: Tax amount, Breakdown

Reused:
- Quote generation OmniScript
- Invoice creation Integration Procedure
- Order summary FlexCard
Benefits:
- Consistency across applications
- Faster development (build once, use many times)
- Easier maintenance (update in one place)
- Reduced testing effort
Performance Optimization Summary Table
| Optimization Area | Impact | Implementation Effort | Priority |
|---|---|---|---|
| Reduce Server Calls | High | Medium | High |
| Implement Caching | High | Medium | High |
| Optimize DataRaptors | Medium-High | Low | High |
| Lazy Loading | Medium | Medium | Medium |
| Pagination | Medium | Low | Medium |
| Asset Compression | Low-Medium | Low | Low |
| Code Optimization | Medium | High | Medium |
Conclusion: Mastering OmniStudio for Interview Success
As we’ve explored throughout this comprehensive guide, OmniStudio represents a powerful, transformative suite of tools within the Salesforce ecosystem. From OmniScripts that create seamless guided experiences to DataRaptors that handle complex data operations, from Integration Procedures orchestrating business logic to FlexCards delivering contextual information—each component plays a crucial role in building sophisticated, industry-specific applications.
Key Takeaways:
1. Foundation Understanding:
- OmniStudio is more than just tools—it’s a complete framework for digital transformation
- Declarative development reduces time-to-market and maintenance overhead
- Integration with Salesforce Industry Clouds provides powerful out-of-the-box capabilities
2. Technical Mastery:
- Understanding the distinctions between components (OmniScripts vs. Flow, client-side vs. server-side processing)
- Implementing best practices for performance, security, and scalability
- Leveraging design patterns to solve common business problems efficiently
3. Real-World Application:
- The ability to translate business requirements into technical solutions
- Balancing user experience with system performance
- Implementing compliance and audit requirements systematically
4. Continuous Learning:
- OmniStudio is evolving—stay current with Salesforce releases
- Engage with the Trailblazer Community for insights and support
- Practice building solutions in developer environments
Interview Preparation Tips:
Before the Interview:
- Build sample projects demonstrating key OmniStudio components
- Prepare 2-3 real-world scenarios you’ve solved with OmniStudio
- Review performance optimization techniques
- Practice explaining technical concepts in business terms
During the Interview:
- Listen carefully to requirements before proposing solutions
- Ask clarifying questions about business context
- Explain your thought process, not just the answer
- Discuss trade-offs between different approaches
- Reference specific features and capabilities
Demonstrating Expertise:
- Share metrics from implementations (performance improvements, time savings)
- Discuss how you’ve handled challenges and errors
- Explain your approach to testing and quality assurance
- Show awareness of security and compliance considerations
Beyond the Interview:
- Technical Skills: Deep understanding of OmniStudio architecture and capabilities
- Business Acumen: Ability to translate business needs into technical solutions
- Communication: Clear explanation of complex concepts to diverse audiences
- Problem-Solving: Creative approaches to unique challenges
- Continuous Improvement: Commitment to learning and optimizing
Success with OmniStudio extends beyond technical knowledge. The most valuable professionals combine:
About RizeX Labs
At RizeX Labs, we’re committed to empowering technology professionals with the knowledge and skills needed to excel in today’s rapidly evolving digital landscape. Our mission is to provide comprehensive, practical resources that bridge the gap between theory and real-world application.
Whether you’re preparing for your next interview, upskilling for a new project, or exploring emerging technologies, RizeX Labs is your trusted partner in professional development.
Internal Linking Opportunities:
External Linking Opportunities:
Quick Summary
Salesforce OmniStudio is a high-demand skill in 2026, enabling developers to build scalable, efficient, and low-code applications. With tools like OmniScripts, DataRaptors, and Integration Procedures, professionals can create powerful enterprise solutions. Mastering these concepts along with real interview scenarios will significantly boost your chances of landing a Salesforce role.