Let’s be honest — managing a growing sales team without a solid CRM is like trying to navigate a cross-country road trip without GPS. You might get there eventually, but you’ll waste time, miss turns, and burn through resources you didn’t need to spend.
That’s exactly why Salesforce Sales Cloud has become the gold standard for sales teams worldwide. Whether you’re a scrappy startup closing your first ten deals or an enterprise organization managing thousands of accounts across multiple regions, Sales Cloud gives you the tools to track leads, manage your opportunity pipeline, automate repetitive tasks, and ultimately close more deals faster.
But here’s the thing: Salesforce is powerful, and powerful tools come with a learning curve. If you’ve ever logged into a Salesforce org for the first time and felt overwhelmed by the sheer number of tabs, objects, and configuration options, you’re not alone. That’s exactly why we created this Salesforce Sales Cloud tutorial — to walk you through everything from foundational concepts to advanced best practices, step by step.
In this guide, you’ll learn:
- What Salesforce Sales Cloud actually is (and how it differs from other Salesforce products)
- The key Salesforce Sales Cloud features that drive real sales results
- How to set up Sales Cloud from scratch, even if you’re a first-time admin
- How lead management in Salesforce works, from capture to conversion
- How to build and optimize your opportunity pipeline for maximum visibility
- Proven best practices that separate top-performing Salesforce orgs from the rest
Whether you’re a sales rep, a sales manager, a Salesforce administrator, or a business owner evaluating CRM options, this tutorial has something for you. Let’s dive in.
What Is Salesforce Sales Cloud?
The Big Picture
Salesforce Sales Cloud is a cloud-based Customer Relationship Management (CRM) platform designed specifically for sales teams. It’s one of several “clouds” (products) within the broader Salesforce ecosystem — alongside Service Cloud, Marketing Cloud, Commerce Cloud, and others — but it remains the company’s flagship offering and its most widely adopted product.
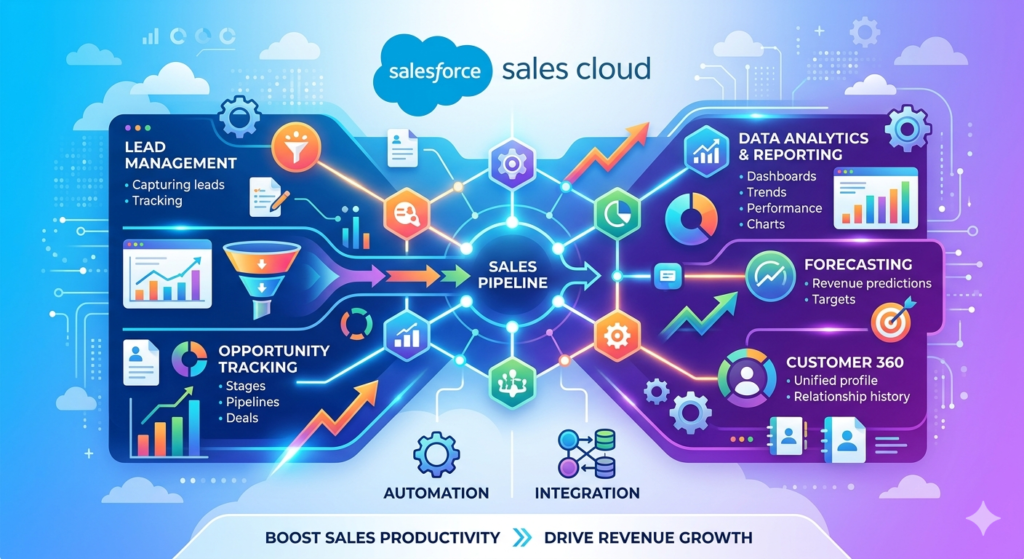
At its core, Sales Cloud helps organizations:
- Track and manage leads from first contact to closed deal
- Organize customer and prospect data in a single, centralized platform
- Automate sales processes to reduce manual work and human error
- Forecast revenue with data-driven accuracy
- Collaborate across teams with shared visibility into every deal
Sales Cloud vs. Other Salesforce Products
A common point of confusion for beginners is understanding where Sales Cloud ends and other Salesforce products begin. Here’s a quick breakdown:
| Product | Primary Purpose | Primary Users |
|---|---|---|
| Sales Cloud | Lead-to-cash sales processes | Sales reps, sales managers, revenue ops |
| Service Cloud | Customer support & case management | Support agents, service managers |
| Marketing Cloud | Marketing automation & campaigns | Marketers, demand gen teams |
| Experience Cloud | Customer/partner portals | External users, partners |
| Revenue Cloud | CPQ & billing | Sales ops, finance teams |
Sales Cloud is specifically built around the sales lifecycle — from the moment a potential customer enters your system as a lead to the moment they sign a contract and become a paying customer (and beyond).
Who Should Use Sales Cloud?
Sales Cloud is designed for organizations of virtually every size and industry. That said, you’ll get the most value if:
- You have a dedicated sales team (even a team of one)
- You need to track deals through defined stages
- You want to eliminate spreadsheet-based sales tracking
- You need visibility into sales performance and forecasting
- You’re looking to scale your sales operations without adding proportional headcount
Now that you understand what Sales Cloud is and who it’s for, let’s explore the features that make it so powerful.
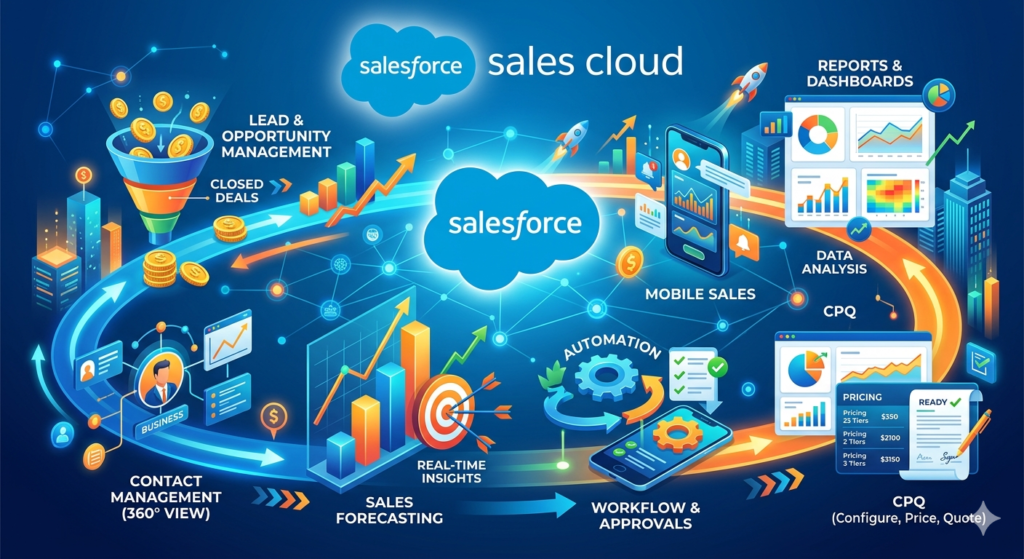
Key Salesforce Sales Cloud Features
One of the reasons Salesforce dominates the CRM market is the sheer breadth and depth of its feature set. In this section of our Salesforce Sales Cloud tutorial, we’ll break down the most important Salesforce Sales Cloud features you need to know — organized by category.
1. Lead Management
Lead management is arguably the most foundational feature in Sales Cloud. It allows you to:
- Capture leads from web forms, email, social media, events, and third-party integrations
- Assign leads automatically to the right sales reps based on territory, product interest, round-robin rules, or custom criteria
- Score and qualify leads to prioritize the hottest prospects
- Track lead activity — every email, call, meeting, and touchpoint — in a single timeline
- Convert leads into Accounts, Contacts, and Opportunities with a single click
We’ll go much deeper into lead management in Salesforce in a dedicated section below.
2. Account and Contact Management
Once a lead converts, it becomes an Account (the company) and a Contact (the person). Sales Cloud gives you a 360-degree view of every account and contact, including:
- Complete interaction history (emails, calls, meetings, notes)
- Related opportunities, cases, and contracts
- Organizational hierarchies (parent/child account relationships)
- Social media insights and news feeds
- Key stakeholder mapping within complex buying committees
Real-world use case: Imagine you’re an account executive managing 50 active accounts. Instead of digging through email threads and calendar invites to remember what happened in your last conversation with a prospect, you simply open their Contact record in Salesforce. Every touchpoint — across every team member who’s interacted with them — is right there. That’s the power of centralized account management.
3. Opportunity Management and Pipeline Tracking
Opportunities are the heart of Sales Cloud. An Opportunity represents a potential deal — a specific product or service you’re trying to sell to a specific account. Opportunity management features include:
- Stage tracking (e.g., Prospecting → Qualification → Proposal → Negotiation → Closed Won/Lost)
- Probability and expected revenue calculations at each stage
- Customizable sales processes for different product lines or business units
- Opportunity teams (assigning multiple reps or roles to a single deal)
- Competitor tracking on each opportunity
- Products and price books to associate specific line items with deals
The opportunity pipeline view gives sales managers instant visibility into every active deal, its current stage, its expected close date, and its dollar value. We’ll cover this in detail in a dedicated section.
4. Sales Forecasting
Sales Cloud’s forecasting tools allow managers and executives to:
- Roll up opportunity data into forecasts by team, territory, or product line
- Categorize deals by forecast category (Pipeline, Best Case, Commit, Closed)
- Compare forecasts against quota to identify gaps early
- Override forecasts at the rep, manager, or executive level based on judgment
- Track forecast accuracy over time to improve predictability
Pro tip: Accurate forecasting depends entirely on accurate pipeline data. If your reps aren’t updating opportunity stages and close dates consistently, your forecast will be unreliable — no matter how sophisticated the tool. We’ll address this in the Best Practices section.
5. Workflow Automation and Process Builder (Flows)
One of the most transformative Salesforce Sales Cloud features is the ability to automate repetitive sales processes. With Salesforce Flow (which has replaced the legacy Process Builder and Workflow Rules), you can:
- Auto-assign leads based on criteria
- Send email alerts when opportunities reach specific stages
- Create follow-up tasks automatically after meetings or calls
- Update fields based on trigger conditions (e.g., auto-set priority based on deal size)
- Enforce sales processes with validation rules and guided paths
Real-world use case: A SaaS company sets up a Flow that automatically creates a follow-up task for the account executive three days after a demo is logged. It also sends an email alert to the sales manager if any opportunity over $50,000 sits in the “Proposal” stage for more than 14 days without activity. These automations ensure nothing falls through the cracks — without anyone having to manually monitor every deal.
6. Reports and Dashboards
Salesforce’s reporting engine is one of its strongest features. With Sales Cloud, you can:
- Build custom reports on virtually any combination of data (leads, opportunities, activities, accounts, etc.)
- Create visual dashboards with charts, gauges, tables, and metrics
- Schedule report delivery via email to stakeholders
- Filter reports by date range, owner, territory, product, stage, and custom fields
- Track KPIs like conversion rates, average deal size, sales cycle length, and win rates
Key reports every Sales Cloud org should have:
- Lead conversion rate by source
- Opportunity pipeline by stage (in dollar value)
- Win/loss analysis by rep, product, or competitor
- Activities per rep (calls, emails, meetings)
- Forecast accuracy trend
7. Mobile Access with the Salesforce Mobile App
Sales reps are rarely chained to a desk. The Salesforce mobile app gives them full access to Sales Cloud on iOS and Android, including the ability to:
- View and update leads, contacts, accounts, and opportunities
- Log calls and meeting notes on the go
- Access dashboards and reports
- Receive push notifications for important events
- Use voice-to-text for faster data entry
8. Einstein AI (Artificial Intelligence)
Salesforce Einstein is an AI layer built directly into Sales Cloud. Key capabilities include:
- Einstein Lead Scoring — automatically scores leads based on historical conversion data
- Einstein Opportunity Scoring — predicts the likelihood of closing each deal
- Einstein Activity Capture — automatically logs emails and calendar events from Gmail or Outlook
- Einstein Conversation Insights — analyzes sales call recordings for keywords, trends, and coaching opportunities
- Einstein Forecasting — uses AI to generate more accurate revenue predictions
9. Integration Capabilities
Sales Cloud doesn’t exist in a vacuum. It integrates with hundreds of tools your team already uses:
- Email: Gmail, Outlook (bi-directional sync)
- Marketing automation: Pardot (Marketing Cloud Account Engagement), HubSpot, Marketo
- Communication: Slack, Microsoft Teams
- Document management: DocuSign, Conga, PandaDoc
- Data enrichment: ZoomInfo, Clearbit, D&B
- Custom integrations: Via REST/SOAP APIs, MuleSoft, or AppExchange apps
10. AppExchange
Salesforce’s AppExchange is essentially an app store with over 7,000 pre-built apps and integrations. Many are specifically designed for sales teams — from territory mapping tools to advanced analytics to gamification platforms.
Step-by-Step Setup Guide
Now let’s get practical. This section of our Salesforce Sales Cloud tutorial walks you through the essential setup steps for a new Sales Cloud implementation. Whether you’re a first-time admin or a consultant setting up an org for a client, follow this sequence.
Step 1: Define Your Sales Process Before You Touch Salesforce
This is the most important step, and it happens outside of Salesforce. Before you configure anything, you need to clearly define:
- Your lead lifecycle: Where do leads come from? What qualifies a lead? When does a lead get passed to sales?
- Your sales stages: What are the discrete steps a deal goes through from first conversation to closed?
- Your data requirements: What information do you need to capture about leads, accounts, contacts, and opportunities?
- Your team structure: How are reps organized? By territory? Product line? Account size?
- Your key metrics: What do you need to measure to know if your sales team is performing well?
Practical tip: Sit down with your sales leadership and top-performing reps. Map out their actual sales process on a whiteboard before you start configuring Salesforce. The technology should reflect your process — not the other way around.
Step 2: Set Up Your Salesforce Org
If you don’t already have a Salesforce org, you’ll need to:
- Choose your edition. Sales Cloud comes in several editions — Starter, Professional, Enterprise, and Unlimited. For most growing businesses, Enterprise Edition offers the best balance of features and flexibility.
- Provision your org. Work with Salesforce (or a certified partner) to purchase licenses and provision your environment.
- Access Setup. Once your org is provisioned, log in and click the gear icon → Setup to access the administration console.
Step 3: Configure Company Settings
In Setup, configure the basics:
- Company Information: Company name, address, fiscal year, default currency, locale, time zone
- Business Hours: Define your organization’s operating hours (relevant for SLAs and escalation rules later)
Navigation: Setup → Company Settings → Company Information
Step 4: Customize Your Sales Stages
Out of the box, Salesforce comes with default Opportunity stages. You’ll almost certainly want to customize these to match your actual sales process.
To customize Opportunity stages:
- Go to Setup → Object Manager → Opportunity → Fields & Relationships → Stage
- Edit the picklist values to match your sales stages
- Assign a probability percentage and forecast category to each stage
Example stage configuration:
| Stage | Probability | Forecast Category |
|---|---|---|
| Prospecting | 10% | Pipeline |
| Discovery/Qualification | 25% | Pipeline |
| Demo/Presentation | 50% | Best Case |
| Proposal/Quote | 65% | Best Case |
| Negotiation | 80% | Commit |
| Closed Won | 100% | Closed |
| Closed Lost | 0% | Omitted |
Step 5: Set Up Lead Statuses and Assignment Rules
Customize Lead Status values:
- Go to Setup → Object Manager → Lead → Fields & Relationships → Status
- Define statuses that reflect your lead lifecycle (e.g., New, Contacted, Qualified, Unqualified, Nurture)
Configure Lead Assignment Rules:
- Go to Setup → Lead Assignment Rules
- Create a new rule with criteria-based entries (e.g., assign leads from the West Coast to Rep A, leads from the East Coast to Rep B)
- Activate the rule
Step 6: Create Custom Fields and Page Layouts
Every organization has unique data requirements. Salesforce lets you add custom fields to any object.
To add a custom field:
- Go to Setup → Object Manager → [Object Name] → Fields & Relationships → New
- Choose the field type (text, number, picklist, date, currency, formula, etc.)
- Define field properties (label, length, required vs. optional, help text)
- Set field-level security (which profiles can see/edit the field)
- Add the field to page layouts
Common custom fields for sales teams:
- Lead Source Detail (more granular than the standard Lead Source)
- Industry Vertical
- Competitor
- Reason Lost (picklist on Opportunity)
- Next Step (text field on Opportunity)
- Decision Timeline
- Budget Range
- Contract Length
Customize Page Layouts:
- Go to Setup → Object Manager → [Object Name] → Page Layouts
- Drag and drop fields, sections, and related lists to design the ideal layout for your users
- Assign different layouts to different profiles if needed (e.g., SDRs see a different Opportunity layout than Account Executives)
Step 7: Set Up Users, Roles, and Profiles
Create user accounts:
- Go to Setup → Users → New User
- Enter user details, assign a license type (Salesforce), and select a profile
- Assign a role within the role hierarchy
Configure the Role Hierarchy:
The role hierarchy determines data visibility — who can see whose records.
Example:
textVP of Sales
├── Sales Manager - West
│   ├── Rep A
│   └── Rep B
└── Sales Manager - East
    ├── Rep C
    └── Rep D
Users higher in the hierarchy can see records owned by users below them.
Profiles and Permission Sets:
- Profiles define baseline permissions (what objects users can access, what fields they can see/edit, what tabs are visible)
- Permission Sets grant additional permissions on top of profiles (a more flexible approach)
Practical tip: Use the principle of least privilege. Start with restrictive profiles and add permissions via Permission Sets as needed. It’s much easier to grant access than to revoke it after data has already been exposed.
Step 8: Import Your Data
If you’re migrating from another CRM (or from spreadsheets), you’ll need to import your existing data. Salesforce offers several tools:
- Data Import Wizard — Best for simple imports of up to 50,000 records (leads, contacts, accounts)
- Data Loader — A desktop application for larger or more complex imports (up to millions of records)
- Third-party tools — Dataloader.io, Jitterbit, or MuleSoft for enterprise-grade migrations
Data import best practices:
- Clean your data first. Deduplicate, standardize formatting, and remove incomplete records before importing.
- Map fields carefully. Ensure your source columns map correctly to Salesforce fields.
- Test with a small batch. Import 50-100 records first, verify accuracy, then import the full dataset.
- Preserve record ownership. Map records to the correct Salesforce users during import.
Step 9: Set Up Email Integration
Connect Salesforce to your team’s email for seamless communication tracking:
- Salesforce for Outlook / Outlook Integration — Sync emails, contacts, and calendar events between Outlook and Salesforce
- Gmail Integration — Use the Salesforce Chrome extension or Einstein Activity Capture to sync Gmail activity
- Einstein Activity Capture — Automatically logs emails and meetings without manual effort
Step 10: Build Reports and Dashboards
Create the essential reports and dashboards your team needs from day one:
- Go to Reports → New Report
- Choose a report type (e.g., Opportunities, Leads, Activities)
- Add filters, groupings, and columns
- Save and add to a dashboard
Starter dashboard components to build:
- Open pipeline by stage (bar chart)
- Leads by status (donut chart)
- Closed won revenue this month vs. quota (gauge)
- Activities logged this week by rep (table)
- Top 10 opportunities by value (table)
Step 11: Configure Automation
Set up essential automations using Salesforce Flow:
- Lead auto-response email: Send an instant acknowledgment when a lead submits a web form
- Task creation: Auto-create a follow-up task when a lead is assigned
- Stage-based notifications: Alert the sales manager when a high-value deal moves to Negotiation
- Overdue opportunity alerts: Notify reps when an opportunity’s close date has passed without a stage update
Step 12: Train Your Team and Launch
The best Salesforce configuration in the world is worthless if your team doesn’t use it. Invest in training:
- Role-based training sessions (separate sessions for reps, managers, and admins)
- Quick reference guides with screenshots for common tasks
- In-app guidance using Salesforce’s built-in Guidance Center or tools like WalkMe
- Office hours where users can drop in with questions during the first few weeks
Lead Management in Salesforce
Let’s go deeper into one of the most critical aspects of Sales Cloud: lead management in Salesforce. This is where your revenue engine starts, and getting it right has a direct impact on pipeline generation and revenue.
What Is a Lead in Salesforce?
A Lead in Salesforce represents a potential prospect — someone who has expressed interest in your product or service but hasn’t yet been qualified as a real sales opportunity. Leads are separate from Contacts and Accounts; they exist in their own object until they’re converted.
Think of it this way:
- Lead = “We think this person might be interested. We need to find out.”
- Contact + Account + Opportunity = “This person is interested, they work at a real company, and there’s a specific deal we’re working.”
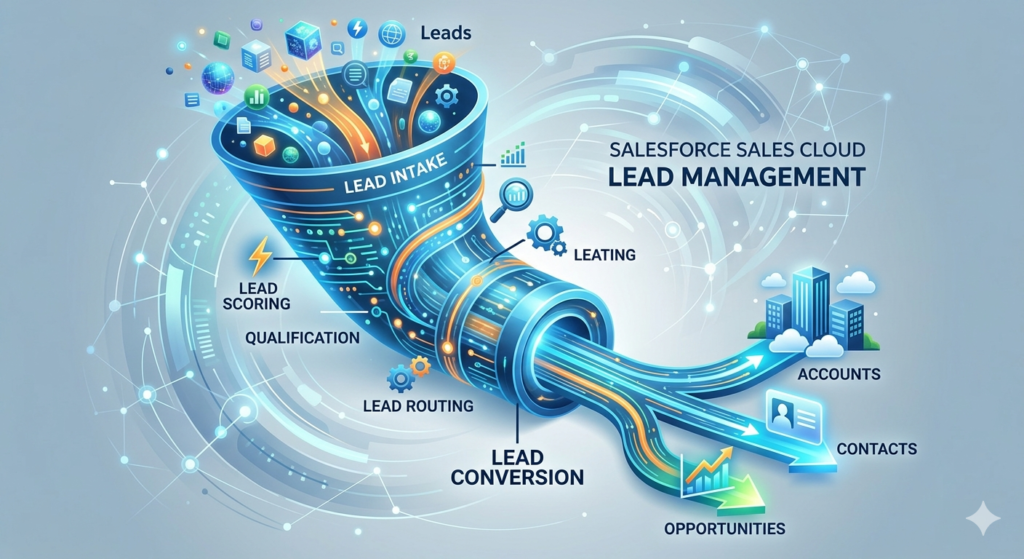
The Lead Lifecycle
A well-designed lead management process in Salesforce typically follows this lifecycle:
1. Lead Capture →
Leads enter Salesforce through various channels:
- Web-to-Lead forms on your website
- Third-party integrations (marketing automation, chatbots, event platforms)
- Manual entry by SDRs or sales reps
- List imports (from events, purchased lists, etc.)
- API integrations with advertising platforms
2. Lead Enrichment →
Once a lead enters Salesforce, enrich it with additional data:
- Use tools like ZoomInfo or Clearbit to auto-fill company size, industry, and title
- Use validation rules to ensure required fields are populated
- Use Einstein Lead Scoring to auto-assign a quality score
3. Lead Assignment →
Route leads to the right rep automatically:
- Assignment Rules — route based on geography, company size, product interest, etc.
- Round-robin assignment — distribute leads evenly using Flow or AppExchange tools
- Queue-based assignment — place leads in a shared queue for reps to claim
4. Lead Qualification →
Reps work the lead to determine if it’s a real opportunity:
- Does the lead have budget? Authority? Need? Timeline? (BANT)
- Do they match your Ideal Customer Profile (ICP)?
- Are they actively evaluating solutions?
5. Lead Conversion →
When a lead is qualified, convert it:
- Click “Convert” on the Lead record
- Salesforce automatically creates an Account (the company), a Contact (the person), and optionally an Opportunity (the deal)
- All historical activity on the Lead is preserved and carried over
6. Nurture or Disqualify →
Not every lead converts immediately:
- Leads that aren’t ready to buy should be marked as “Nurture” and sent back to marketing for continued engagement
- Leads that don’t fit should be marked as “Unqualified” with a reason (wrong industry, too small, no budget, etc.)
Lead Management Best Practices
- Respond fast. Research consistently shows that responding to a lead within 5 minutes dramatically increases conversion rates. Use auto-response emails and real-time notifications to ensure speed.
- Don’t let leads rot. Set up alerts for leads that haven’t been contacted within 24 hours of assignment.
- Enforce data quality. Use validation rules to require key fields (e.g., email, company, phone) before a lead can be saved.
- Track lead sources religiously. Understanding which channels produce the highest-quality leads allows you to optimize marketing spend. Use both the standard Lead Source field and a custom “Lead Source Detail” field for granularity.
- Define your MQL criteria clearly. Marketing and sales should agree on what constitutes a Marketing Qualified Lead (MQL) before leads are passed to sales. Codify this in Salesforce using lead scoring or specific field values.
Real-World Use Case: B2B SaaS Company
A B2B SaaS company with a 10-person sales team implements the following lead management system in Salesforce:
- Web-to-Lead captures demo requests from their website
- Einstein Lead Scoring assigns a score of 0-100 based on historical conversion patterns
- A Flow auto-assigns leads scored 70+ to the sales team via round-robin and creates a “Call within 1 hour” task
- Leads scored below 70 are routed to a nurture queue and synced to their marketing automation platform for drip campaigns
- SDRs qualify leads using a custom qualification framework built into the Lead page layout
- Qualified leads are converted into Opportunities with a pre-set stage of “Discovery”
Result: Lead response time dropped from 4 hours to 18 minutes, and lead-to-opportunity conversion rates improved by 34% in the first quarter.
Understanding the Opportunity Pipeline
If leads are where your sales process begins, the opportunity pipeline is where deals are won or lost. Understanding how to build, manage, and optimize your pipeline in Salesforce Sales Cloud is essential for predictable revenue growth.
What Is an Opportunity Pipeline?
An opportunity pipeline is a visual representation of all your active deals, organized by their current stage in your sales process. It shows you:
- How many deals are in each stage
- The total dollar value at each stage
- Expected close dates for each deal
- Which deals are healthy (progressing) and which are stalled (stuck)
In Salesforce, you can view your pipeline in several ways:
- Kanban View — A drag-and-drop board view where each column represents a stage (similar to Trello)
- List View — A traditional table view with sortable columns
- Pipeline Inspection — An AI-enhanced pipeline view available in newer Salesforce editions
- Reports and Dashboards — Custom pipeline reports with charts and filters
Anatomy of an Opportunity Record
Each Opportunity record in Salesforce contains key information:
- Opportunity Name — A descriptive name (e.g., “Acme Corp — Enterprise License — Q2 2025”)
- Account — The company you’re selling to
- Contact Roles — The people involved in the buying decision (economic buyer, champion, technical evaluator, etc.)
- Stage — Where the deal currently sits in your sales process
- Amount — The expected deal value
- Close Date — When you expect the deal to close
- Probability — The likelihood of winning (often auto-set based on stage)
- Forecast Category — How the deal should be counted in forecasts
- Next Steps — A free-text field describing the next action needed
- Products — Specific line items associated with the deal (if using Products and Price Books)
- Activity History — All logged calls, emails, meetings, and tasks
How to Build a Healthy Pipeline
Building a healthy pipeline isn’t just about having a lot of deals — it’s about having the right deals in the right stages with accurate data.
Pipeline health indicators:
- Coverage ratio: Your total pipeline value should be 3-4x your quota to account for natural attrition (deals that slip or are lost)
- Stage distribution: A healthy pipeline has a pyramid shape — more deals in early stages and fewer in late stages. If your pipeline is top-heavy (lots of deals stuck in Negotiation), something is wrong.
- Age by stage: Every stage should have an expected duration. If a deal sits in “Qualification” for 60 days when the average is 14, it’s either stalled or miscategorized.
- Close date accuracy: Reps should update close dates as new information emerges. A pipeline full of overdue close dates is a red flag.
Pipeline Views and Inspection in Salesforce
Kanban View:
- Navigate to the Opportunities tab
- Switch to Kanban View using the toggle in the top-right corner
- Drag and drop opportunities between stages
- Click on any deal card to see summary details
The Kanban view is incredibly intuitive and is a favorite for pipeline review meetings.
Pipeline Inspection (Enterprise Edition and above):
Pipeline Inspection is a more advanced view that includes:
- Week-over-week pipeline changes (deals added, moved, removed)
- AI-driven insights from Einstein (deal risk signals, activity gaps)
- Inline editing for fast updates
- Historical trending to see how pipeline has changed over time
Custom Pipeline Report:
- Go to Reports → New Report
- Select “Opportunities” report type
- Add columns: Opportunity Name, Account, Stage, Amount, Close Date, Owner
- Add a filter: Stage NOT EQUAL TO “Closed Won, Closed Lost”
- Group by Stage
- Summarize Amount (SUM)
- Save and add a bar chart showing pipeline value by stage
Running Effective Pipeline Reviews
The opportunity pipeline is most valuable when it’s actively reviewed and managed. Here’s how top-performing sales teams use Salesforce for pipeline reviews:
Weekly 1:1 pipeline reviews (Manager + Rep):
- Review every opportunity in the rep’s pipeline
- Validate stage accuracy — “Is this deal really in Proposal, or are you still in Discovery?”
- Update close dates based on buyer signals
- Identify stalled deals and agree on next steps to re-engage
- Flag at-risk deals for manager intervention or executive sponsorship
Weekly team pipeline review (Manager + Full Team):
- Review pipeline totals vs. quota
- Celebrate recent wins
- Share lessons learned from recent losses
- Identify cross-sell or upsell opportunities
- Discuss competitive intelligence
Monthly/Quarterly forecast review (VP/CRO + Managers):
- Roll up pipeline data into forecasts
- Identify gaps between forecast and target
- Allocate resources (e.g., SE support, executive engagement) to high-value deals
- Adjust territory assignments or lead distribution if needed
Real-World Use Case: Pipeline Optimization
A mid-market software company noticed that their pipeline reports showed a healthy total dollar value, but they were consistently missing their quarterly targets. After analyzing their Salesforce data, they discovered:
- 42% of opportunities had close dates in the past (never updated)
- The average deal sat in “Negotiation” for 38 days, compared to an industry benchmark of 15 days
- 23% of opportunities had no logged activity in the past 30 days
Actions taken:
- Implemented a validation rule requiring reps to update the close date whenever they change the stage
- Created a Flow that sends an alert to the manager if an opportunity has no activity for 14 days
- Added a “Last Activity Date” column to the team pipeline dashboard
- Began enforcing mandatory pipeline hygiene during weekly 1:1s
Result: Within two quarters, forecast accuracy improved from 61% to 84%, and the average sales cycle decreased by 11 days.
Best Practices for Using Sales Cloud
You’ve seen the features. You’ve walked through the setup. Now let’s talk about the habits, strategies, and principles that separate organizations that use Salesforce from organizations that thrive on Salesforce.
1. Adopt a “If It’s Not in Salesforce, It Didn’t Happen” Culture
This is the single most important best practice. Salesforce is only as good as the data inside it. If reps are tracking deals in their heads, in spreadsheets, or in sticky notes, your pipeline, forecasts, and reports are all unreliable.
How to enforce this:
- Make Salesforce the system of record for all sales activity
- Tie compensation and deal credit to Salesforce data (no Opportunity record = no commission)
- Lead by example — managers should run all reviews, forecasts, and team meetings from Salesforce dashboards
- Remove friction — use email integration, mobile app, and automation to make data entry as painless as possible
2. Keep It Simple (Especially at the Start)
One of the most common mistakes in Salesforce implementations is over-engineering. New admins get excited about the platform’s capabilities and build complex automations, dozens of custom fields, and elaborate approval processes — before anyone has even logged in.
Start lean:
- Begin with 5-7 Opportunity stages (you can add more later)
- Only create custom fields that your team will actually use in the first 90 days
- Build 3-5 essential reports and one summary dashboard
- Add complexity incrementally based on user feedback and evolving needs
3. Invest in Data Quality
Bad data is the #1 killer of CRM adoption. If reps don’t trust the data in Salesforce, they won’t use it.
Data quality strategies:
- Duplicate management: Enable Salesforce’s built-in duplicate rules, or use an AppExchange tool like Cloudingo or DemandTools
- Validation rules: Require key fields (e.g., close date, amount, stage, next steps) to be populated before saving
- Standardized picklists: Use picklist fields instead of free text whenever possible to ensure consistency
- Regular audits: Schedule monthly data quality reviews to catch and fix issues
- Decay prevention: Set up alerts for records that haven’t been updated in a defined period
4. Automate, But Thoughtfully
Automation is one of the most powerful Salesforce Sales Cloud features — but poorly designed automation can create confusion, generate noise, and erode trust.
Good automation:
- Auto-creating a follow-up task when a lead is assigned ✓
- Sending a Slack notification when a deal moves to Closed Won ✓
- Updating a field based on a clear, consistent trigger ✓
Bad automation:
- Sending 5 email alerts for every minor record update ✗
- Auto-advancing opportunity stages without rep confirmation ✗
- Creating complex, multi-step Flows that no one can troubleshoot when they break ✗
Rule of thumb: Every automation should either save time or prevent errors. If it doesn’t do one of those things, question whether you need it.
5. Leverage Einstein AI (But Don’t Blindly Trust It)
Einstein’s AI capabilities — lead scoring, opportunity scoring, activity capture, and forecasting — can significantly enhance your team’s productivity and decision-making. But AI is a tool, not a replacement for human judgment.
Best practices for Einstein:
- Use Einstein Lead Scoring to prioritize leads, but don’t skip leads just because they have a low score — the model isn’t perfect
- Use Opportunity Scoring as a conversation starter in pipeline reviews (“Einstein says this deal is at risk — what’s going on?”)
- Review and retrain scoring models periodically as your data and sales process evolve
- Use Activity Capture to reduce manual logging, but verify that auto-logged activities are associating to the correct records
6. Customize for Your Users, Not for Your Admins
It’s tempting to build Salesforce the way you think it should work. But the people who matter most are the end users — the reps and managers who interact with it daily.
User-centric design principles:
- Minimize clicks. Reduce the number of fields and steps required to complete common tasks.
- Use record types and page layouts to show only relevant fields for each user role.
- Leverage Lightning App Builder to create custom app pages with the components users need most.
- Gather feedback regularly. Run quarterly surveys or hold feedback sessions to identify pain points.
- Measure adoption. Use Salesforce’s built-in login history and adoption dashboards to track who’s using the system — and who isn’t.
7. Plan for Scalability
Even if you’re starting small, design your Salesforce org with growth in mind:
- Use naming conventions for custom fields, reports, Flows, and other metadata (e.g., prefix custom fields with a category like “Sales_” or “Ops_”)
- Document your configuration — maintain a living document that describes your objects, fields, automations, and integrations
- Use a sandbox environment for testing changes before deploying to production
- Stay current with Salesforce releases — Salesforce pushes three major releases per year (Spring, Summer, Winter), each with new features and enhancements
- Consider a Center of Excellence — as your org grows, establish a governance model for change management, user requests, and technical debt
8. Integrate Sales Cloud with Your Broader Tech Stack
Sales Cloud delivers the most value when it’s connected to the tools your team uses every day:
- Marketing automation → Salesforce: Ensure MQLs flow seamlessly from your marketing platform into Salesforce as leads
- Salesforce → Slack/Teams: Push deal notifications, alerts, and approvals into your team’s communication channels
- Salesforce → CPQ/Billing: Connect to Revenue Cloud or a CPQ tool for seamless quote-to-cash
- Salesforce → Customer Success: When a deal closes, automatically create an onboarding record or hand off to your Customer Success team in Service Cloud
- Enrichment tools → Salesforce: Auto-populate firmographic and contact data to reduce manual research
9. Continuously Train and Enable Your Team
Training isn’t a one-time event — it’s an ongoing investment.
- Onboarding training for new hires (role-specific, hands-on)
- Release training when new Salesforce features or internal configurations are rolled out
- Advanced training for power users and managers
- Self-service resources — maintain an internal knowledge base with how-to articles, video walkthroughs, and FAQs
- Salesforce Trailhead — Salesforce’s free learning platform is an incredible resource for users at every level. Encourage (or require) your team to complete relevant trails and modules.
10. Measure What Matters
Finally, use Salesforce to track the metrics that actually drive sales performance:
| Metric | Why It Matters |
|---|---|
| Lead response time | Faster response = higher conversion |
| Lead-to-opportunity conversion rate | Measures lead quality and SDR effectiveness |
| Pipeline coverage ratio | Ensures enough pipeline to hit quota |
| Win rate | Percentage of opportunities that close won |
| Average deal size | Identifies trends in deal value over time |
| Sales cycle length | How long deals take from creation to close |
| Activity volume per rep | Correlates effort with results |
| Forecast accuracy | Measures predictability of the sales engine |
Build dashboards around these metrics and review them weekly. Data-driven sales teams consistently outperform those that rely on gut instinct alone.
Conclusion
Salesforce Sales Cloud is more than just a CRM — it’s a complete platform for managing, optimizing, and scaling your sales operation. From capturing and qualifying leads to managing a multi-million-dollar opportunity pipeline to forecasting revenue with AI-powered precision, Sales Cloud gives sales teams the tools they need to work smarter, move faster, and close more deals.
But here’s the takeaway that matters most: the technology is only as good as the strategy behind it. The organizations that get the most value from Sales Cloud are the ones that:
- Define their sales process clearly before they configure the tool
- Commit to data quality and adoption from day one
- Start simple and add complexity incrementally
- Invest in ongoing training and enablement
- Use data and dashboards to drive decisions, not gut feelings
Whether you’re just getting started with Salesforce or looking to optimize an existing implementation, this Salesforce Sales Cloud tutorial has given you the foundation you need. The features are there. The setup playbook is there. The best practices are there. Now it’s time to execute.
About RizeX Labs
We’re Pune’s leading IT training institute specializing in enterprise-grade technologies like Salesforce and cloud architecture. At RizeX Labs, we help professionals bridge the gap between theory and implementation through hands-on Sales Cloud workshops, real-world pipeline simulations, and expert mentorship. Our programs are designed to transform aspiring admins into certified Salesforce consultants with a deep understanding of revenue operations and business process automation.
Internal Links:
- Salesforce Admin & Development Training
- Salesforce Apex Triggers: Beginner’s Guide with Real-Time Examples
- Salesforce Integration Patterns: REST, SOAP, and Middleware
- Salesforce Revenue Cloud: Understanding CPQ & Billing Fundamentals
External Links:
- Salesforce Sales Cloud Official Product Page
- Trailhead: Sales Cloud Configuration Basics
- Salesforce Help: Lead Management Best Practices
- Salesforce Einstein AI for Sales Overview
Quick Summary
Mastering Salesforce Sales Cloud is more than just learning where to click; it’s about architecting a system that scales with your business. While the foundational setup of Leads and Opportunities provides the "bread and butter" of CRM, the real competitive advantage lies in leveraging Salesforce Flow for automation and Einstein AI for predictive forecasting. For most organizations, the key to success is a lean implementation—starting with essential objects and standardizing data entry habits before layering on complex customizations. This balanced approach ensures high user adoption and a pipeline you can actually trust to drive growth.

