Introduction: Why a SFMC Welcome Email Journey Matters
First impressions count — especially in email marketing. When someone signs up for your product, service, or newsletter, that initial moment of connection is your golden opportunity. A well-crafted SFMC welcome email journey ensures that every new subscriber receives a timely, personalized, and meaningful experience right from the start.
Research consistently shows that welcome emails generate up to 4x higher open rates and 5x higher click-through rates compared to standard marketing emails. Yet many brands still send a single static welcome email and call it done. That’s where Salesforce Marketing Cloud’s Journey Builder changes the game entirely.
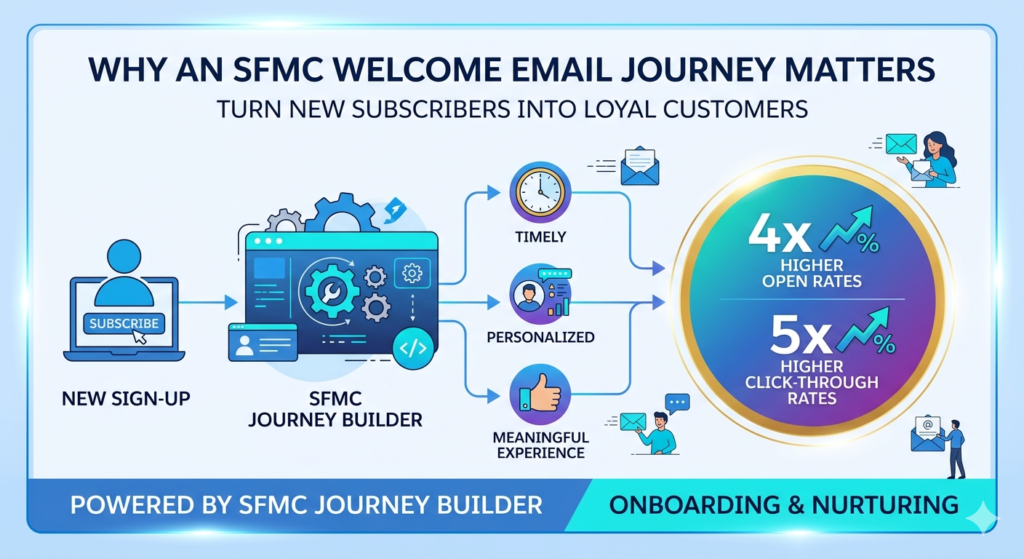
Journey Builder is SFMC’s powerful automation tool that allows marketers to design, execute, and optimize multi-step customer journeys — triggered by real behaviors and data. With Journey Builder, you can turn a simple welcome email into a fully automated, personalized SFMC onboarding journey that nurtures subscribers from their very first touchpoint.
Whether you’re new to SFMC or looking to level up your automation strategy, this Journey Builder tutorial will guide you through everything you need to know.
What is Journey Builder in SFMC?
Before diving into the build, let’s quickly cover what Journey Builder is and how it works.
Journey Builder is a campaign automation tool within Salesforce Marketing Cloud that enables marketers to create customer journeys across multiple channels — including email, SMS, push notifications, and ads. Unlike traditional batch-and-blast campaigns, Journey Builder responds to customer behavior in real time.
Key Components of Journey Builder:
- Entry Sources: The trigger that brings a contact into the journey (e.g., a Data Extension, API event, or CloudPage form submission)
- Activities: Actions taken within the journey — such as sending an email, waiting a set number of days, or updating a record
- Decision Splits: Logic-based branches that personalize the journey based on subscriber attributes or behaviors
- Wait Activities: Time-based delays that control the pace of your journey
- Goals and Exit Criteria: Define when a contact successfully completes the journey or should be removed
This Journey Builder tutorial will walk you through all of these elements as we build a real welcome journey from scratch.
Benefits of an SFMC Onboarding Journey
Why invest time in building a structured SFMC onboarding journey instead of sending a one-off email?
✅ Improve Engagement and Conversions
A series of well-timed, relevant emails keeps new subscribers engaged during their critical first days. Sequential messaging builds familiarity and drives action — whether that’s completing a profile, making a first purchase, or exploring a feature.
✅ Build Strong First Impressions
Your onboarding sequence sets the tone for the entire customer relationship. A thoughtful, personalized welcome journey signals professionalism and care — making subscribers feel valued from day one.
✅ Automate Personalized Communication
With SFMC’s data capabilities, you can tailor every email based on subscriber attributes like name, location, industry, or signup source — all automatically. No manual effort required once the journey is live.
Prerequisites Before Creating Your Journey
Before jumping into Journey Builder, make sure you have the following in place:
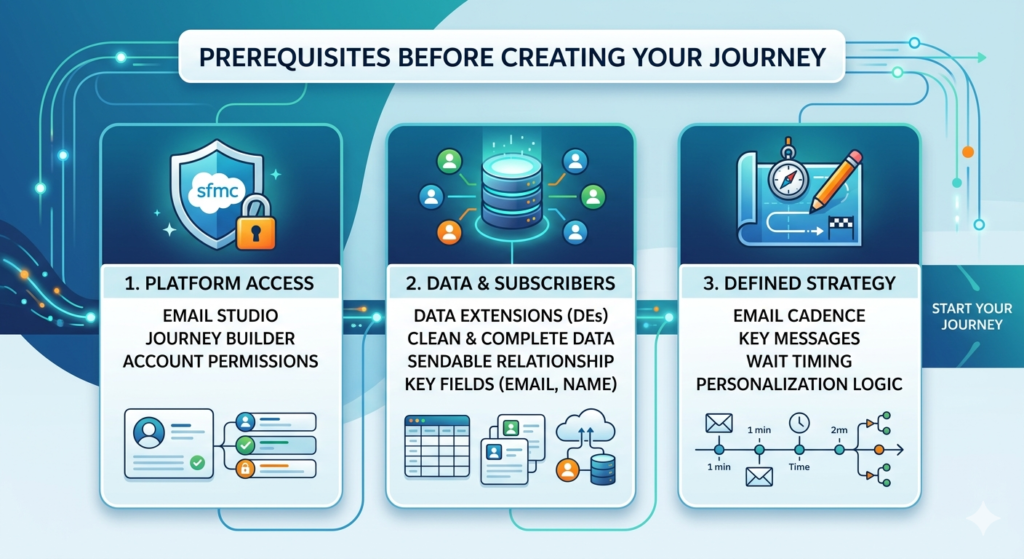
1. Access to Email Studio and Journey Builder
Ensure your SFMC account includes Email Studio (for building emails) and Journey Builder (for automation). Both are required for this tutorial.
2. Subscriber Data and Data Extensions Ready
Your entry source will typically be a Data Extension (DE) — a table in SFMC that holds subscriber information. Your DE should include fields like:
- Email Address
- First Name
- Signup Date
- Subscription Source (optional, for decision splits)
Make sure your data is clean, complete, and properly configured with a sendable relationship to the All Subscribers list.
3. A Defined Onboarding Strategy
Know what you want to achieve. Outline:
- How many emails your journey will include
- What each email will communicate
- The timing between each touchpoint
- Any personalization logic you want to apply
Step-by-Step Journey Builder Tutorial: Build Your SFMC Welcome Email Journey
Now let’s build your journey. Follow these steps carefully.
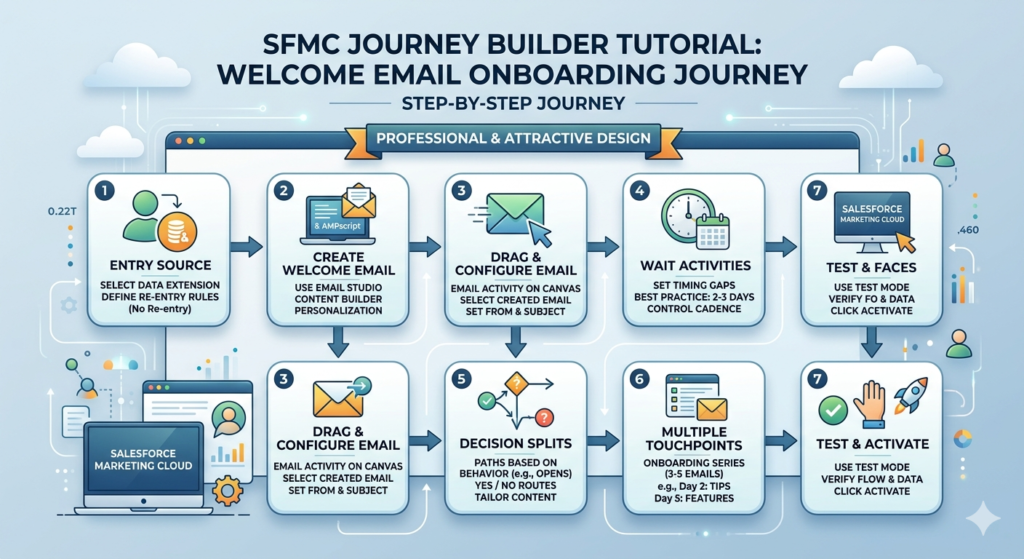
Step 1: Define Your Entry Source
- Navigate to Journey Builder in SFMC and click + New Journey
- Select Multi-Step Journey
- Name your journey (e.g., “Welcome Email Onboarding Journey”)
- Under Entry Source, select Data Extension
- Choose the Data Extension connected to new signups
- Set the Entry Schedule — choose “Add contacts when they are added to the data extension” for real-time triggering
- Set Re-entry rules — typically set to “No Re-entry” to avoid sending welcome emails multiple times
Pro Tip: Use a dedicated “New Subscribers” DE that gets populated automatically via a form, API, or automation studio rule.
Step 2: Create Your Welcome Email in Email Studio
Before configuring the journey, build your welcome email in Email Studio:
- Go to Email Studio → Content Builder
- Click Create → Email
- Choose a template or start from scratch
- Craft a compelling subject line (e.g., “Welcome to [Brand Name] — Here’s What’s Next 🎉”)
- Personalize the email body using AMPscript (e.g.,
%%First Name%%) - Include a clear CTA — such as “Explore Our Features” or “Complete Your Profile”
- Preview, test, and save the email
Step 3: Drag and Configure the Email Activity
Back in Journey Builder:
- Drag the Email activity from the left panel onto the canvas
- Click the activity to configure it
- Select Email Studio and find the welcome email you created
- Choose your From Name and From Email Address
- Set the Subject Line (you can pull from the email or override it here)
- Click Done
Step 4: Add Wait Activities for Timing
Timing is critical in a welcome journey. Don’t overwhelm new subscribers by sending multiple emails at once.
- Drag a Wait activity after your first email
- Set the wait duration — a common best practice is 2–3 days between emails
- Choose “Wait by Duration” for fixed time gaps, or “Wait Until” for specific send times
- Repeat after each subsequent email in the journey
Step 5: Use Decision Splits for Personalization
Decision Splits allow you to branch the journey based on subscriber data or behavior.
Example: Split based on whether the subscriber opened the welcome email.
- Drag a Decision Split activity onto the canvas after the wait period
- Name it (e.g., “Opened Welcome Email?”)
- Set the condition: Email Opened = True / False
- Create two paths:
- Yes (Opened): Send a follow-up with additional value content
- No (Not Opened): Send a re-engagement version with a different subject line
You can also split by subscriber attributes like industry, location, or signup source to deliver hyper-relevant content.
Step 6: Add Multiple Emails for a Complete Onboarding Journey
A robust SFMC onboarding journey typically includes 3–5 touchpoints. Here’s a simple structure:
| Step | Timing | |
|---|---|---|
| Day 0 | Welcome Email | Immediately on signup |
| Day 2 | Getting Started / Tips | 2 days after welcome |
| Day 5 | Feature Highlight or Case Study | 3 days after Email 2 |
| Day 8 | Exclusive Offer or CTA | 3 days after Email 3 |
| Day 12 | Check-In / Feedback Request | 4 days after Email 4 |
Configure each email activity following Steps 2–3, and add Wait activities between each one.
Step 7: Test and Activate Your Journey
Before going live, always test!
- Click Test Mode in Journey Builder
- Use a test contact from your Data Extension
- Verify that emails send correctly, personalization tokens render, and splits route properly
- Check email rendering across devices using Content Builder’s preview tool
- Review journey settings — timezone, contact entry rules, and goal tracking
- Once satisfied, click Activate
Your SFMC welcome email journey is now live and running automatically!
Journey Builder vs. Automation Studio: What’s the Difference?
Many beginners confuse Journey Builder with Automation Studio. Here’s the key distinction:
| Feature | Journey Builder | Automation Studio |
|---|---|---|
| Primary Use | Customer journey automation | Data processing & scheduled tasks |
| Trigger Type | Event-based / real-time | Scheduled or file-triggered |
| Channel Support | Multi-channel | Email + data activities |
| Personalization | High (behavior-based) | Moderate |
| Best For | Welcome journeys, nurture series | Data imports, SQL queries, list management |
For building a SFMC welcome email journey, Journey Builder is always the right tool. Automation Studio plays a supporting role — often feeding data into the Data Extensions that trigger your journeys.
Best Practices for Your SFMC Welcome Email Journey
🎯 Personalization is Everything
Use subscriber data to personalize subject lines, email body content, and CTAs. Even something as simple as using the subscriber’s first name increases engagement significantly.
⏰ Optimize Send Timing
Schedule emails to send during peak engagement windows — typically Tuesday–Thursday, between 9–11 AM in the subscriber’s local time. Use SFMC’s Send Time Optimization (STO) feature if available.
🧪 A/B Test Subject Lines
Use Journey Builder’s built-in A/B testing or Engagement Split to test different subject lines. Small tweaks can result in significant lift in open rates.
🛤️ Keep the Journey Simple and Focused
Especially when starting out, resist the urge to over-engineer. A clean 3-5 email onboarding journey with clear goals outperforms a complicated 15-step flow every time.
Benefits of an SFMC Onboarding Journey
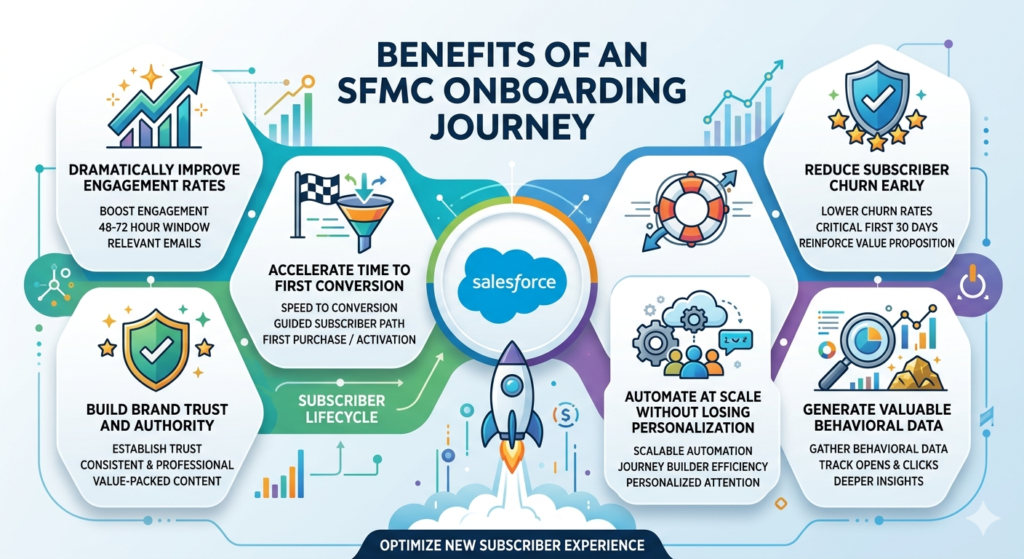
Dramatically Improve Engagement Rates
An SFMC onboarding journey keeps new subscribers engaged during the 48-72 hour window when they’re most receptive to your messaging. Sequential, relevant emails maintain momentum and prevent the dreaded “forgot I signed up for this” syndrome.
Accelerate Time to First Conversion
Whether your goal is a first purchase, a free trial activation, a profile completion, or a webinar registration, a well-designed journey systematically guides subscribers toward that moment faster than any single email ever could.
Build Brand Trust and Authority
Consistency builds trust. When new subscribers receive timely, professional, value-packed emails that deliver on the promise made at signup, they develop confidence in your brand. This foundation makes all future marketing more effective.
Reduce Subscriber Churn Early
The first 30 days are critical for subscriber retention. Brands that implement structured onboarding journeys see significantly lower early churn rates because subscribers understand the value proposition and feel connected to the brand.
Automate at Scale Without Losing Personalization
Whether you have 100 new subscribers a month or 100,000, Journey Builder handles every single one with the same level of personalized attention. This scalability is one of the most powerful advantages of building a SFMC welcome email journey.
Generate Valuable Behavioral Data
Your welcome journey becomes a data goldmine. By tracking opens, clicks, engagement splits, and goal completions, you learn exactly what resonates with new subscribers — insights you can apply to all your marketing programs.
5. Prerequisites and Setup C
Common Mistakes to Avoid
❌ Overcomplicating the Journey
Too many splits, conditions, and branches make the journey hard to manage and troubleshoot. Start simple and iterate.
❌ Ignoring Data Quality
Garbage in, garbage out. If your Data Extension contains duplicates, missing fields, or incorrect email addresses, your journey will fail. Audit your data before launch.
❌ Not Testing Before Activation
Skipping the test phase is one of the most common — and costly — mistakes. Always run through the full journey in test mode before going live.
❌ Forgetting to Set Exit Criteria
Without proper exit criteria, contacts may receive irrelevant emails after they’ve already converted. Define a goal (e.g., “Made a purchase”) so Journey Builder exits contacts at the right time.
Real-World Example: SFMC Onboarding Journey Structure
Here’s a sample SFMC welcome email journey for a SaaS product:
text[Entry Source: New Signup Data Extension]
        ↓
[Email 1: Welcome + Account Setup Guide] — Day 0
        ↓
[Wait: 2 Days]
        ↓
[Decision Split: Opened Email 1?]
    ↓ YES                        ↓ NO
[Email 2A: Feature Tips]    [Email 2B: "Did You Miss This?" Re-send]
        ↓                           ↓
   [Wait: 3 Days]              [Wait: 3 Days]
        ↓                           ↓
[Email 3: Customer Success Story + CTA to Upgrade]
        ↓
[Wait: 3 Days]
        ↓
[Email 4: Limited-Time Offer or Free Trial Extension]
        ↓
[Journey Goal: Contact Upgrades to Paid Plan → EXIT]
This structure balances personalization, automation, and clear conversion goals — the hallmarks of an effective SFMC onboarding journey.
Conclusion: Start Building Your SFMC Welcome Email Journey Today
Building a SFMC welcome email journey doesn’t have to be overwhelming. With the right data foundation, a clear strategy, and Journey Builder’s intuitive interface, you can create a powerful onboarding experience that runs automatically and delivers real results.
To recap what we covered in this Journey Builder tutorial:
- Set up your Data Extension as an entry source
- Build personalized emails in Email Studio
- Configure email activities, wait times, and decision splits
- Test thoroughly before activating
- Follow best practices and avoid common pitfalls
The sooner you invest in a structured SFMC onboarding journey, the sooner you’ll see improved engagement, stronger customer relationships, and higher conversions. Journey Builder is a tool that rewards those who use it thoughtfully — so start building today.
About RizeX Labs
At RizeX Labs, we specialize in delivering advanced Salesforce Marketing Cloud (SFMC) solutions, including customer engagement strategies using Journey Builder.
Our expertise combines deep technical knowledge, marketing automation best practices, and real-world implementation experience to help businesses design personalized customer journeys that drive engagement and conversions.
We empower organizations to transform their customer communication—from one-time interactions to automated, lifecycle-based journeys—using tools like Journey Builder, Email Studio, and Data Extensions to ensure scalability, personalization, and measurable results.
Internal Links:
- Link to your Salesforce Marketing Cloud course page
- How to Build a Salesforce Portfolio That Gets You Hired (With Project Ideas)
- Salesforce Admin vs Developer: Which Career Path is Right for You in 2026?
- Wealth Management App in Financial Services Cloud
- Salesforce Admin And Development Course
External Links:
- Salesforce official website
- Journey Builder overview
- Marketing Cloud Email Studio
- Salesforce Trailhead (Journey Builder)
- Marketing Cloud Developer Docs
- REST API concepts
Quick Summary
A Welcome Email Journey in Salesforce Marketing Cloud Journey Builder allows businesses to automatically engage new users or subscribers with personalized onboarding emails.
Using Journey Builder, marketers can define entry sources such as Data Extensions or API events, and design step-by-step workflows that send emails, wait for user actions, and apply decision splits based on engagement.
With this approach, organizations can improve customer onboarding, increase engagement rates, and build strong first impressions. It also enables real-time personalization, better tracking, and automation of repetitive marketing tasks.
By leveraging Journey Builder effectively, businesses can create a seamless and scalable welcome experience that aligns with customer behavior—making it a critical component of modern digital marketing strategies.
