
By Rizex Labs Team | Last Updated: April 2026 | 8 Min Read
Introduction
In the hyper-accelerated digital economy of 2026, a delayed response is a lost opportunity. Statistics suggest that businesses responding to a lead within five minutes are 100 times more likely to qualify that prospect than those waiting just thirty minutes. If your team is still manually copy-pasting data from Outlook or Gmail into your CRM, you are essentially leaving revenue on the table.
A professional Salesforce Email-to-Lead setup is no longer a luxury—it is a baseline requirement for survival. By automating the transition from a simple inquiry to a structured CRM record, you empower your sales force to focus on closing rather than data entry. In this guide, we will walk you through the most secure and modern way to handle your inbound pipeline.
Why Every Business Needs a Salesforce Email-to-Lead Setup
Before we dive into the technical steps, let’s look at the ROI. Implementing a standard Salesforce Email-to-Lead setupprovides three massive advantages for your organization. Moreover, it ensures that your data remains consistent across all departments.
- 24/7 Lead Capture: Your CRM works while you sleep, capturing global inquiries instantly.
- Data Accuracy: Manual entry is prone to "fat-finger" typos. Automation ensures the email address and name are 100% accurate.
- Instant Routing: Use 2026 Flow logic to get the right lead to the right rep in seconds, not hours.
Step-by-Step: The Remarkable Salesforce Email-to-Lead Setup
Step 1: Enabling the Global Settings
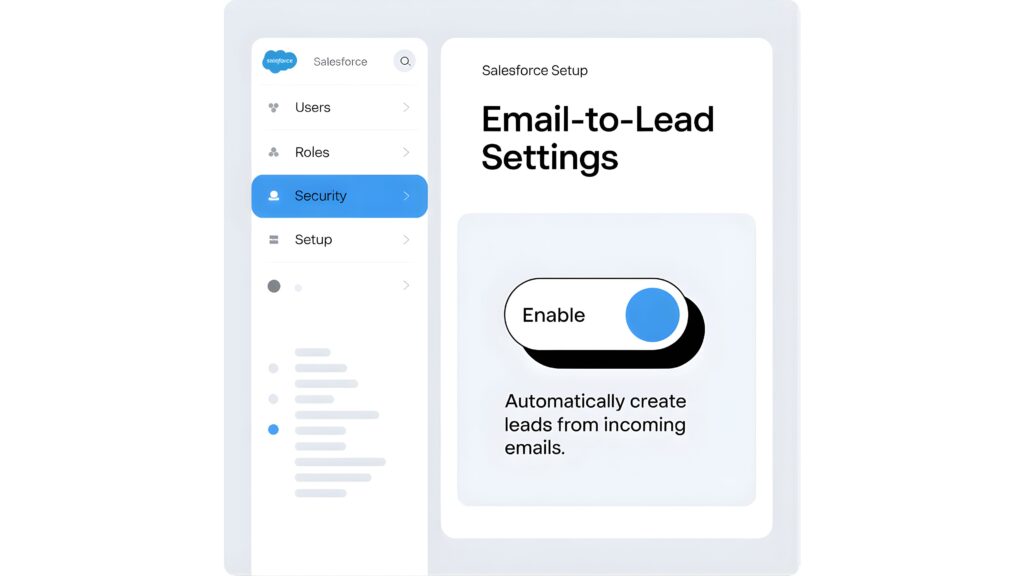
Before building your automation, you must authorize your Salesforce org to receive external data.
- Log into your Salesforce instance and navigate to Setup.
- In the Quick Find box, type Email-to-Lead and select the settings page.
- Click Edit and ensure the Enable Email-to-Lead checkbox is selected.
- Pro Tip: Enable "HTML Email" to ensure that signatures and formatted text are captured accurately.
Step 2: Configuring Routing Addresses
This is the most critical phase of your Salesforce Email-to-Lead setup. You need to create a bridge between your public-facing email (e.g., sales@company.com) and the internal Salesforce services address.
- Under the Routing Addresses section, click New.
- Provide a clear Routing Name (e.g., "Main Sales Inbound").
- Enter the Email Address your customers actually write to.
- Choose your Default Lead Owner. For 2026 best practices, we recommend assigning these to a Lead Queue to ensure fair distribution.
Step 3: Verification and Forwarding
Salesforce will now send a verification link to the email address you provided.
- Log into your mail server (Microsoft 365 or Google Workspace).
- Open the email from Salesforce and click the link to verify ownership.
- Crucial Action: Set up a "Redirect" or "Forwarding Rule" on your mail server. All mail sent to your public address should now forward to the long, alphanumeric "Email Services Address" generated by Salesforce.
Advanced 2026 Automation: Using Salesforce Flow Integration
A basic Salesforce Email-to-Lead setup is just the beginning. To truly compete in today's market, you need to use Salesforce Flow Integration to add intelligence to the record. Since Process Builder was retired, Flow is the only way to build high-performance CRM lead management systems.
The "Auto-Qualification" Logic
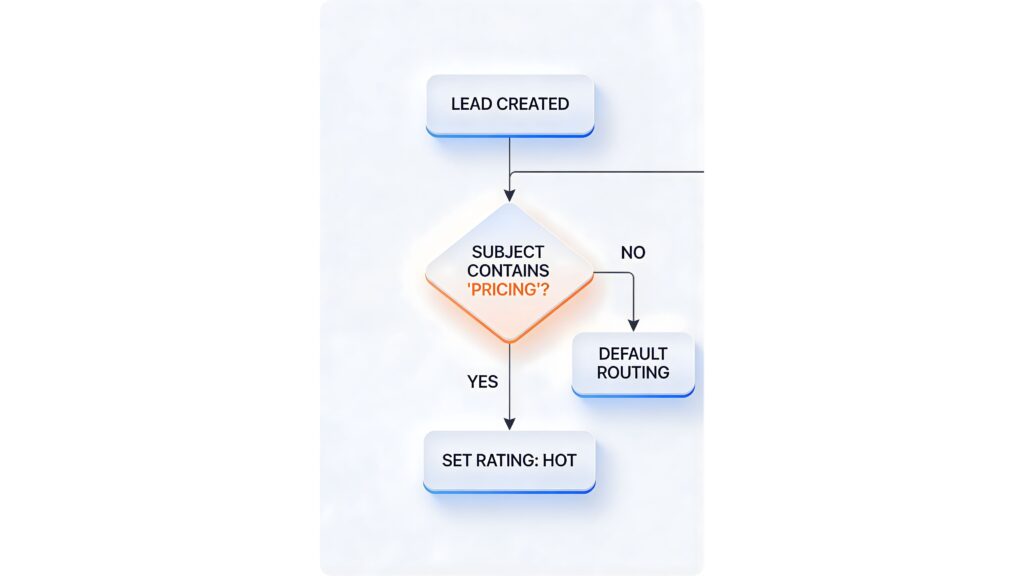
Don't just create a "cold" lead; categorize it instantly. Create a Record-Triggered Flow that runs whenever a Lead is created via your Salesforce Email-to-Lead setup.
- Decision Element: If the subject line contains "Pricing" or "Quote," the Flow can automatically set the
Lead Ratingto Hot. - Territory Routing: If the sender's email ends in
.ukor.ca, the Flow can reroute the owner from the general queue to the International Sales Team. - Duplicate Check: Use the Flow to check if the email address already exists as a Contact. If it does, create a Taskfor the Account Executive instead of a duplicate Lead.
Common Troubleshooting for Salesforce Email-to-Lead Setup
Even a proven strategy can face technical friction. Understanding these common errors will save your team hours of troubleshooting and ensure a smooth CRM lead management experience.
| Issue | Likely Cause | Fix |
| Leads not appearing | Forwarding failed | Check your Outlook/Gmail forwarding rules. |
| No Attachments | Size Limit | Salesforce limits total email size to 25MB. |
| Spam Leads | No Filter | Use a Flow to auto-delete leads containing "Unsubscribe". |
| Wrong Lead Owner | Rule Hierarchy | Check your Lead Assignment Rules order. |
Best Practices for a High-Converting Setup
To ensure your Salesforce Email-to-Lead setup yields the highest ROI, implement these three tactical shifts:
- Map Custom Fields: Don't just settle for the Name and Email. Use a Flow to parse the email body for phone numbers or specific product interests and map them to custom fields.
- Enable Lead Scoring: Use the incoming data to assign a score. A lead from a corporate domain (
@company.com) should be scored higher than one from a generic provider (@gmail.com). - Instant Gratification: Set up an Auto-Response Rule. The moment the lead is created, the customer should receive a personalized email acknowledging their request.

Actionable Takeaways for Salesforce Automation 2026
If you want to stay ahead of the curve, keep these takeaways in mind:
- Audit Monthly: Check your Email Logs in Salesforce to ensure no emails are bouncing.
- Test your Flow: Use the "Debug" feature in Salesforce Flow to ensure your routing logic is working perfectly.
- Security First: Ensure your email domain has SPF and DKIM records set up so Salesforce trusts the incoming mail.
Conclusion: Transform Your Inbound Pipeline
A successful Salesforce Email-to-Lead setup is the bridge between a chaotic inbox and a streamlined revenue engine. By following this guide, you have moved beyond basic data capture and into the realm of intelligent automation.
The transition from manual entry to automated routing is a game-changer for any growing enterprise. However, technology is only half the battle; the other half is strategy.
Ready to revolutionize your CRM performance? At Rizex Labs, we specialize in advanced Salesforce configurations, including AI-driven parsing and complex multi-region routing.
[Contact Rizex Labs Today for a Free CRM Audit →]
Frequently Asked Questions (FAQ)
Q: What happens if I exceed the 1,000-lead daily limit?
A: Salesforce will queue the remaining emails and process them the following day. If your volume is consistently higher, you may need to upgrade your edition or contact Salesforce support for a limit increase.
Q: Does this work with encrypted emails?
A: Generally, yes. Your mail server (like Gmail or Outlook) usually decrypts the email before forwarding it to the Salesforce routing address, allowing the CRM to read the text.
Q: How do I prevent "Out of Office" loops?
A: Ensure your Auto-Response rules are configured to send only once per email address, and use a Flow to detect strings like "Automatic Reply" to prevent the system from creating infinite records.
Q: Can I map custom fields directly from the email?
A: Not natively. Standard setup only maps to standard fields. To extract data like "Budget" into a custom field, you’ll need a Salesforce Flow Integration to parse the email body text.
SEO Metadata (Paste these in the plugin)
- Primary Keyword:
Salesforce Email-to-Lead Setup - Secondary Keywords: Salesforce Automation 2026, CRM Lead Management, Email-to-Lead Routing, Salesforce Flow Integration.
- Meta Description: Master your Salesforce Email-to-Lead setup with this proven 2026 guide. Boost conversion, automate routing, and stop losing leads in your inbox today.
https://trailhead.salesforce.com reference link of trailhead.